
Table of contents: Replacing the outer door seal ↓ Disconnect the door opening limiter ↓ Mark the position of the seal ↓ Remove the outer door seal ↓ Mark the position of the seal ↓ External seal of the new door ↓ Adhesive area of the outer door seal ↓ Press the outer door trim ↓
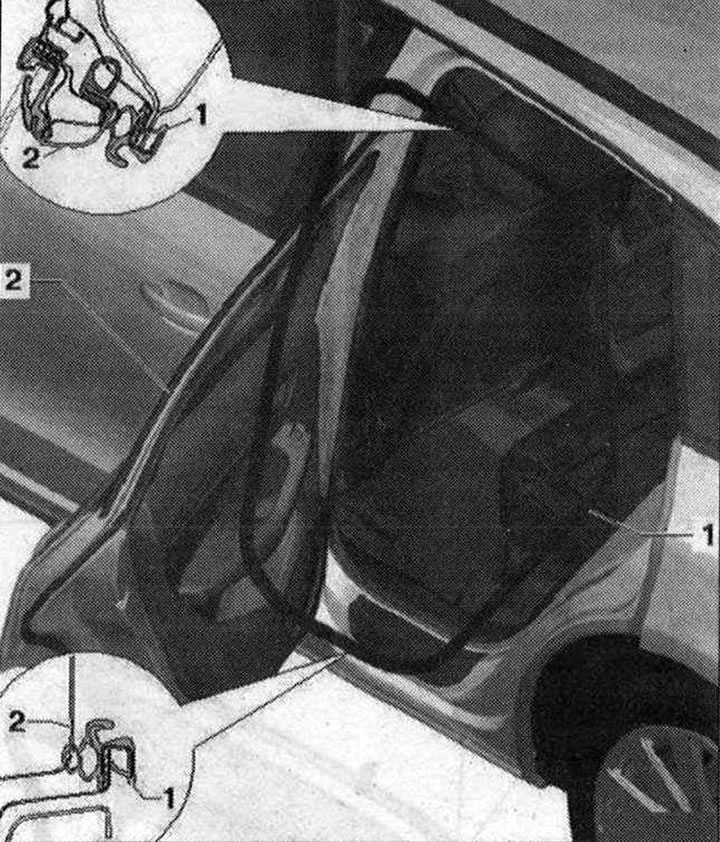
Removal the inner door seal 1. Inner door seal. Remove the glass frame trim. Disconnect the door stop from the B-pillar. Placed on the body edge. Remove from the body edge. When installing the vulcanized rubber seal, align it with the joint in the center of the lower hinge and press it by hand to the body flange.; 2. Door
Replacing the outer door seal
The car and the outer door seal must be at room temperature. The outer door seal is glued and can only be replaced. The bonding surfaces must be cleaned of dust and grease with a cleaning agent "D 009 401 04". Apply the adhesion promoter "D 355 205 A2" to the bonding surfaces using an applicator "D 009 500 25" and leave to dry for 10 minutes. The drainage holes should be located on the underside of the door when installed correctly.
- 1. External door seal. Mark the position of the seal on the door before removing, for example with electrical tape. In order to avoid leaving adhesive residue on the door, pull the seal only in the longitudinal direction and only then remove it from the door. Pull the seal slightly from the top of the door and cut it with regular scissors. Removal: pull the seal only in the longitudinal direction, then gradually remove it upwards. Installation: clean the gluing areas with a cleaner "D 009 401 04", if necessary remove adhesive residues with the adhesive strip removal tool "VAS 6349". Apply the clutch booster "D 355 205 A2" with an applicator "D 009 500 25" in the bonding area and let dry for 10 minutes. Disconnect the door opening limiter on the body. Remove the outer door seal behind the door opening limiter. Re-fasten the door retainer. Fix the outer door seal to the window frame on the left and right outside with electrical tape. For correct positioning, the water drainage holes (2x) must be in the outer door seal at the bottom. From both sides, successively press in the outer door seal, starting from the middle. Remove the protective film from the bottom of the door. Press in the outer door seal in the center of the lower part to the left and right. Then gradually remove the protective film and press in the outer door seal. Then press the door seal up along the A and B pillars. Then press the door seal up along the window frame. Do not stretch or flatten the door seal during installation. Any stretching or flattening of the seal on the underside or on the A and B pillars may cause it to peel off. The door seal can be stretched or flattened by the talc of the upper area of the window frame, since this is where a firm fit is ensured over the frame trim. Press the base of the door seal with a roller for rolling the insulating film "3356". To prevent the outer door seal from shifting and falling out, do not close the door for 2 hours, while the car must be at room temperature
- 2. Door
Disconnect the door opening limiter
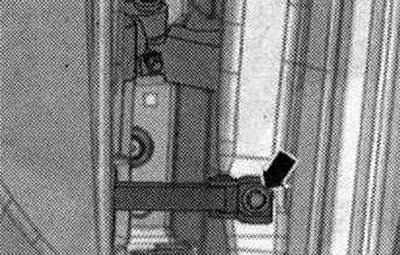
Remove the "arrow" bolt of the door opening limiter.
Insert the seal behind the door opening limiter and tighten the bolt to the correct torque.
Mark the position of the seal
Mark the position of the outer door seal on the window frame with tape...
and in the transition to the door lock, as shown in the figure.
Remove the outer door seal
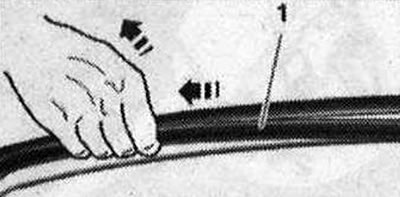
By pulling in the longitudinal direction, the door seal adhesive is softened and after that the seal can be removed from the window frame without leaving any adhesive residue. Pull the outer door seal consistently, as shown, in the longitudinal direction "arrow" and remove.
Perform these actions consistently on all sides and completely remove the door seal. Remove any remaining adhesive on the window frame using the adhesive strip removal tool "VAS 6349".
Mark the position of the seal
Mark the position of the seal as shown with electrical tape on the window frame and in the door lock area.
Remove the seal: Pull the seal "1" only in the longitudinal direction, then remove it from the door. By pulling, the glue softens and after that the seal can be removed without leaving any glue residue.
External seal of the new door
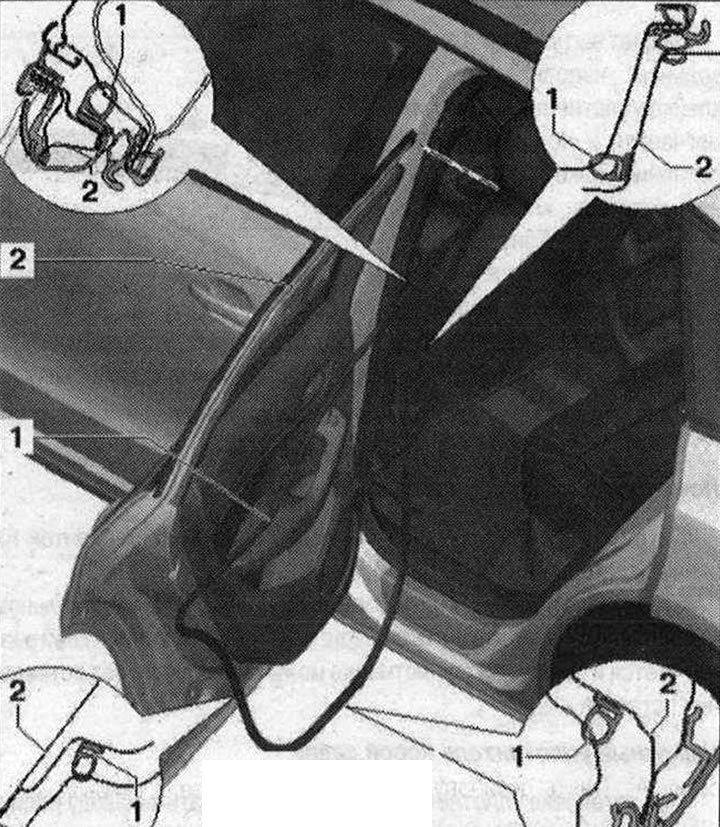
When installing, the seal must be pressed against the radius outlet (by inner and outer radius), as shown in the drawings "arrows". To facilitate installation, apply marks in these places and press the seal. Gluing areas along the inner and outer radius.
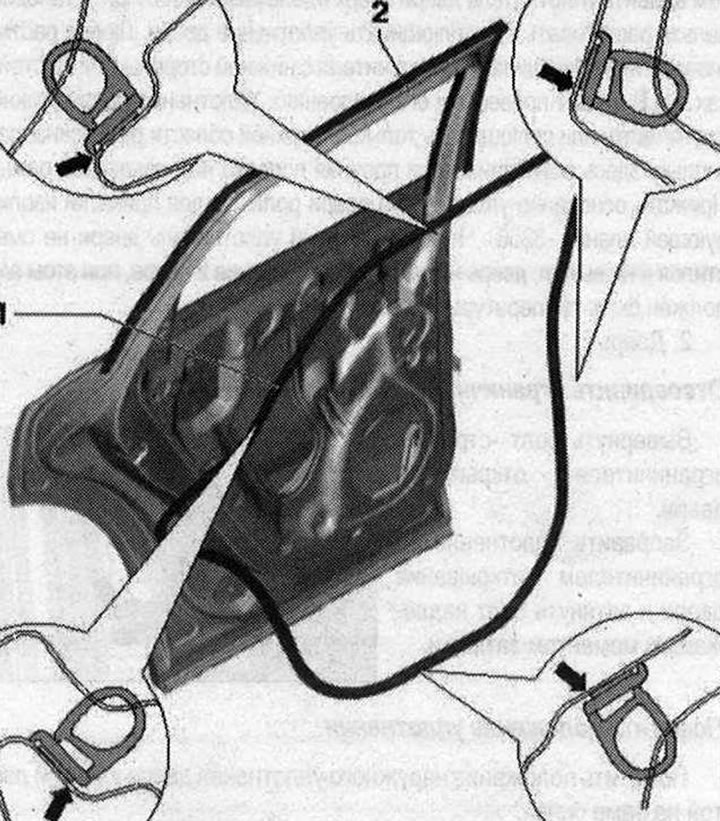
- 1. External door seal. After applying the markings at the specified distances, further installation is carried out according to the instructions. Install the door seal with the rear edge, as shown in the callouts in the figure, starting from the lower edge of the rear door and up to the lower edge of the front door, respectively, to the outputs of the inner radius. On the lower side of the door up to the door lock, the front edge of the seal should be adjacent to the output of the outer radius. Over the entire area, press the seal tightly with a roller for rolling the insulating film "3356".
- 2. Door
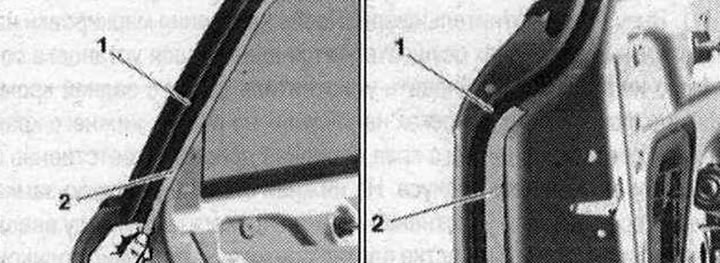
Adhesive area of the outer door seal
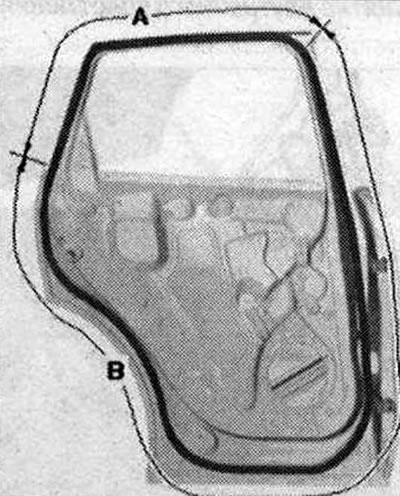
In zone "A" the front edge of the seal, starting approximately from the pressure bar, then along the window frame to "pillar B", must be placed and pressed, as shown in the figure, along the outer radius. In section "B" the rear edge of the seal must be installed at the exit of the inner radius.
Press the outer door trim
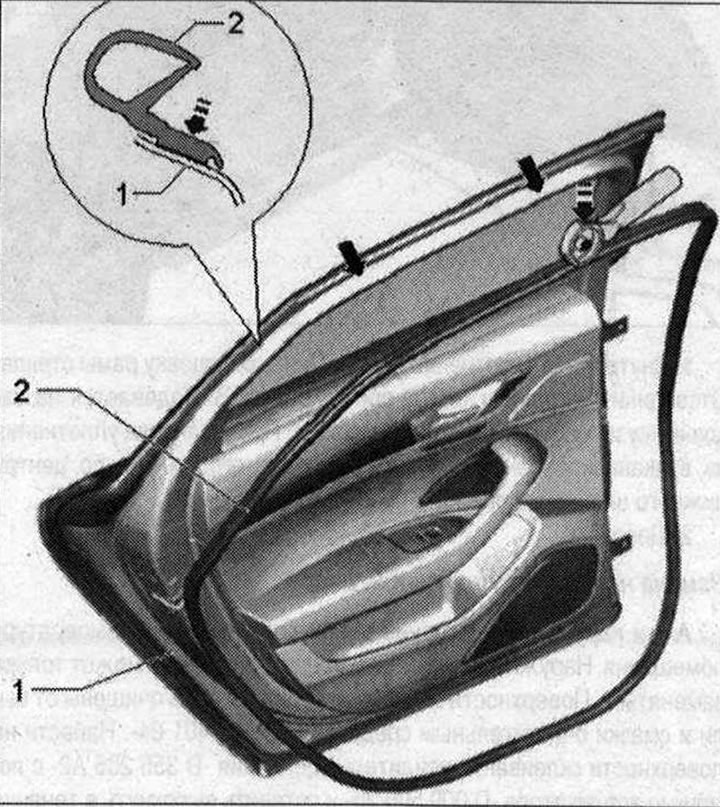
- 1. Back door
- 2. External door seal. Fix the external door seal on the window frame with electrical tape "arrows". The external door seal is pressed only into the base with a roller for rolling the insulating film "3356". Lift the seal as indicated and press it tightly with a roller for rolling the insulating film "3356" along the perimeter of the base