
Table of contents: Electric window lift motor, window… ↓ Removal and installation the window… ↓ Removal and installation the inner… ↓ Removal and installation the window… ↓ Installation diagram of external and… ↓ Removal and installation the glass… ↓
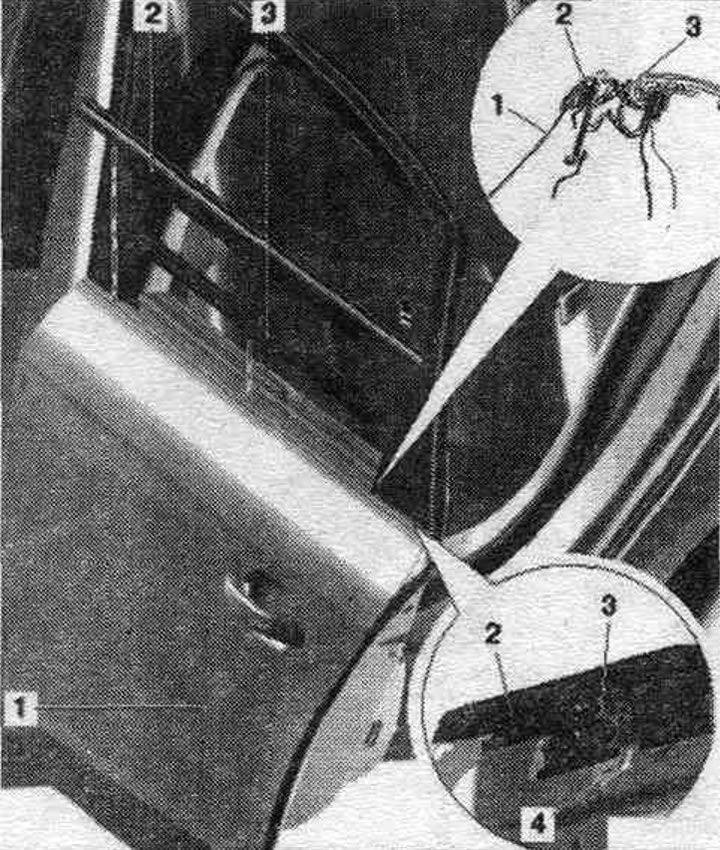
Electric window lift motor, window lift
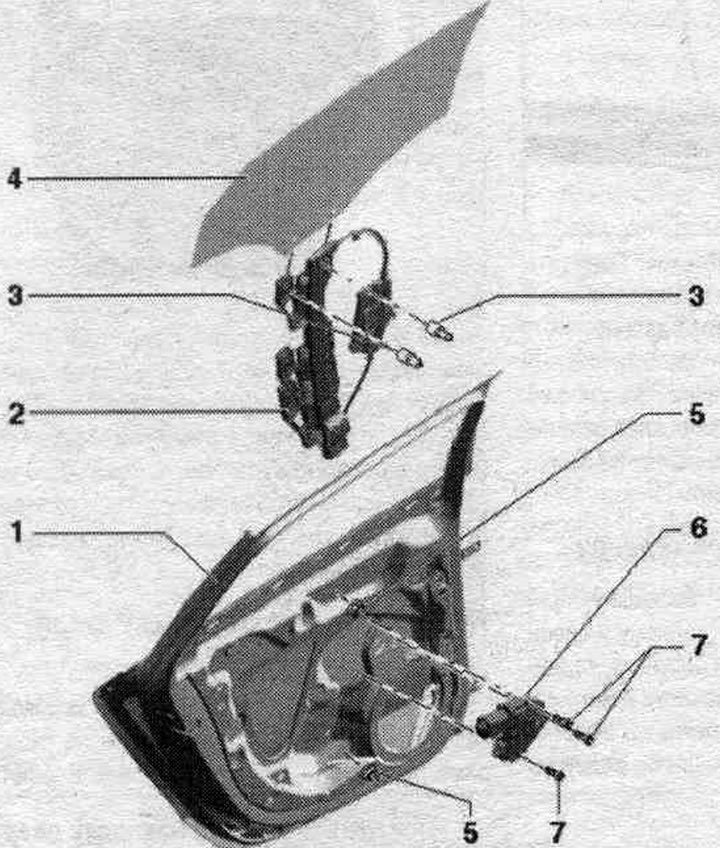
1. Door.
2. Window lifter.
3. Clamp.
4. Door glass.
5. Nut: 9 Nm.
6. Electric window lift motor.
7. Bolt: 3 pcs.; 3.5 Nm.
Removal and installation the window lift motor

1. Electrical connector: Disconnect the electrical connector from the used door.
2. Electric window lift motor: removal: remove the door trim, unscrew the bolts "6" and remove the electric motor. window lift motor; installation: installation in reverse order, taking into account the following: the "arrow" clamps of the threaded pins of the window regulator must be fixed in the inner panel of the door, put on the el. attach the window lift motor to the threaded pins and tighten the "6" bolts. The window lift motor can be removed and installed in any position of the motor or the door glass. With the window switches connected, turn on the ignition and raise the door windows as far as they will go. Continue holding the window switch for approx. 2 seconds to activate base reg. and lifting and lowering functions.
3. Threaded pins.
4. Window lifter.
5. Bolt.
Removal and installation the inner door panel trim
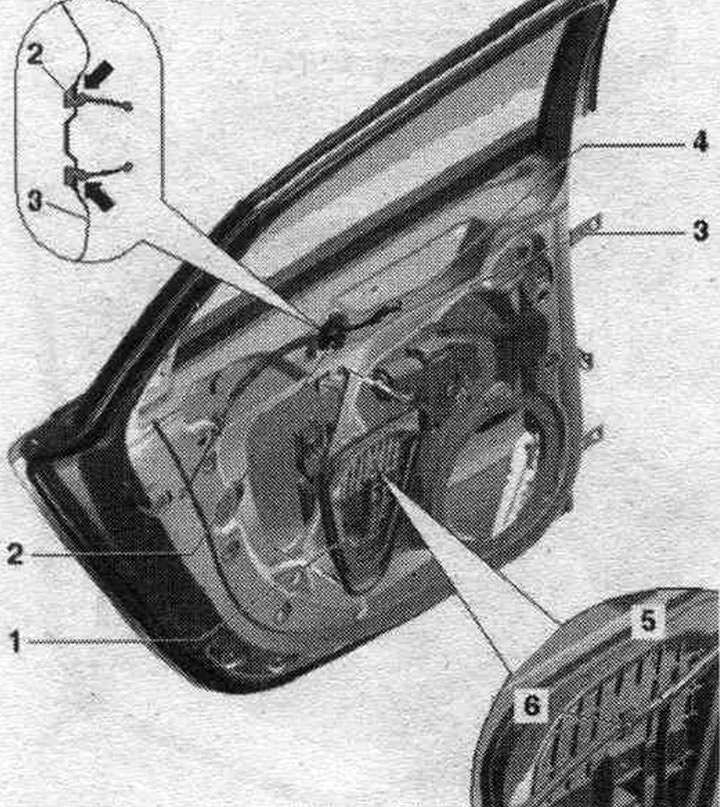
1. Trim: remove the door trim, remove the wiring harness "4" from the bracket "5", remove the trim, be sure to start from the top.
2. Nozzle: when installing, be sure to ensure that the "arrow" is seated correctly.
3. Inner door panel.
4. Cable drive.
5. Electric cable: release from bracket "6".
6. Bracket.
Removal and installation the window regulator
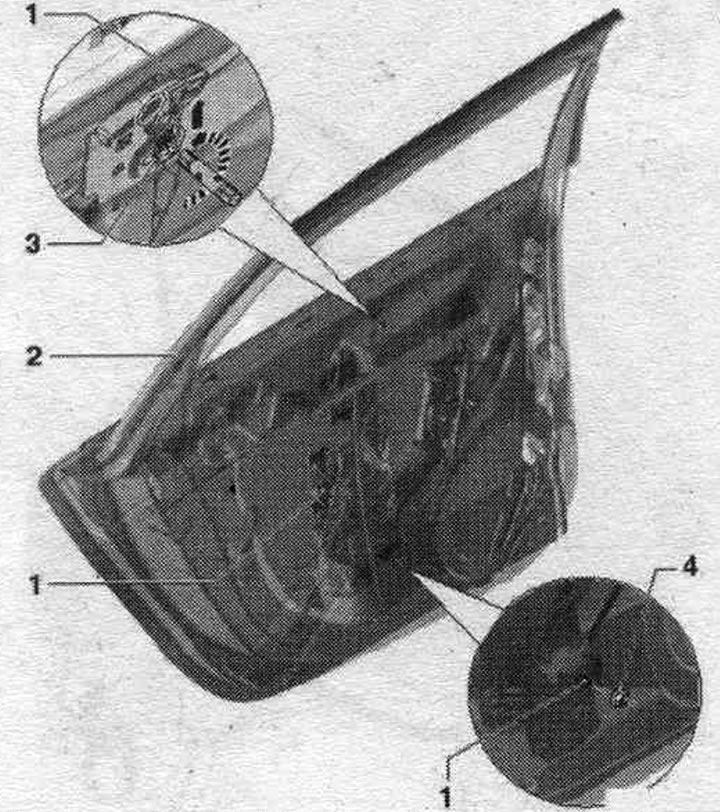
1. Window regulator: removal: door trim removed, window regulator electric motor removed, door glass removed, door inner panel trim removed; unlock the threaded pins of the window lift motor and pass it through the inner panel, loosen the upper nuts, unscrew the lower nut and remove the window lift from the door by moving it upwards.
2. Door.
3. Nut: To remove the window regulator, just loosen it.
4. Nut: unscrew to remove the window regulator.
Unlock the threaded pins

Unlock the fastening clamps "arrow" of the threaded pins "3" of the window regulator using an 11 mm socket head; to do this, place the head on the threaded pins. Unlock clamp "1" of traction cable "2" from the inside of the guide of traction cable "1".
Upper point of the window regulator bolt
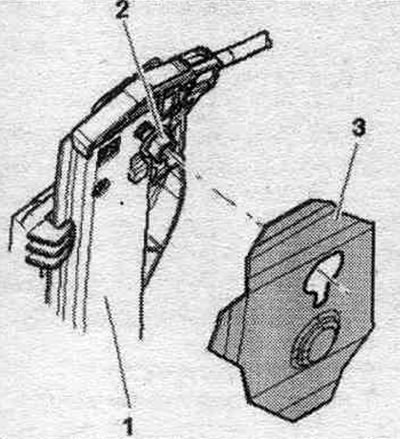
To remove window regulator "1" just loosen nut "2".
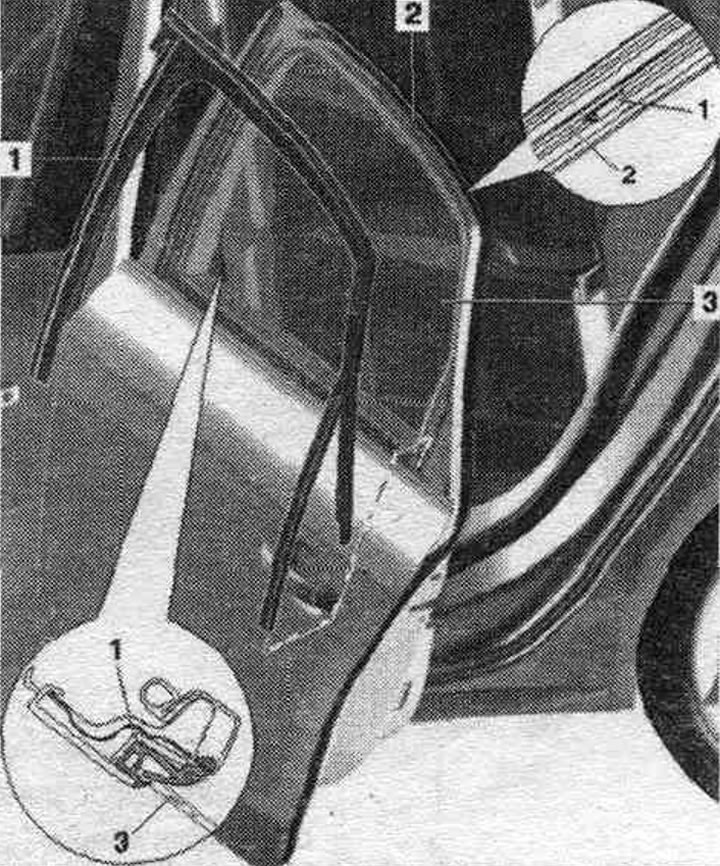
Installation diagram of external and internal glass pressure bars
1. Door.
2. External glass pressure bar: removal: door trim removed, raise the glass completely, remove the pressure bar upwards.
3. Inner pressure plate in the door cavity: removal: the door trim is removed, remove the pressure plate upwards.
4. Clamp: 3 pcs.
Removal and installation the glass guide
1. Glass guide: door and window frame trim removed, B-pillar and C-pillar trim removed, door glass removed; starting from the top of the glass frame, remove the glass guide from the B-pillar and the C-pillar on the side of the door, pull the glass guide out of the door in an upward direction, lubricate the glass guide with soapy water to make installation easier, insert the glass guide into the guide channel as shown in the figure, insert the glass guide protrusions into the door from the side.
2. Door.
3. Door glass.
[Material republished from the website: AUDIMANUAL.RU]