
1. Remove the decorative wheel cover.
2. Loosen (no more than 90°) the hex head screw for the outer shaft joint.
3. Remove the wheel and re-tighten all wheel mounting bolts.
4. Remove the hex head screw for the outer shaft joint.
5. Unscrew the joint shaft from the gearbox flange shaft.

In the case of a tripod joint on an automatic transmission, it is necessary to loosen the multi-tooth screws (arrows)
6. If there is not enough space to remove the pivot shaft, do the following: Loosen nut 1, remove the hexagon-head screw and pull both control arms 2 upward.
Note: The splines of the wheel bearing housing must not be widened using a chisel or similar tools. Do not loosen bolts 3 and 4, otherwise the front axle installation will change!
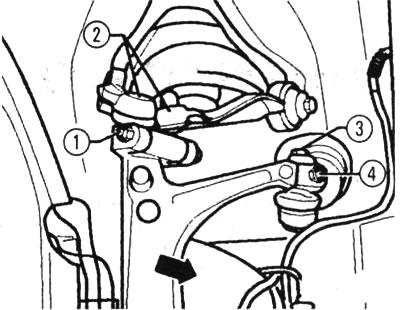
Bolts 3 and 4 must not be loosened!
7. After this, turn the wheel bearing housing sideways in the direction of the arrow and remove the pivot shaft.
8. When installing, insert the shaft into the wheel bearing housing. Insert both arms. Tighten the nuts to a torque of 40 Nm. While tightening the nut, push the suspension arm as far as possible towards the bearing housing.
9. Screw the shaft to the gearbox, screw the outer joint of the shaft.
Note: When tightening the outer joint of the shaft, the vehicle must not touch the ground!
10. To perform the following operation, an assistant is needed; he must sit in the car and operate the foot brake.
11. Meanwhile, tighten the hexagon head screw for the cardan shaft.
12. Mount the wheel. Only after the car is standing on its wheels, tighten the hex head screw.
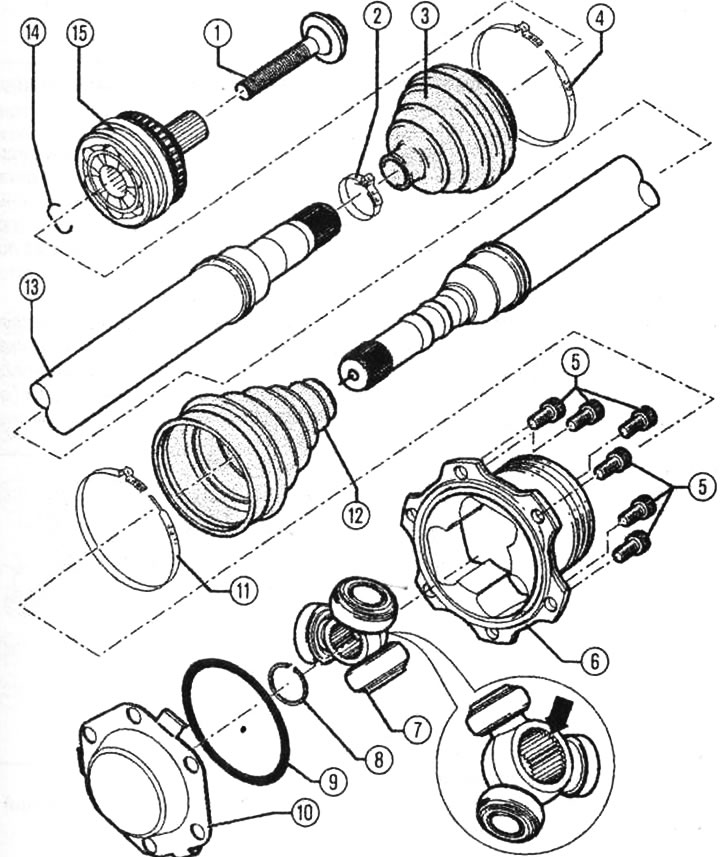
PTO shaft with tripod joint: 1 - hex head screw, 2 and 4 - clamp, 3 - cuff for constant velocity joint (check for cracks and abrasions), 5 - multi-tooth screw, 6 - hinge part, 7 - coupling with three pins and rollers, 8 - retaining ring, 9 and 14 - circular cross-section sealing ring, 10 - cover, 11 - clamp for tripod hinge, 12 - cuff for hinge, 13 - hinge shaft, 15 - outer constant velocity joint.