
Table of contents: Removal ↓ Installation ↓
The vacuum booster is supplied with reduced pressure from the intake manifold through the corresponding hose. When braking, due to the difference between atmospheric pressure and the pressure from the intake manifold, a large elastic membrane is displaced, which additionally acts on the piston of the main brake cylinder.
Vehicles with a diesel engine are equipped with a vacuum pump that supplies reduced pressure to the vacuum booster, due to the absence of one in the intake manifold.
Removal
Attention! The vacuum booster cannot be repaired and is replaced as a set.
1. Remove the brake master cylinder, see the relevant chapter.
2. Disconnect the vacuum supply hose from the booster.
Attention! The brake booster rod is attached to the brake pedal with a ball head at the end. A special device is required to disconnect the rod from the pedal, for example, VW/AUDI T10006 (see illustration 10.2).
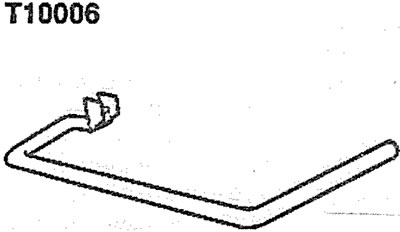
10.2. Special device VW/AUDI-T10006 for disconnecting the vacuum booster rod from the brake pedal
3. Remove the brake light switch from the brake pedal.
4. Place the special tool T10006 under the brake pedal and secure it to the ball head of the vacuum booster rod (see illustration).
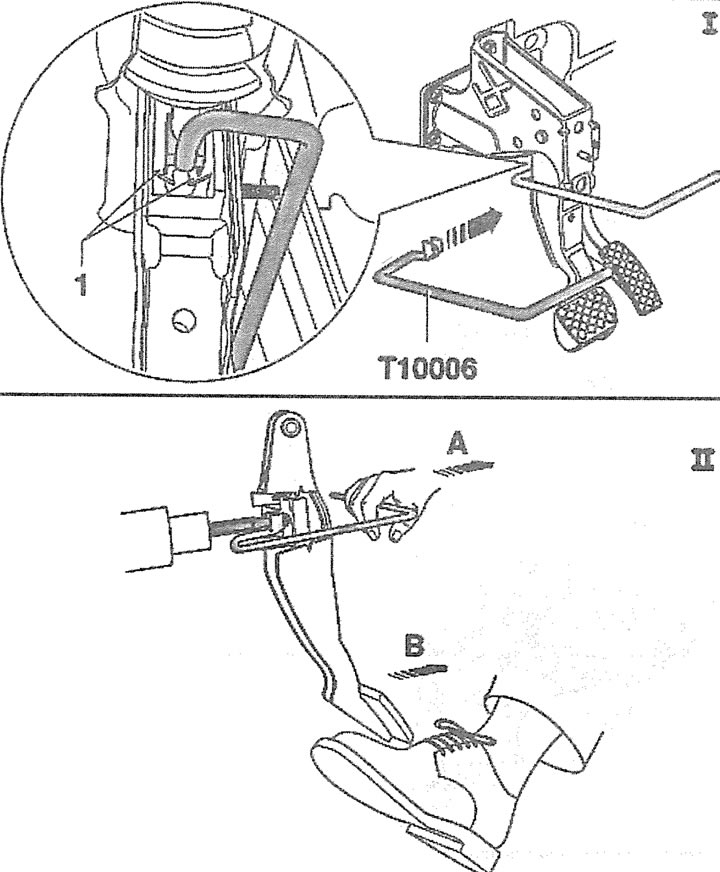
10.4. Place the special tool T10006 under the brake pedal and secure it to the ball head of the vacuum booster rod
5. Move the device in the direction of arrow A. This will release the clamps 1 on the brake pedal and release the rod head (see illustration 10.4).
6. Hold the device in the same position and move the brake pedal in the direction of arrow B (see illustration 10.4), to remove the clamps from the rod head.
Caution! If the device is released, the clamps will return to their original position and the pedal will not be able to be disconnected.
Installation
The vacuum booster is installed in the reverse order of removal.
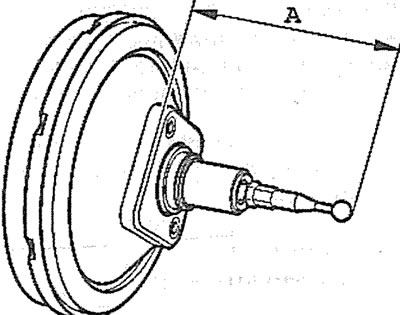
10.0. Adjust the length of the vacuum booster rod
Attention! When installing a new vacuum booster, it is necessary to adjust the length of its pushrod. The distance "A" from the head of the rod to the surface of the booster contact with the engine compartment bulkhead, excluding the sealing gasket, should be 159 mm±0.5 mm (see illustration 10.0). The length is changed by means of an adjusting nut on the rod.