
Table of contents: Muffler ↓ Removal and installation the… ↓
Muffler
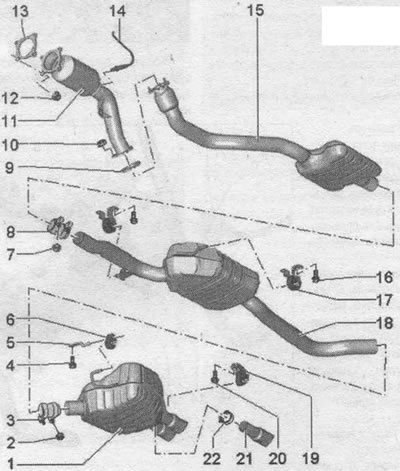
1. Additional muffler: in the factory configuration, a single unit with additional. muffler - in case of repair, replace separately: align the exhaust system without mechanical stress.
2. Nut: 23 Nm.
3. Rear clamp: Before tightening, align the exhaust system without mechanical stress; tighten threaded connections evenly.
4. Bolt; 23 Nm.
5. Holder.
6. Mounting loop: replace if damaged.
7. Nut: 23 Nm.
8. Double clamp, front: Before tightening, align the exhaust system without mechanical stress; tighten threaded connections evenly.
9. Gasket: replace.
10. Nut: 25 Nm.
11. Neutralizer: protect the neutralizer from impacts and shocks; align the exhaust system without mechanical stress.
12. Nut; 40 Nm; replace; lubricate the turbocharger locating pins with heat-resistant paste.
13. Gasket: replace.
14. Lambda probe after the "G130" neutralizer and heating of lambda probe 1 after the "Z29" neutralizer: the threads of the new lambda probes are lubricated with mounting paste; when reusing the same lambda probe, lubricate its threads with heat-resistant paste; it prevents the mounting and refractory lubricant from getting into the grooves of the lambda probe body.
15. Intermediate muffler: with detachable element: align the exhaust system without mechanical stress.
16. Bolt: 23 Nm.
17. Suspension mount: replace if damaged; check pre-tension.
18. Middle muffler: in the factory configuration, a single unit with additional. muffler - in case of repair it is replaced separately; align the exhaust system.
19. Suspension mount: replace if damaged; check pre-tension.
20. Bolt: 23 Nm.
21. Exhaust pipe: replace separately during repairs; the point of separation between the rear muffler and the muffler outlet pipe.
22. Clamp: 60 Nm.
Removal and installation the neutralizer
Disconnect connector "4" of the lambda probe after the "G130" neutralizer and the lambda probe heater 1 after the "Z29" neutralizer and release the wiring. Remove the rear noise insulation cover.

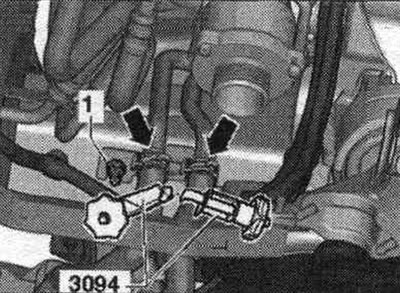
Cars with independent heater: Clamp the coolant line of the independent heater at the top with hose clamps up to 25 mm "3094" and disconnect. Unscrew the coolant lines from the body "1".
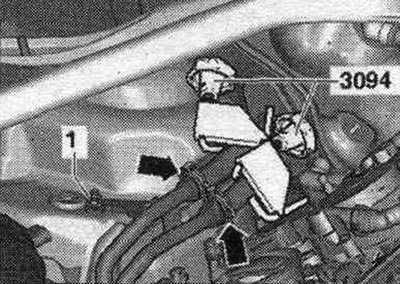
Clamp the coolant line of the independent heater from below using hose clamps up to 25 mm "3094" and disconnect. Unscrew the coolant lines "1" from the body and remove them.
All
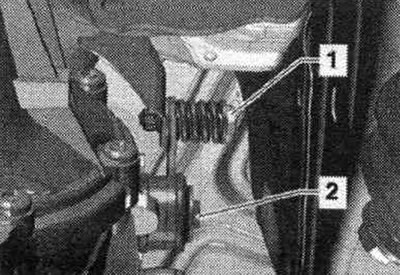
Remove the additional muffler. Disconnect threaded connection "1", unscrew bolt "2" and remove the neutralizer mount.
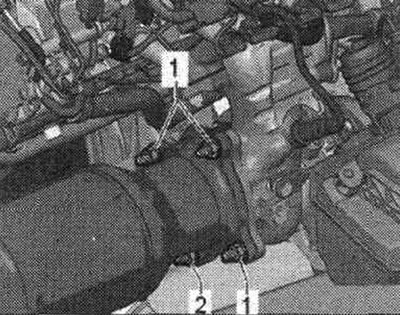
Unscrew nuts "1" from above.
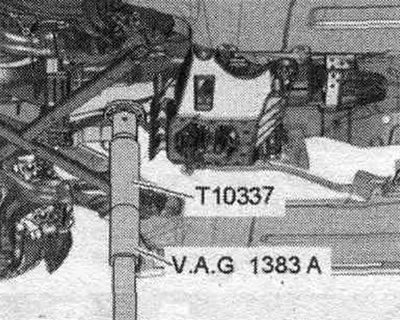
Place the plunger of the engine and transmission jack - VAG 1383 A - with the "T10337" bracket attached to it under the gearbox. Raise the gearbox slightly using the jack.
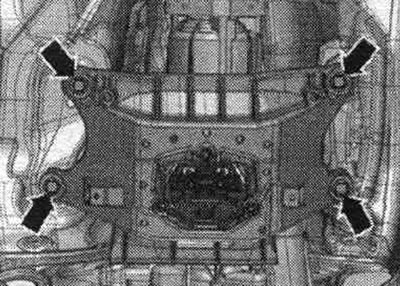
Loosen the tunnel cross member arrow bolts.
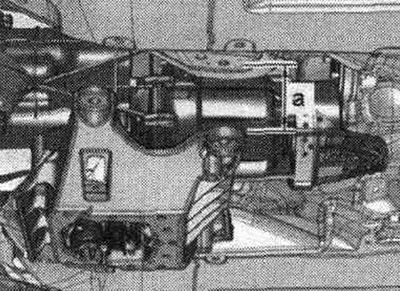
Using a lift, lower the CP by distance "a". Dimension "a" = max. 80 mm.
Unscrew nut "2" from below and remove the neutralizer downwards.
Installation
Installation in reverse order. Replace all seals, gaskets and self-locking nuts. Install the tunnel cross member. Install add. muffler. Cars with independent heater: bleed the independent heater.
[The original version of the article is posted on the website: AUDIMANUAL.ru]