
Table of contents: Interior trim ↓ A-pillar trim at the top ↓ Front door sill trim ↓ Rear sill trims ↓ B-pillar trim ↓ C-pillar trim ↓ D-pillar trim ↓ Footrest and floor covering ↓ Rear shelf ↓
Interior trim

1. Facing of D-pillars.
2. Rear shelf.
3. Rear threshold trim.
4. Facing of B-pillars at the top.
5. Facing of B-pillars at the bottom.
6. Upper trim of A-pillars.
7. Slotted cover of the A-pillar.
8. Footrest/floor covering.
9. Front threshold trim.
10. Facing of C-pillars.
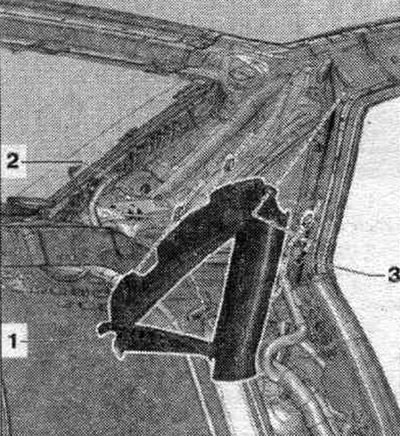
A-pillar trim at the top
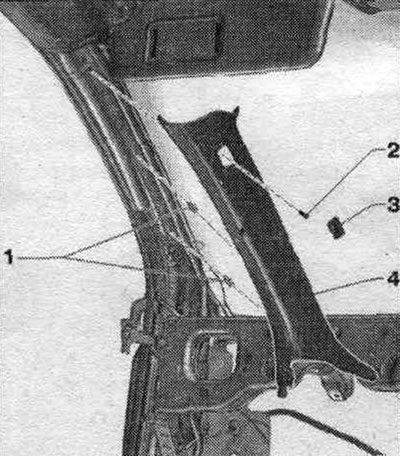
1. Staples: Insert into the trim; replace if damaged or deformed.
2. Bolt: Replace after each removal: Always clean the threaded hole for the bolt, for example with a tap; 3.5 Nm.
3. Lid: with "Airbag" icon; unclip carefully; an integral element of the overlay.
4. Upper trim of A-pillars.
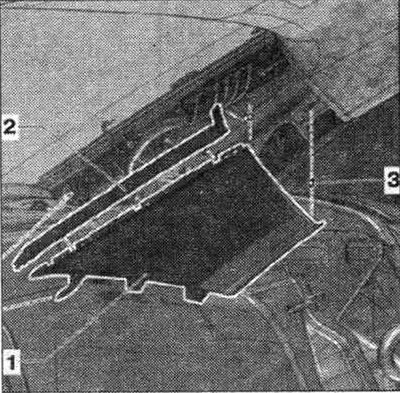
Front door sill trim
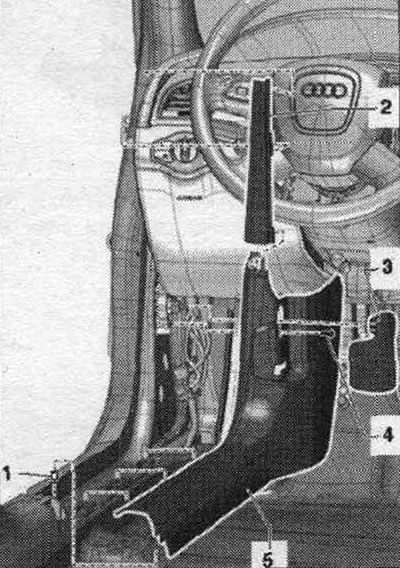
1. Clamp: 4 pcs.; insert into the casing; replace if damaged or deformed.
2. Slotted cover of the A-pillar.
3. Cable drive lever; only drives on the side.
4. Bolt: only on the driver's side.; 2.5 Nm.
5. Front threshold trim.
Rear sill trims
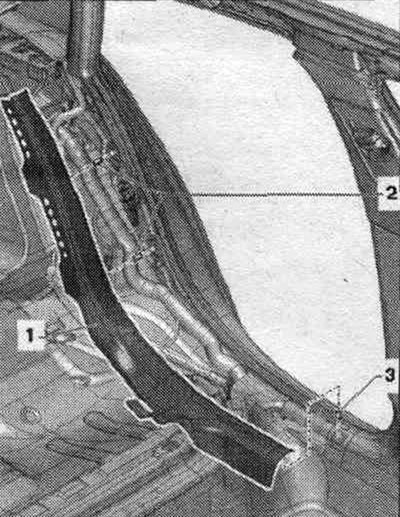
1. Rear threshold trim.
2. Clip: Insert into the threshold trim; replace if damaged or deformed.
3. Clip: Insert into the threshold trim; replace if damaged or deformed.
B-pillar trim
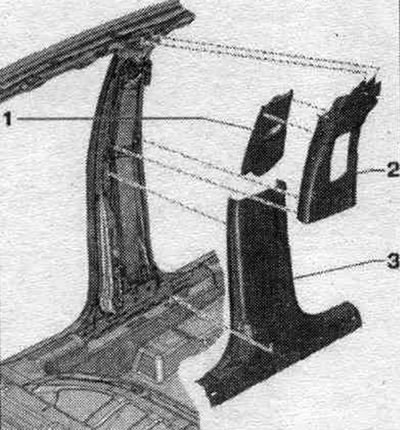
1. Slider: seat belt position adjustment. by height; detail of the upper trim of the B-pillars at the top.
2. Facing of B-pillars at the top.
3. Facing of B-pillars at the bottom.
C-pillar trim
1. Facing of C-pillars.
2. Clamp: 3 pcs.; insert into the cladding; replace if damaged or deformed.
3. Expansion clamp: unclip carefully.
D-pillar trim
1. Facing of D-pillars.
2. Cover: for sunshade guide.
3. Clamp: 2 pcs.; insert into the cladding; replace if damaged or deformed.
Footrest and floor covering
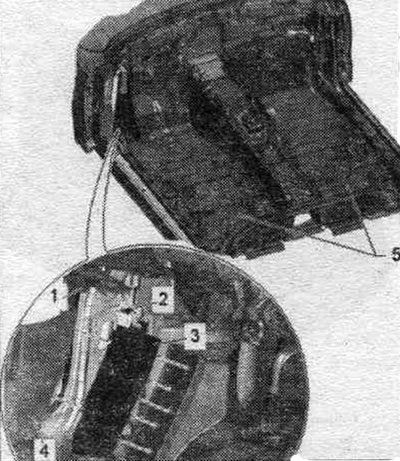
1. Front panel trim on the driver's side.
2. Clamp: Insert into the footrest.
3. Footrest: It cannot be removed without damaging it.
4. Front threshold trim.
5. Floor covering: solid.
Rear shelf
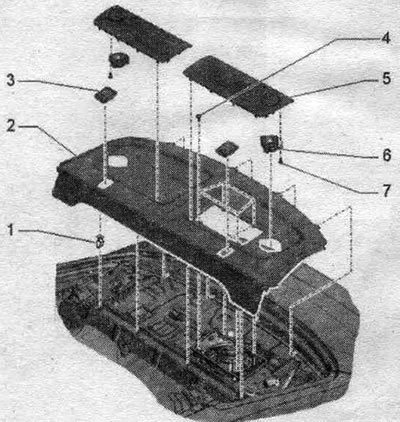
1. Clamp: 4 pcs.; insert into the rear shelf; replace if damaged or deformed.
2. Rear shelf: options: without sun blind, with sun blind; inserted into the rear frame. glass.
3. Lid.
4. Bolt: 4 pcs.; 2 Nm.
5. Speaker cover.
6. Speaker.
7. Bolt: 4 pcs.
Tightening torque rear. shelves on the spacer insert at the back. shelves
Configuration option with additional equipment. fastening: tighten the "arrow" bolt to a torque of 2 Nm.
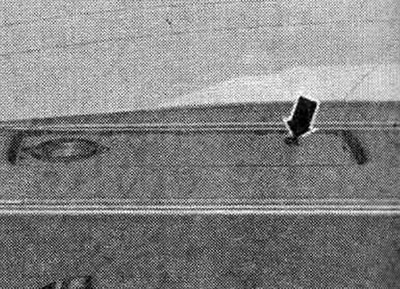
Tightening torque of the rear spacer insert. shelves on the body
Configuration option with additional equipment. fastening: tighten bolt "2" of spacer insert "1" with a torque of 2 Nm. The locking pin "arrow" must enter the hole in the body.