
Table of contents: Trunk lining - Avant ↓ Rear lining. body parts ↓ Side trim of the trunk ↓ Mesh partition ↓ Trunk floor with slotted linings ↓ Trunk floor with support rail ↓ Trunk linings - Avant ↓ Lower trunk trim ↓ Removal and installation the lower… ↓ Upper trunk trim ↓
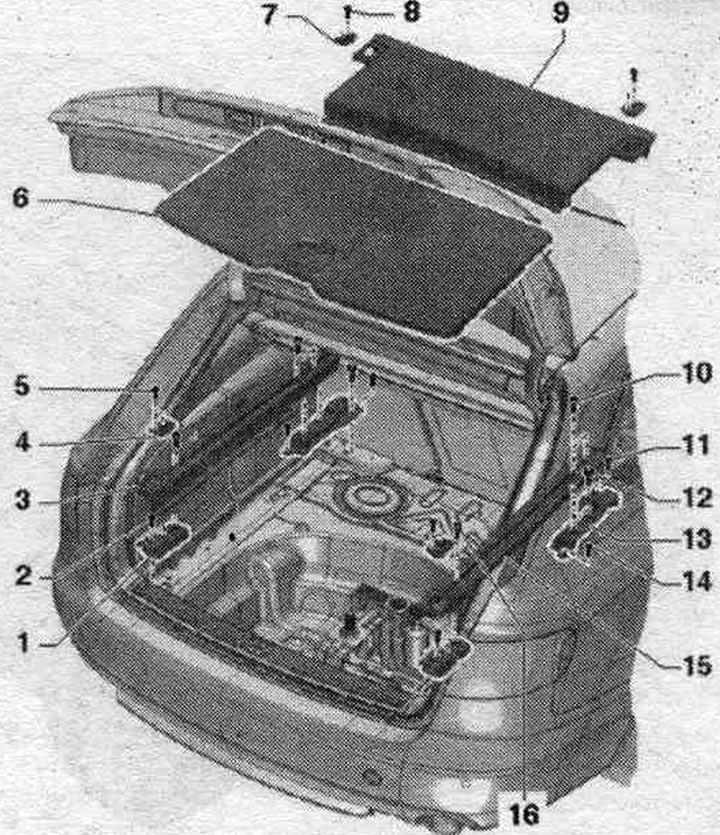
Trunk lining - Avant
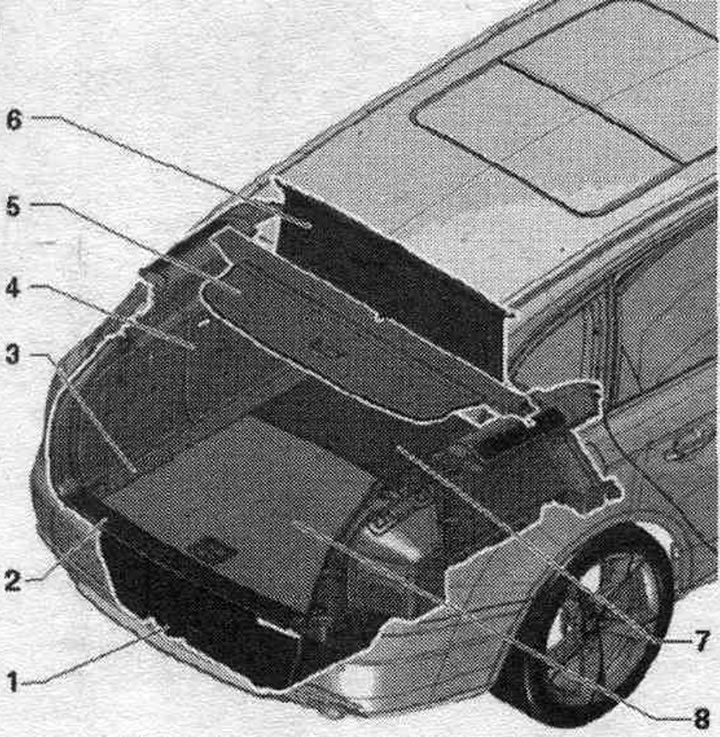
1. Spare wheel niche trim.
2. Facing the edge of the rear. body parts.
3. Slotted plate or mounting rail.
4. Side trim of the trunk.
5. Trunk trim.
6. Partition mesh.
7. Front part of the trunk floor: options: with slotted linings, with guide rails.
8. Rear part of the trunk floor: options: with slotted linings, with guide rails.
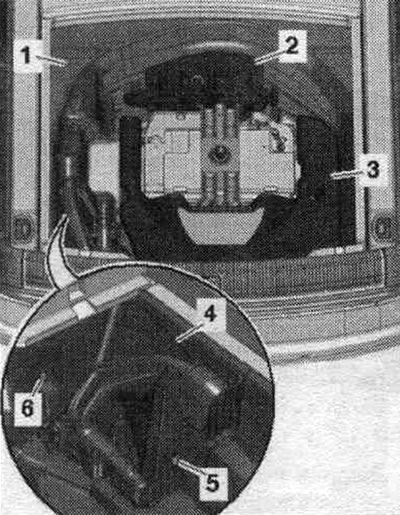
Rear lining. body parts
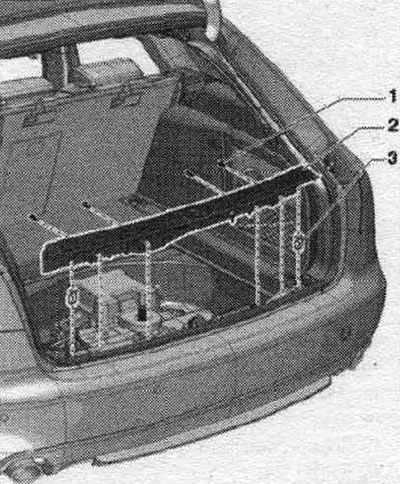
1. Bolt: 4 pcs.; 1.5 Nm.
2. Facing the edge of the rear. body parts.
3. Clamp: 4 pcs.; insert into the cladding; replace if damaged or deformed.
Side trim of the trunk
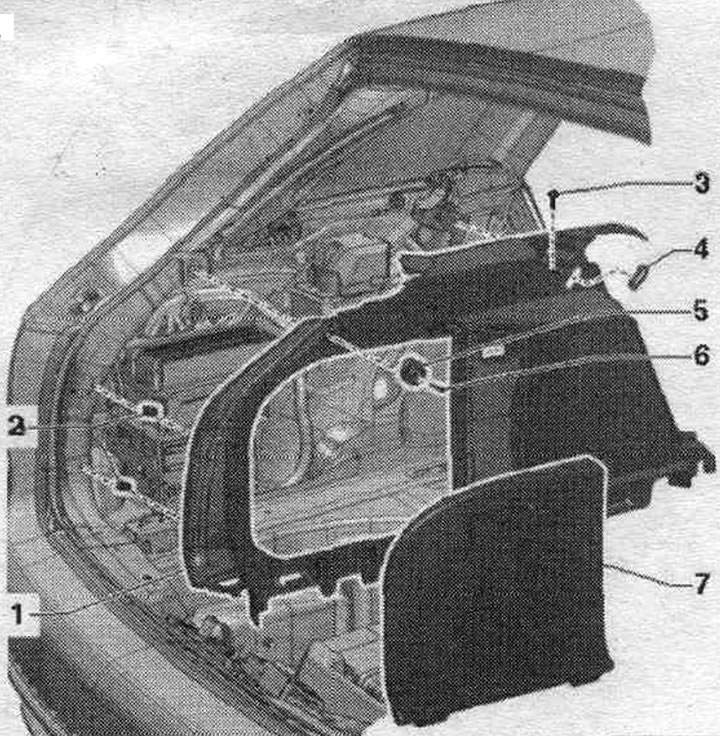
1. Side trim of the trunk.
2. Clamp: 2 pcs.; insert into the cladding; replace if damaged or deformed.
3. Bolt: 1.5 Nm.
4. Rubber tip for fastening the mesh partition.
5. Hook for bags.
6. Bolt: 3 Nm.
7. Trunk side trim cover.
Mesh partition
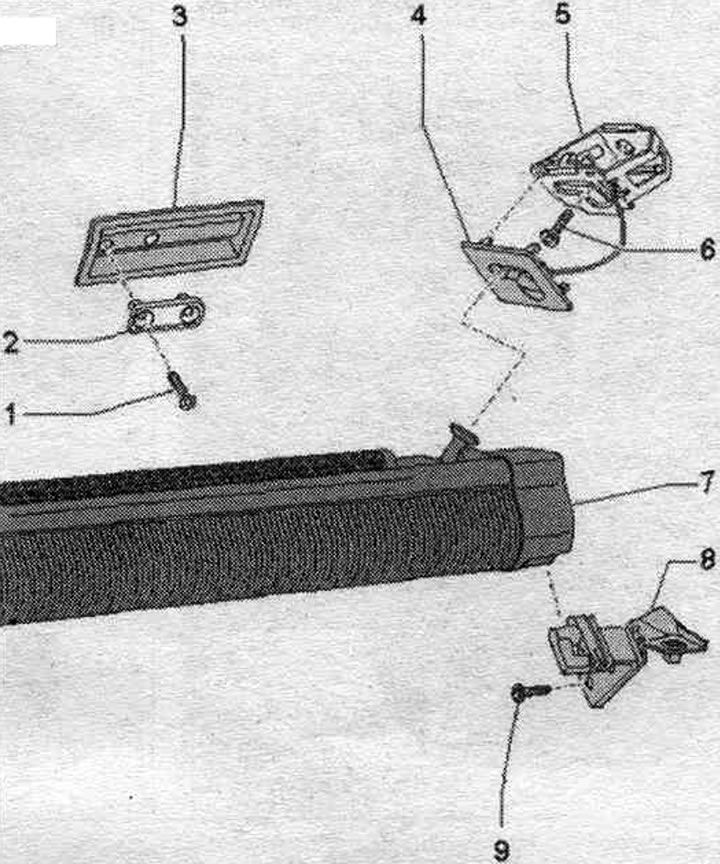
1. Bolt: 2 pcs.; 9 Nm.
2. Guide for the mesh partition on the back of the seat.
3. Seat back guide cover.
4. Mounting plate.
5. Fastening: for mesh partition.
6. Bolt: 9 Nm.
7. Mesh partition: on the back. seats.
8. Holder: for mesh partition.
9. Bolt: 2 pcs.; 4.5 Nm.
Trunk floor with slotted linings

1. Rear holder.
2. Bolt: 2 pcs.; 9 Nm.
3. Slotted overlay.
4. Mounting eye.
5. Bolt: 2 pcs.; 6 Nm.
6. Bolt: 2 pcs.; 1.2 Nm.
7. Counter support: for the trunk bottom handle.
8. Rear part of the trunk floor.
9. Handle: for the trunk floor.
10. Front part of the trunk floor: with a profile insert for a set of tools.
11. Bolt: 2 pcs.; 6 Nm.
12. Mounting eye.
13. Bolt: 9 Nm.
14. Front holder.
15. Bolt: 55 Nm.
16. Slotted overlay.
Tightening torque of the holder of the device for hanging "4" on the body
Tighten nuts "5" and "6" to a torque of 4 Nm. Ignore "Pos. 1, 2, 3".
Trunk floor with support rail
1. Rear holder.
2. Bolt: 2 pcs.: 9 Nm.
3. Left strut.
4. Mounting eye.
5. Bolt: 2 pcs.; 6 Nm.
6. Rear part of the trunk floor.
7. Mounting eye.
8. Bolt: 2 pcs.; 6 Nm.
9. Front part of the trunk floor: with a profile insert for a set of tools.
10. Bolt: 2 pcs.; 7 Nm.
11. Bolt: 9 Nm.
12. Bolt: 55 Nm.
13. Front holder.
14. Counter support: for the trunk bottom handle.
15. Right strut.
16. Bolt: 7 Nm.
Trunk linings - Avant
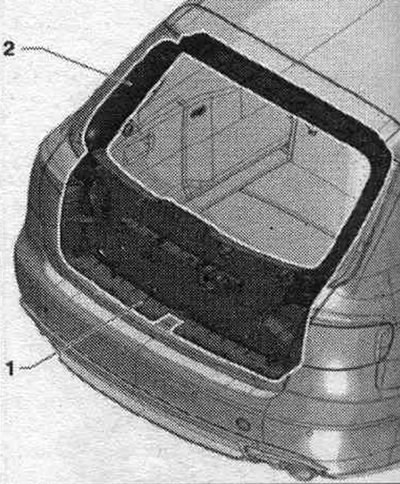
1. Lower trunk trim.
2. Trunk lining, upper.
Lower trunk trim
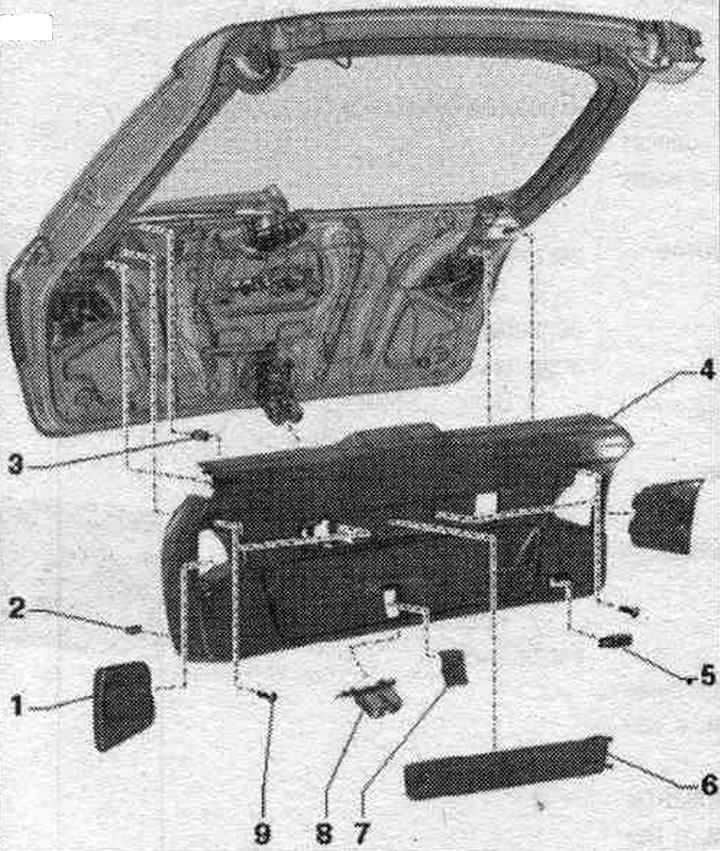
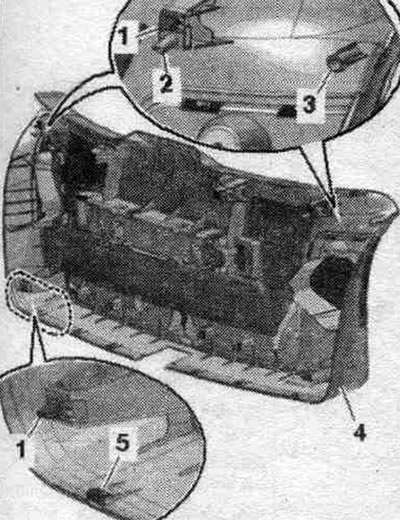
1. Rear lining. lantern.
2. Rubber stop: 6 pcs.; insert into the cladding.
3. Clamp: 12 pcs.; insert into the cladding; replace if damaged or deformed.
4. Lower trunk trim.
5. Trunk light.
6. Warning triangle cover.
7. Overlay: for emergency release.
8. Trunk lock trim
9. Bolt: 4 pcs.; 2 Nm.
Removal and installation the lower trunk trim
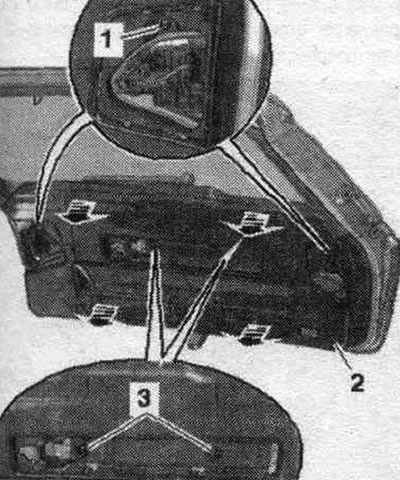
Remove the trunk light. Remove the trunk lid release button in the E406 luggage compartment. Remove the rear light trims. Remove the warning triangle cover and take out the warning triangle. Remove bolts "1" and "3." Carefully remove lower trim "2" from the trunk. To do this, release the trim clips using the "80-200" lever from the trunk. Reach between the trim and the trunk lid and disconnect the remaining clips. Remove the lower trunk trim.
Installation
Installation in reverse order. If the clips "1" of the trim remain in the mounting points of the trunk, remove them and place them on the trim for installation. Check the clamps for defects and deformations; replace if necessary. Check if all rubber buffers "5" are present in the lining. First insert the lower trunk trim "4" into the centering pin "2" and "3" and then press until it clicks into place.
Upper trunk trim
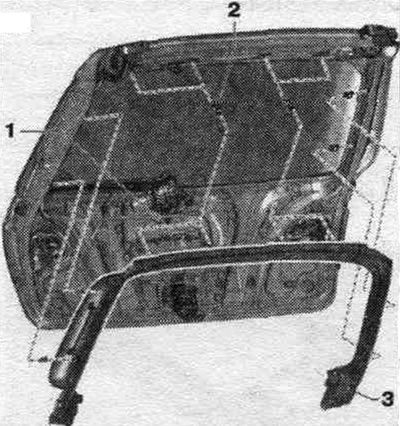
1. Rubber stop: 11 pcs.; insert into the cladding.
2. Clamp: 8 pcs.; insert into the cladding; replace if damaged or deformed.
3. Trunk lining, upper.
(This article was copied from the website: «audimanual.ru»)