
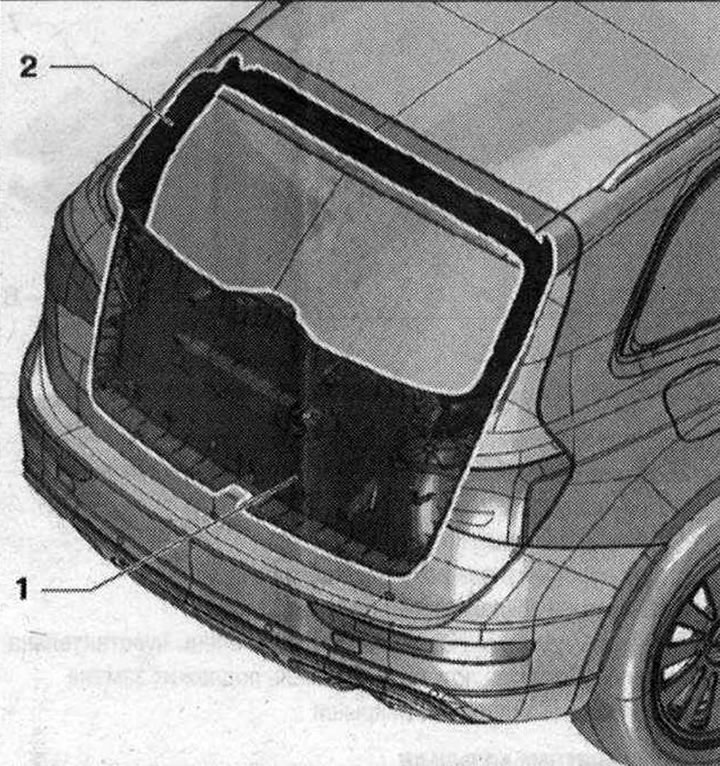
Trunk lid trim 1. Lower trim of the trunk lid; 2. Upper trunk lid trim
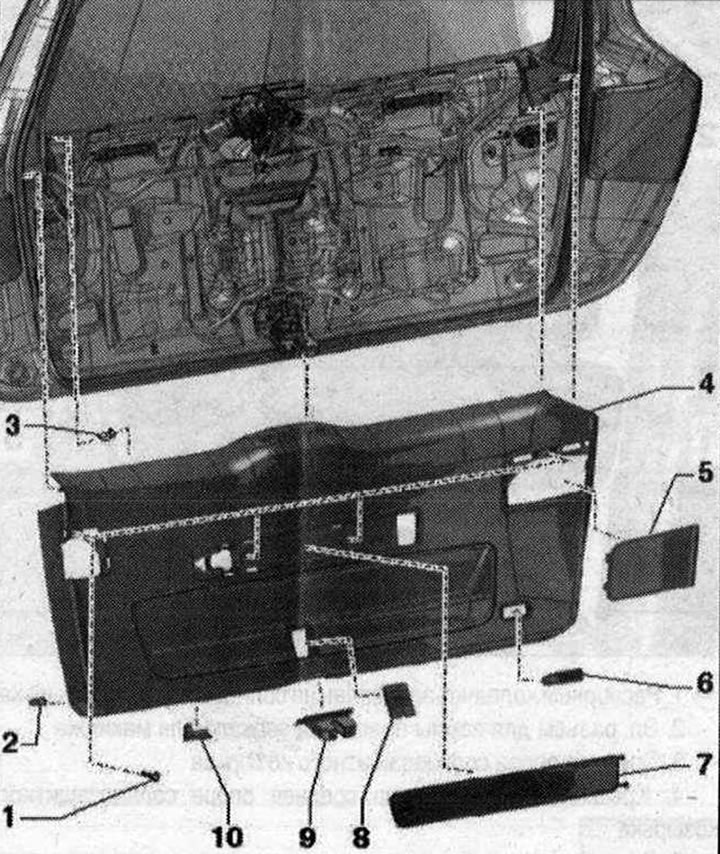
Lower trunk lid trim 1. Bolt. 4 things. 2 Nm; 2. Rubber stop. 4 things. Insert into the casing; 3. Clamp. 12 pcs. Insert into the casing. Replace if damaged or deformed; 4. Bottom trim of the trunk lid; 5. Rear light trim; 6. Trunk light; 7. Warning triangle overlay; 8. Emergency release pad; 9. Trim of the trunk lid lock; 10. Button for closing the rear door in the trunk -E406-
Removing the rear light cover
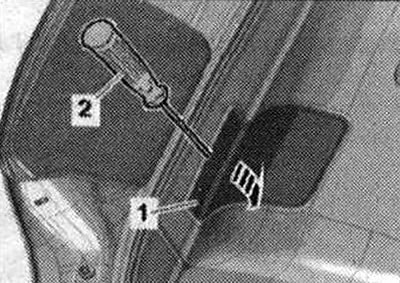
Place a wedge -3409-il and a screwdriver -2- to the hole and press the cover -1- inwards in the -direction of the arrow-.
Installation: Install the plug until it clicks.
Removing the lower trunk lid trim
Remove the trunk lamp. If fitted, remove trunk lid closing button in trunk -E406-. Remove the rear light covers. Remove the warning triangle trim and pull out the warning triangle. Remove bolts -1- and -3-. Carefully remove the lower trim -2- from the trunk lid -arrows-; to do this, release the clips of the trim using the lever -80-200- from the trunk lid.
Reach between the trim and the trunk lid and disconnect the remaining clips. Remove the trim from the bottom of the trunk lid.
Installation
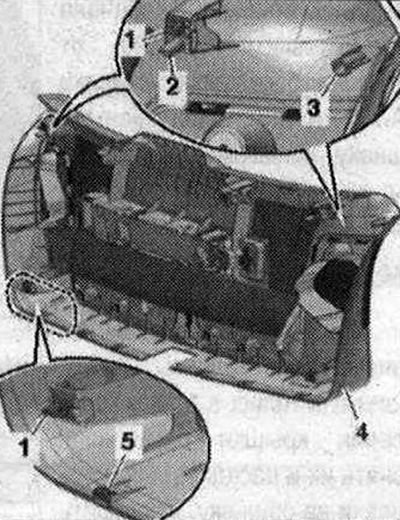
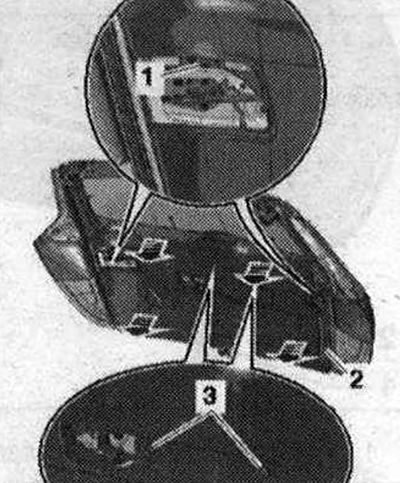
Installation in reverse order: if the clips -1- of the trim remain at the attachment points of the trunk lid, remove them and push them onto the trim for installation. Check the clamp clamps for defects and deformations and replace if necessary. Check that all rubber buffers -5- are present in the trim. First, install the lower trim of the trunk lid -4- onto the centering pins -2- and -3- and then press until it audibly clicks into place.
Removing the trunk lid lock trim
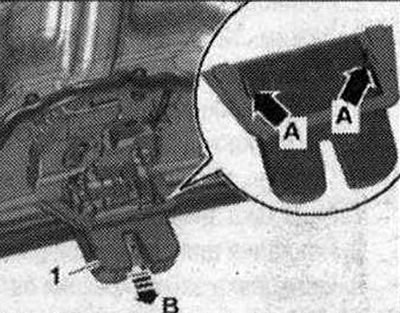
Remove the lower trim of the trunk lid. Using a screwdriver, release the latches -arrows A- and remove the trim -1- from the trunk lid lock -arrow B-.
Installation
Installation in reverse order: press the trim until it audibly clicks into the trunk lid lock.
Visitor comments