
1. Disconnect the battery ground cable. Place the rear of the vehicle on jack stands.
2. Remove the cover on the right, next to the fuel tank (arrows) and place a container under the tank to receive the fuel.
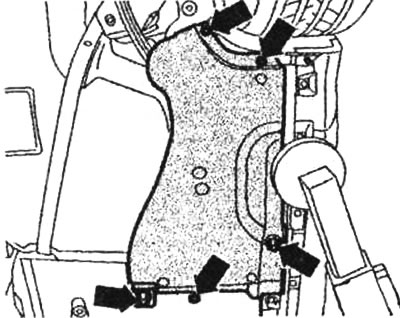
The fuel filter can only be accessed by removing the cover on the right, next to the tank
3. Remember about the pressure in the system, put a rag on the pipes. Then, carefully loosen the connection, relieve the pressure.
4. Disconnect fuel lines 1 and 3 (press the unlock button) and unscrew screw 2. After this, you can remove the fuel filter.
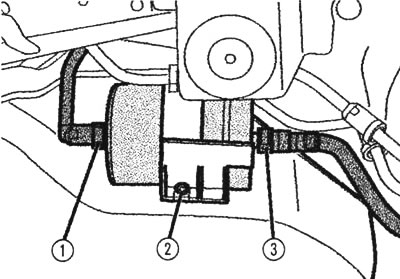
The fuel lines are easily removed by pressing the release button
5. In the case of a turbocharged engine, in order to remove the filter, it is necessary to remove the return line 1, the supply line from the fuel tank 2, the supply line to the engine 3 and the air bleed line 4, and also unscrew the screw 5.
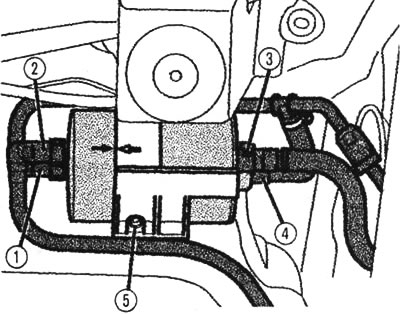
In the case of a turbocharged engine, in order to remove the filter, it is necessary to remove four fuel lines
6. When installing, which is done in the reverse order, it is necessary to ensure that the appropriate direction of fuel flow is observed, this direction is indicated by an arrow. Arrow 1 on the filter must be directed towards arrow 2 on the holder.
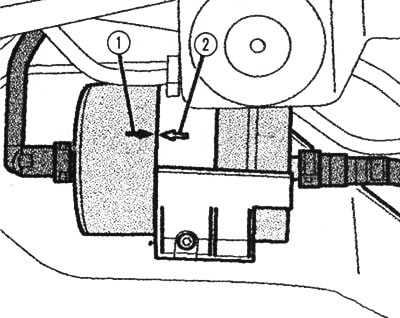
Arrows make it easier to install the fuel filter
7. The purpose of the connections in the case of a turbocharged engine is indicated on the filter (see fig. to p.5): 1 - return line "RL", 2 - supply line to the fuel tank "VL", 3 - supply line to the engine "MOTOR", 4 - air outlet line "E".
8. After a test drive, check the tightness of all hose connections.
The full version is posted on the resource AUDImanual