



During installation, the exhaust system must not fall under any circumstances, otherwise the ceramic body in the catalytic converter may be damaged and the converter will become unusable.
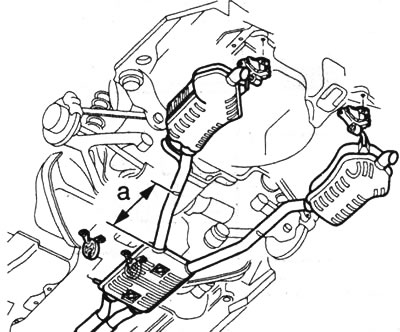
In vehicles with all-wheel drive, there are two mufflers. To replace one muffler, cut the connecting pipe. The separation point is shown in the figure. Dimension a is 244 mm
When purchasing replacement parts, be sure to purchase self-locking nuts. Seals and worn-out retaining rings should also be replaced. Four-wheel drive vehicles and vehicles with six-cylinder engines have two mufflers.
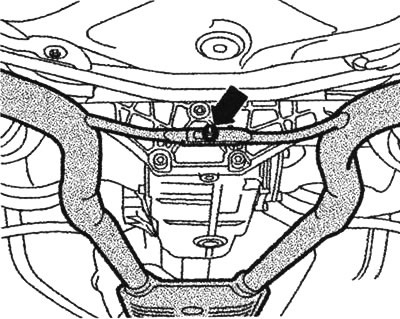
The nut on the spacer between the exhaust pipes in a car with a six-cylinder engine is tightened to a torque of 23 Nm
1. Place the vehicle on jack stands so that it is resistant to vibrations.
2. If necessary, remove the lower engine cover. Spray all bolted connections of the exhaust system with a rust remover, wait for some time until the rust dissolves.
3. Support the exhaust system or hang it with wire from the underbody of the vehicle to prevent it from falling and damaging the catalytic converter. Disconnect the oxygen sensor connectors.
4. The front and additional muffler are installed as a single part as standard. If you only need to replace the muffler, cut the connecting pipe at a right angle in the place marked with a recess (using a special saw VAG 1523). The front and additional muffler are supplied separately as spare parts in case of repair, together with a repair double clamp (fixing sleeve).
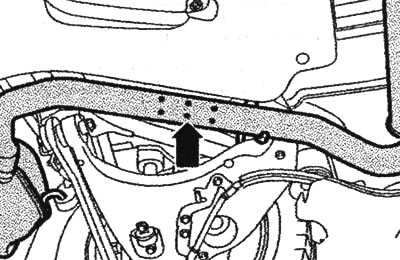
Exhaust pipe split location. The exhaust pipe on a vehicle with a four-cylinder engine should be cut at a right angle at the designated location (arrow)
5. The bushing must be positioned so that the cut is in the middle of the bushing. The bolt heads must point downwards according to Audi specifications.
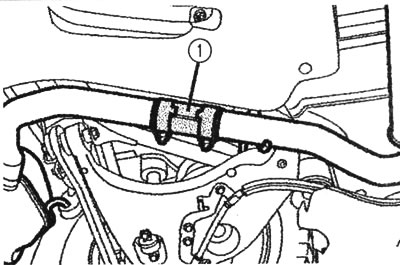
Double repair clamp (fixing sleeve) 1 is placed so that the cut is in the middle
6. When installing, first mount all exhaust system parts loosely, tighten the bolted connections on the flanges and clamps by hand.
7. The exhaust system is aligned in a cold state and without stress. In cars with fastening sleeves between the front and additional muffler, it is additionally necessary to align the front muffler.
8. To do this, move the exhaust system forward (arrow) so that at the front right near the front muffler the pre-tension at the locking loop is a = 7...9 mm. After this, tighten the bolted connections of the front fastening sleeve evenly with a torque of 40 Nm (position 22 in the figure, which shows the exhaust system for a four-cylinder engine).
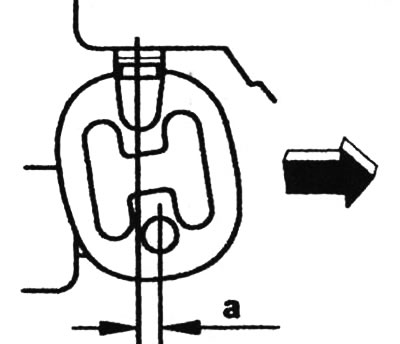
Installing the front muffler
9. Move the rear part of the system forward in such a way (arrow) that the pre-tension at the stop loop (or locking loops in case of 3.0L engine) at the rear of the additional muffler was a=7...11 mm.
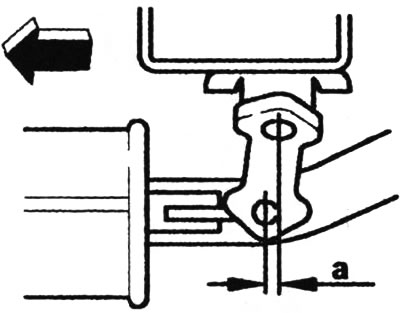
Installing an additional muffler
10. Tighten the bolt connections evenly.
11. To make it easier to loosen bolted connections later, lubricate them with high-temperature paste.