
Table of contents: Various rubber exhaust system mounts ↓ The exhaust system must be… ↓ Disconnecting the inlet pipe and… ↓ Removal the lambda probe ↓ Detaching the triangular flange… ↓ Removal the Double Tube Clamp ↓ Disconnecting the intermediate… ↓ Exhaust system alignment ↓
The following sections describe how to disconnect the individual exhaust system connections from each other. The last section on exhaust system alignment is important for assembly.
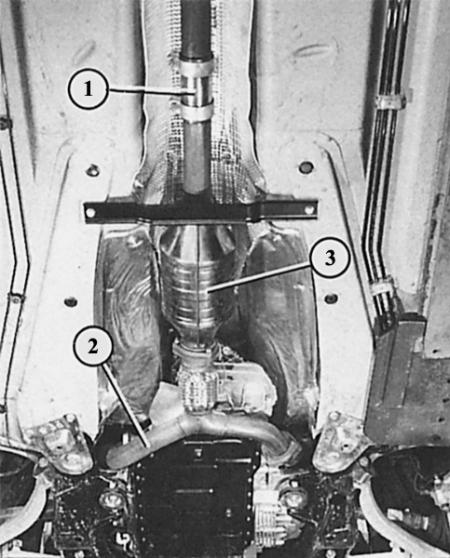
The front-wheel drive model with a six-cylinder engine has only one catalytic converter (3). The exhaust pipes from both cylinder banks (2) enter in front of the catalytic converter at the same place. The number "1" shows a double clamp.
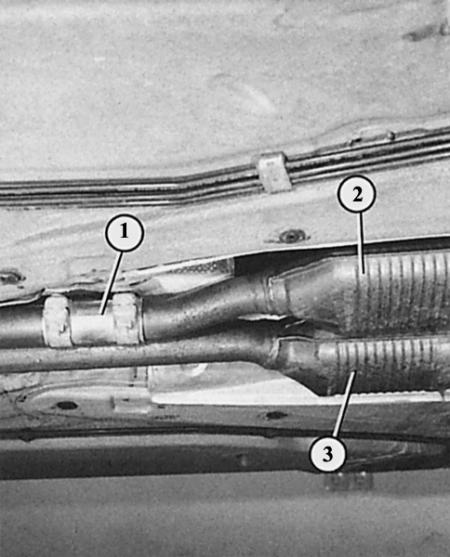
The six-cylinder engine in the quattro model has two separate catalytic converters (2 and 3). The number "1" shows a double clamp.
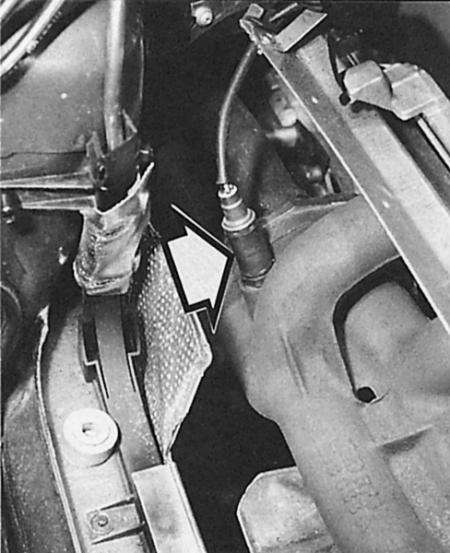
Here the arrow shows the lambda probe screwed into the exhaust manifold in a four-cylinder engine with a working volume of 1.6 liters.
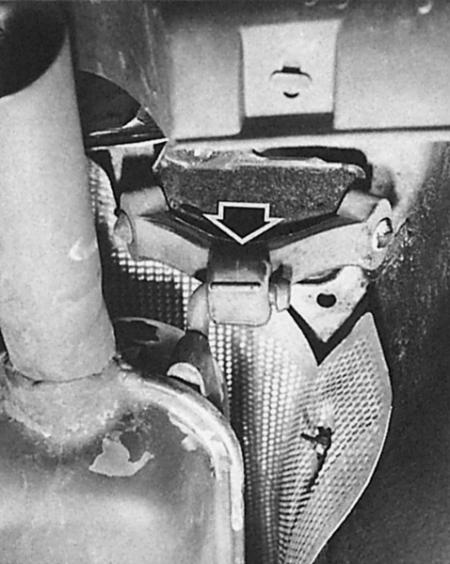
Various rubber exhaust system mounts
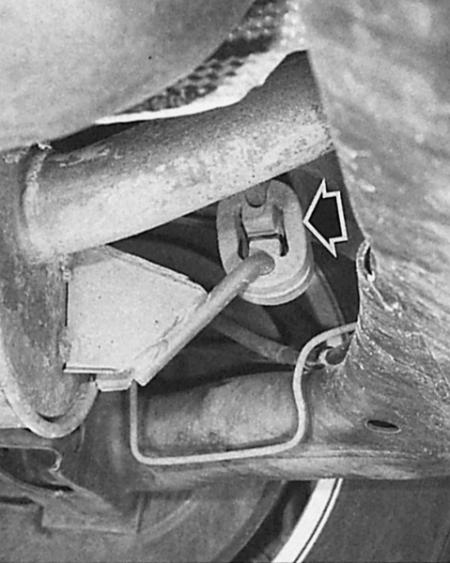
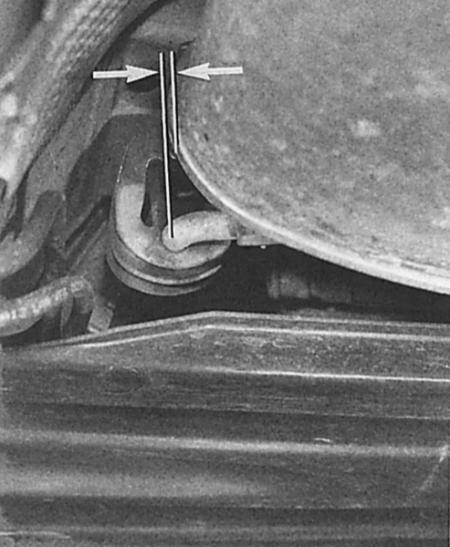
Front suspension of the final muffler in the Audi A4 with front wheel drive.
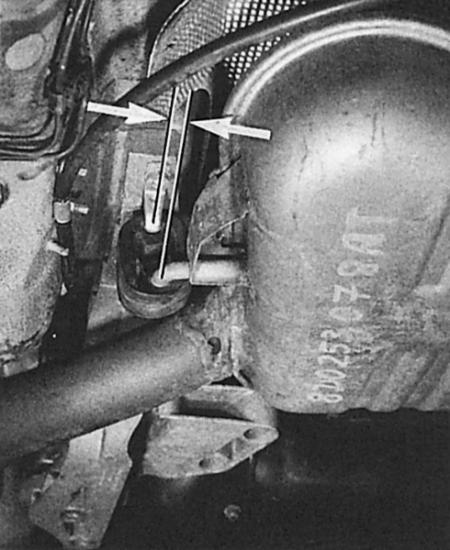
One of the rear suspensions of the final silencer in the A4 quattro.
The exhaust system must be straightened without tension
In a front-wheel drive Audi, the front suspension should have a preload of approximately 7 mm.
In quattro, the mounting eye at the front of the intermediate silencer should have a pre-tension of approx. 7 mm.
Disconnecting the inlet pipe and exhaust manifold
1. The spacer studs on which the fastening nuts of the intake pipe are located easily break off if a heavily rusted nut is unscrewed with pressure.
2. Therefore: treat the screw connection with anti-corrosion spray or (often it's better):
3. Break the nuts with a sharp chisel. They are usually made of soft material with a threaded spiral embedded in them. The threaded part must then be removed separately from the thread of the expansion stud.
4. The new nuts in the exhaust mounting kit are also made of the same soft material. Do not use nuts from your home. Tightening torque: 30 Nm.
Removal the lambda probe
The lambda probe must be removed when replacing the catalytic converter (or the probe itself).
1. Hang the wire brackets on the body, disconnect the connectors (inspect the wire along its entire length).
2. Unscrew the probe.
3. When installing, lubricate the lambda probe with anti-corrosion grease. However, the grease should not get into the area of the probe body holes. Tightening torque: 50 Nm.
Detaching the triangular flange (with spring)
1. Loosen the three screw connections on the connecting flange.
2. If a sealing ring is included, special attention should be paid to it - it should not fall on the floor. The hard material may crack.
3. If there is a gasket inserted into the flange, it must be replaced.
4. Tightening torque of bolts: 25 Nm.
5. When tightening, make sure that the bolts are tightened parallel to each other.
Removal the Double Tube Clamp
The double pipe clamp perfectly connects two cut pieces of pipe and is easy to detach. Important: The double pipe clamp cannot be used a second time. It must be replaced even after the screw connection has loosened.
1. Mark the mounting location of the clamp for subsequent assembly.
2. Disconnect the screw connections of the double tube clamp; to do this, treat the threads with a rust solvent.
3. If the screw connection cannot be separated in this way, separate the bolt from the nut with an angle grinder.
4. Another option: cut the nut with a chisel.
5. Tightening torque of screw connection: 25 Nm.
Disconnecting the intermediate muffler and the final muffler
1. In the original exhaust system, both mufflers are connected by a solid piece of pipe.
2. In order to replace one of the two mufflers, you need to saw through the connecting pipe.
3. To be sure about the place of cutting, transfer the length of the new muffler pipe to the pipe of the old one. To be sure, leave a reserve of about 10 mm. In this case, there will be a little space for adjustment during installation.
4. Cut the pipe with a metal saw at a right angle if possible.
5. Due to lack of space, it is hardly possible to do this on an installed muffler. It is better to dismantle both mufflers together.
6. Even if you are replacing both mufflers, you will only be able to purchase the mufflers separately as spare parts.
7. Connect the pipes with a double pipe clamp as already mentioned (from the spare parts warehouse). Tightening torque: 25 Nm.
Exhaust system alignment
An exhaust system installed with a tie-down can cause annoying noise. Therefore:
1. Before tightening the screw connections, hang the exhaust system freely in the mounting loops and straighten:
2. All parts must be at a sufficient distance from the body.
3. The end muffler(s) must be at the same distance from the edges of the cutout in the bumper on all sides.
4. Tighten the bracket on the gearbox with a tightening torque of 25 Nm. Pay attention to the correct assembly of the sleeve and spring.
5. Pre-tensioning the exhaust system to ensure balanced thermal expansion:
6. In front-wheel drive Audis, the front intermediate muffler mount should have a preload of approximately 7 mm.
7. In quattro, the fastening loop at the front of the intermediate silencer must have a pre-tension of approx. 7 mm.
8. Finally, tighten all exhaust system screw connections, starting from the front. Tightening torques are specified in the previous sections.
The original article is available on the online resource: audimanual.ru