



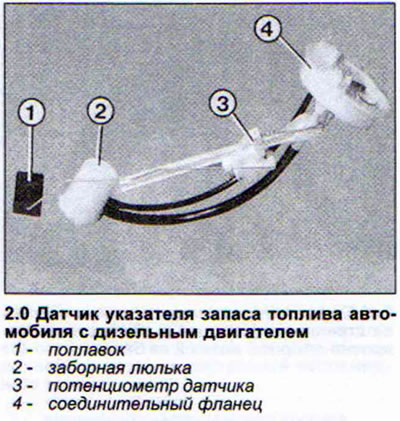
Different fuel tank shapes have led to the emergence of fuel gauge sensors with different designs. The main distinguishing feature of the sensors is that the sensor with a rectangular float is installed on front-wheel drive vehicles, and the sensor with a spherical float is installed on quattro vehicles.
Fuel gauge sensor - removal and installation
Caution! To avoid fuel leakage when removing the fuel gauge sensor, the tank must be filled to a maximum of ⅔.
1. Unscrew the trunk floor covering.
2. Unscrew the black cap.
3. Disconnect the multi-pin plug.
4. Squeeze the leashes of the fuel return line connecting clamps and disconnect it (see illustration).
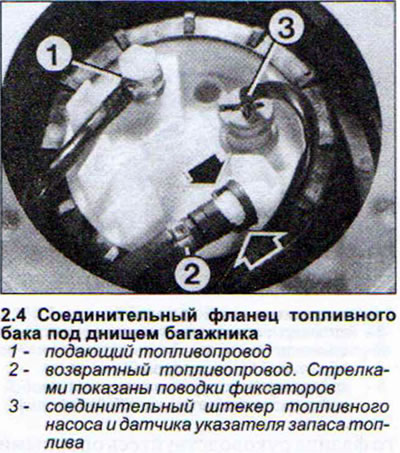
5. Disconnect the fuel supply line.
6. Unscrew the plastic union nut. Usually this nut is tightened tightly and unscrews with difficulty. In such cases, it is recommended to place a screwdriver on the edge of the nut and, hitting the screwdriver handle with a hammer, loosen the nut.
7. Remove the fuel tank connecting flange by pulling it upwards. If necessary, disconnect the fuel return line connecting pipe from the rear side of the flange by squeezing its leashes.
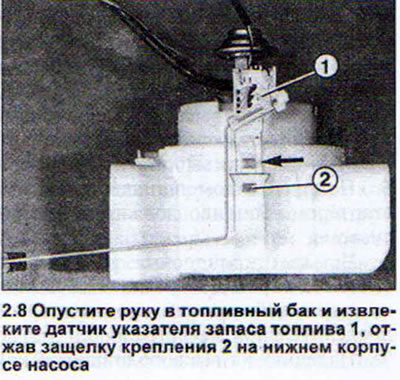
8. Reach into the fuel tank and remove the fuel gauge sensor by pressing the retaining latch on the lower pump housing (see illustration). This part of the pump is glued and cannot be removed from the fuel tank.
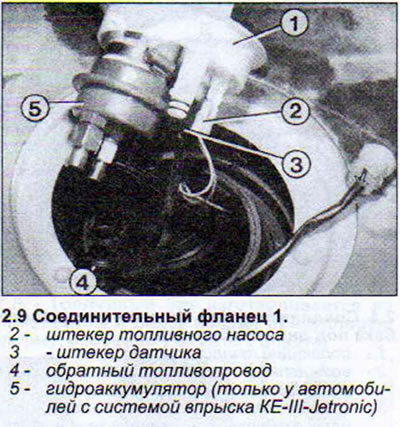
9. Disconnect the sensor plug from the connecting flange (see illustration).
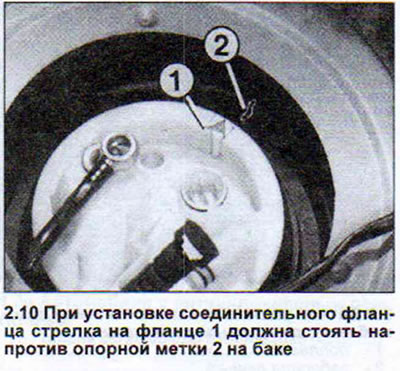
10. Moisten the sealing ring of the connecting flange before installing it. When installing the connecting flange, be guided by the reference marks. The arrow on the flange should be opposite the mark on the tank (see illustration).
In vehicles with the KE-III-Jetronic injection system, a hydraulic accumulator is mounted on the connecting flange, which ensures constant fuel pressure in the system after the engine is turned off.