
Table of contents: Removal ↓ Installation ↓
Removal
Remove the front bumper.
Remove the locker.
Remove the sealing tape.
Open the hood.
Left wing: remove the hood stop from the rubber nozzle and knock out the nozzle.
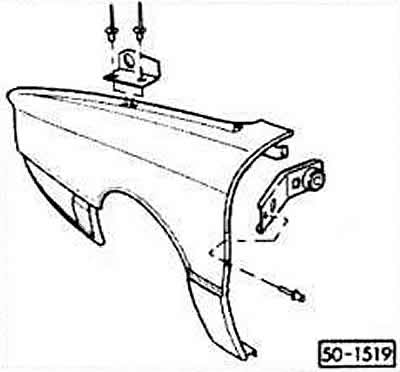
Right wing: loosen the gas-filled spring strut. To do this, remove the locking clip and remove the pin. Remove the cap.
Remove the wing mounting bolts.
Due to the anti-corrosion seal, the wing sits very tightly. To loosen the fastening, you will need a hair dryer with a temperature of 600°C.
Install a flat nozzle on the hair dryer and soften the seal around the perimeter. Gradually remove the wing.
Installation
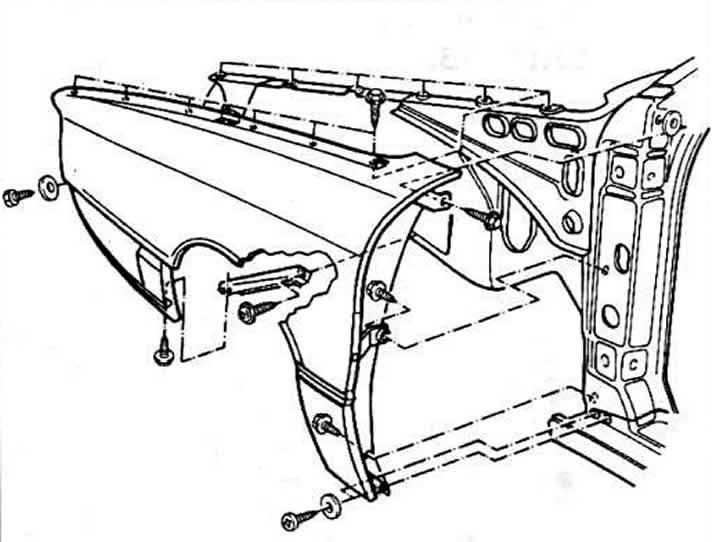
Before installing the new wing, rivet the bracket on the front wall to the front pillar. For this, you will need special pliers for pop rivets.
Rivet a hood support on the left wing.
Paint the wing.
Clean and, if necessary, straighten the adjacent parts of the front wing.
Apply sealing tape to the adjacent surfaces of the front wing.
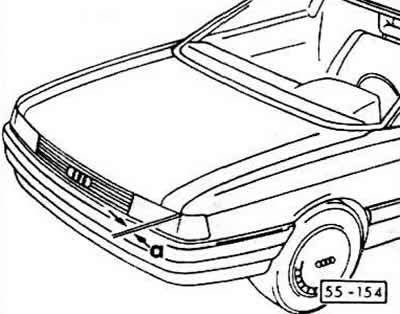
Attach, align and bolt the front wing. The specified gap value between the hood and the wing: a = 4.5+1 mm.
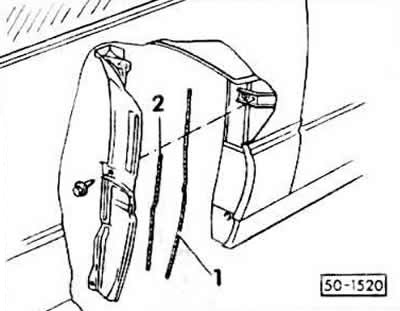
Glue the sealing cords "1" and "2" and secure the casing to the bracket and front wing with 2 screws. The length of the sealing cord l = 480 mm and the diameter is 7 mm; respectively for sealing cord 2; 250 mm and 7 mm in diameter. Sealing cord AKD 49701004R10 is sold by the meter; diameter 10 mm processed to 7 mm
Apply underbody corrosion protection to the inside of the front fender.
Install a locker.
Install the bumper.
Install new sealing tape.
[Content source: the specified website AUDIMANUAL.RU]