



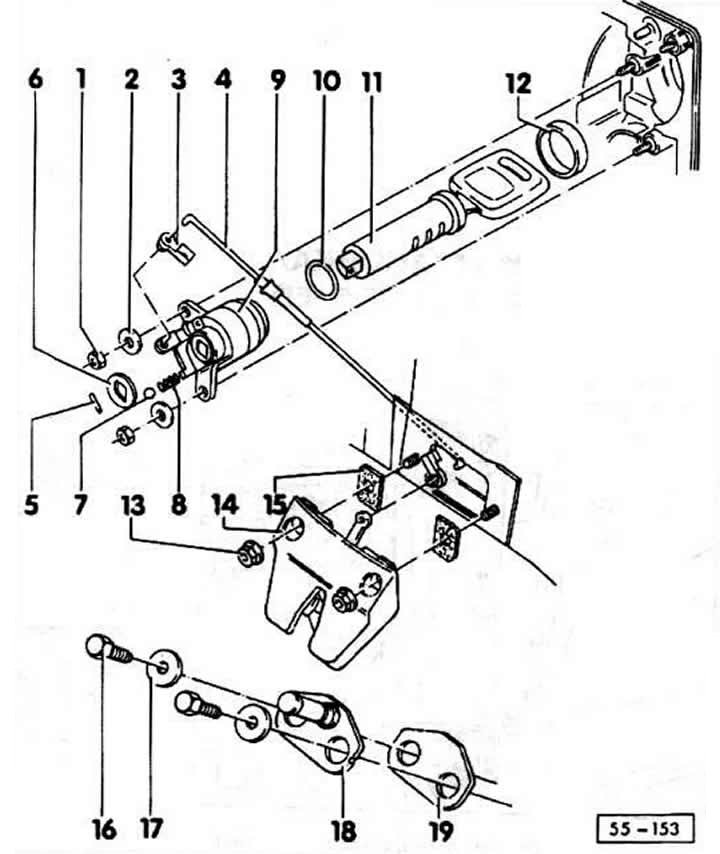
Sedan
1 - nut, 6 Nm
2 - spring washer
3 - hinge bushing
4 - drive rod
Adjustment: insert the ends of the rod and tighten the rod, selecting the gap in the threaded connection, but do not overtighten.
5 - pin
6 - eccentric
For cars with central locking, remove carefully. Make sure that the ball and spring do not fall out.
7 - ball
Only for central locking. When installing into the lock cylinder, lightly coat with grease.
8 - spring
Only with central locking.
9 - lock cylinder body
10 - sealing ring
For the cylinder at the back.
11 - lock cylinder
To remove, remove the pin and remove the eccentric.
Attention: Press out the cylinder only with the key inserted.
12 - sealing ring
13 - lock nut, 3 Nm
14 - castle
15 - gasket
Remove the protective film and stick it on the new lock.
16 - bolt, 3 Nm
17 - washer
18 - locking wedge
Move the wedge with the bolts loosened to set the size of the trunk lid gap.
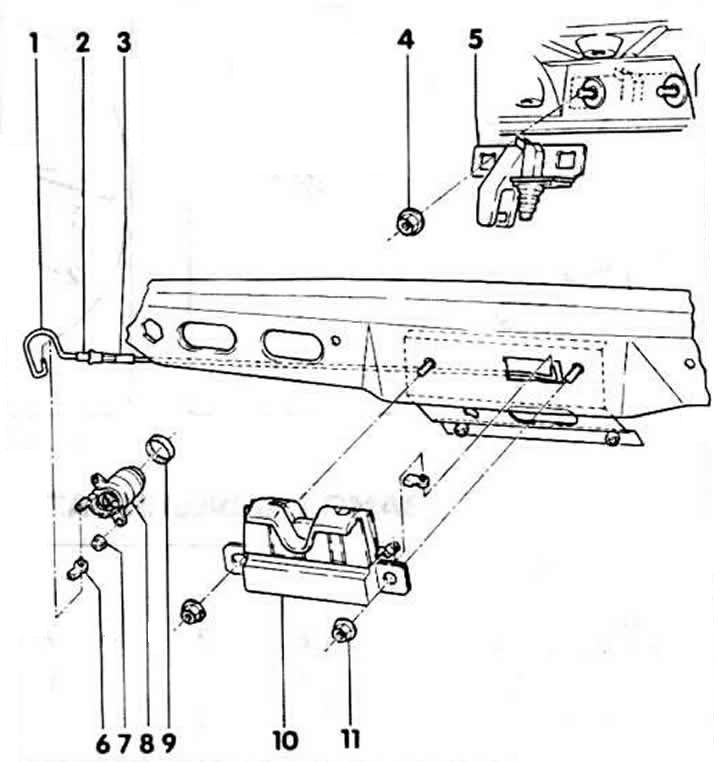
Coupe
1 - drive rod
Adjustment: do not overtighten when installing, maximum play is 2 mm.
2 - bushing
3 - threaded connection
4 - hex nut, 8 Nm
5 - lock plate
Adjustment: set in the middle and down. Tighten the hex nuts "4" with a force of 0.8 Nm. Close the trunk, the plate itself will take the required position. Tighten the hex nuts "4". 6 - hinge bushing
7 - hex nut, 4 Nm
8 - lock cylinder
9 - thrust ring
10 - castle
11 - Hexagonal nut, 8 Nm
(This article was copied from an online resource: AudiManual.ru)