



Table of contents: HID headlights - vehicles after… ↓ Repair kit ↓ Removal and installation the… ↓ Removal and installation the sealing… ↓ Replacing the gas discharge lamp… ↓ Removal the LED daytime running… ↓ Replacing the fixed headlight bulb… ↓ Removal and installation the low… ↓ Replacing the front turn signal bulb… ↓ Removal and installation the gas… ↓ Removal and installation the… ↓ Removal and installation the control… ↓ Removal and installation the… ↓ Replacing the front side marker… ↓ Removal and installation the… ↓ Removal and installation the inner… ↓ Removal and installation the upper… ↓ Removal and installation the control… ↓
HID headlights - vehicles after model year 2013
Headlight housing, control units, lamps
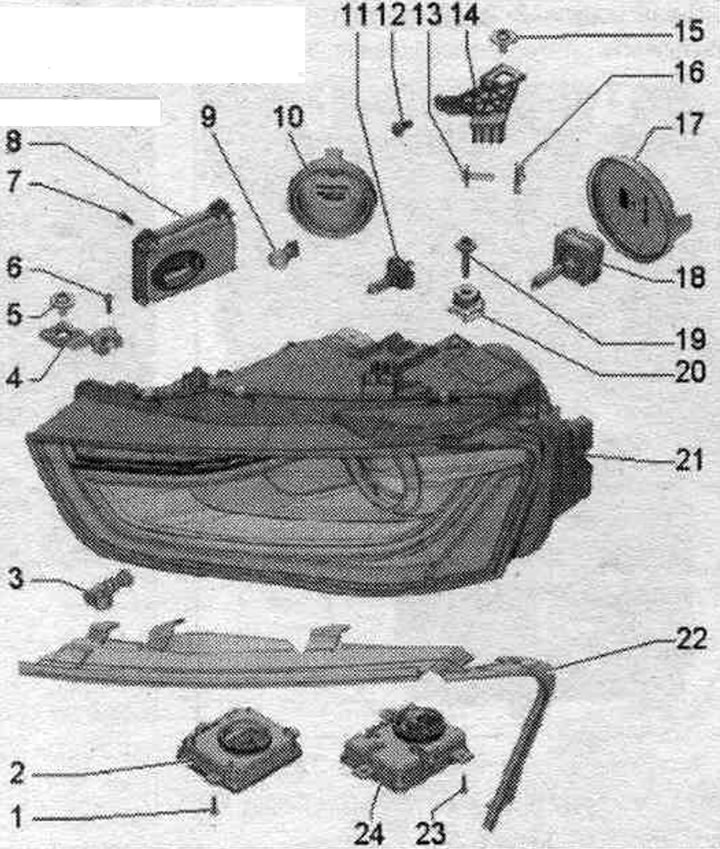
1. Bolt: 3 pcs.; 1.5 Nm.
2. Used gas discharge lamp: used left gas discharge lamp "J343", used right gas discharge lamp "J344".
3. Ventilation: for headlight housing.
4. Inner bracket of headlight housing.
5/13/15/19. Bolt: 4.5 Nm.
6. Bolt: 2 pcs.; 6 Nm.
7. Bolt: 3 pcs.; 1.5 Nm.
8. Used lighting systems for daytime driving and parking. light: used lighting systems for daytime driving and parking. left light "J860", used lighting system for daytime driving and parking. light on the right "J861".
9. Front turn signal lamp: Front turn signal lamp. left turn signal "M5", front lamp. right turn signal "M7"; 12V, 24W (F024MD).
10. Housing cover.
11. Fixed headlight lamp system. adaptive lighting: left fixed headlight syst. adaptive lighting "M51", right fixed headlight system. adaptive lighting "M52"; 12V, 55W (H7).
12. Stop screw: for aligning the headlight housing with the contours of the car body; should be pressed against the radiator frame.
14. Upper bracket of headlight housing.
16. Bracket.
17. Housing cover.
18. Gas discharge lamp: with built-in ignition coil; left gas discharge lamp "L13", right gas discharge lamp "L14"; 42 V, 35 W (D3S).
20. Adjusting element: for per. headlight housing relative to bumper contour.
21. Headlight housing: left with left LED module for daytime running and parking lighting. light "L176", on the right with the right LED lighting module for daytime and parking. light "L177"; option for the national market: with front lamp. side marker light "M33"/"M34", cannot be replaced separately.
22. Sealing frame.
23. Bolt: 3 pcs.; 1.5 Nm.
24. Headlight power module: only in vehicles with adaptive lighting; left headlight power module "J667", right headlight power module "J668".
Repair kit
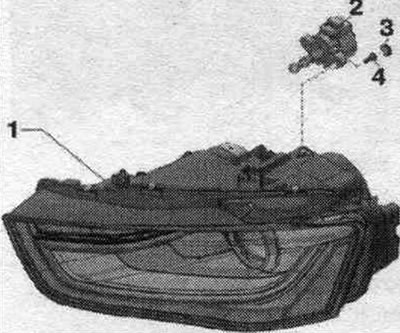
1. Headlight housing.
2. Executive el. motor of headlight corrector: executive el. left headlight corrector motor "V48", actuator. right headlight corrector motor "V49".
3. Bushing: for replacement of the execution. the engine, it is necessary to open the headlight housing for subsequent closing of the mount. a nozzle is supplied for the holes.
4. Bolt: 2 pcs.; 1.4 Nm.
Removal and installation the headlight housing
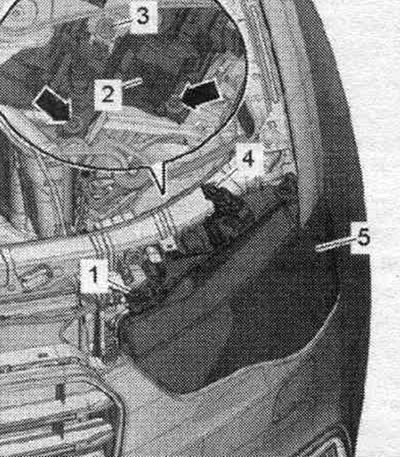
Disconnect the ground wire from the battery with the ignition off. Remove the lock support trim. Disconnect plug connection "2". Unscrew bolts "1, 4". Unscrew screw "3" and remove the adjusting element from the headlight housing. Loosen the "arrow" bolt on the headlight housing by several turns. Remove headlight "5" forward from the body.
Installation
Installation in reverse order. When installing the headlight "2" in the retainer "2", make sure that the headlight guide grooves lock into the retainer guides "arrows". The headlight must enter the seating recess easily and without force.
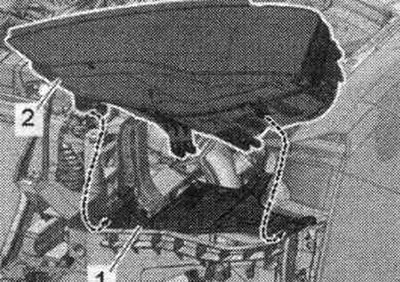
When installing headlight "4", make sure that the ventilation "3" of the headlight is evenly placed on the fastening "2" of the ventilation hose "1" "arrow".
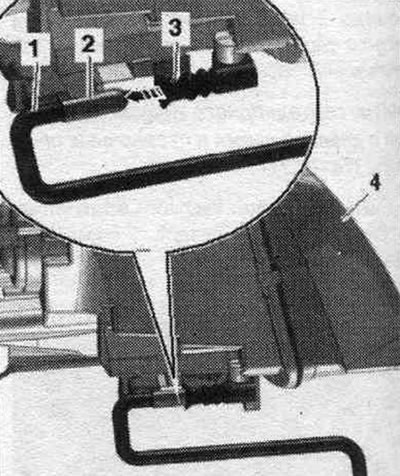
Tighten bolts "1, 3, 4" and "arrows". Install the lock support trim. Connect the battery.
Removal and installation the sealing frame
Remove the headlight housing. Disconnect the seal. frame "3" on the bottom side "1" and on the side of the headlight housing "4". Unlock the fastening clamp "2" "arrows" and remove the seal. frame.
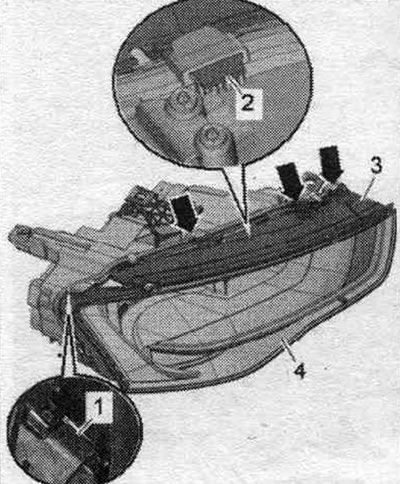
Installation in reverse order: install the headlight housing.
Replacing the gas discharge lamp "L13"/"L14"
Right: remove the air duct housing. filter. Removal/Installation in reverse order: install the headlight housing.
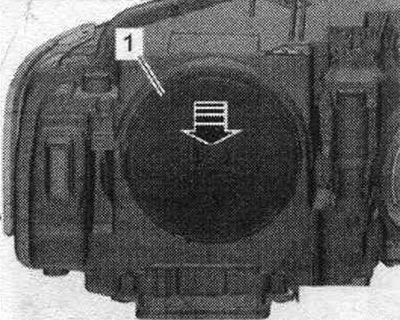
Turn the gas discharge lamp "2" in the direction of the "arrow" and remove it from the headlight housing. Disconnect plug connection "1".
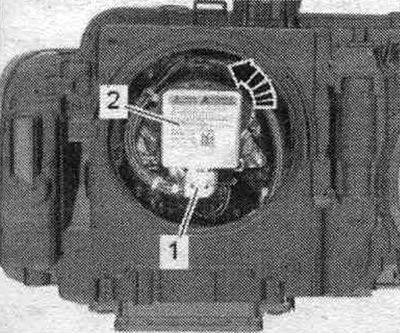
Installation in reverse order. Insert the new gas discharge lamp into the housing, being careful not to touch the glass bulb of the lamp with bare hands. Mounting position: connector facing downwards. Close the housing cover. Right: Install the air duct housing. filter.
Removal the LED daytime running light module and parking lights "L176"/"L177"
LED module syst. lighting for daytime driving and parking. the lamp is located in the housing and cannot be replaced separately if it malfunctions.
Replacing the fixed headlight bulb of the adaptive lighting system "M51"/"M52"
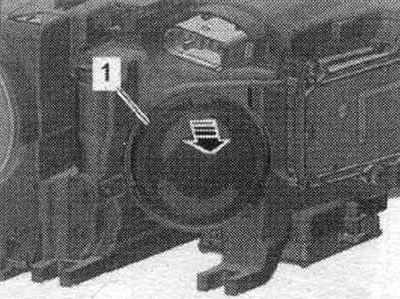
Right: remove the air duct housing. filter. Remove the housing cover "1" from the headlight housing "arrow".
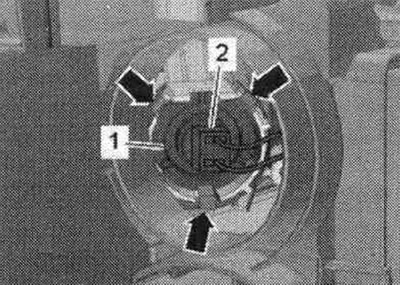
Remove lamp "1" from the spring clips "arrows". Disconnect the plug connection "2" of the lamp.
Installation in reverse order. Connect the plug connection and insert the new gas discharge lamp into the housing, without touching the glass bulb of the lamp with bare hands. Close the housing cover. Right: Install the air duct housing. filter.
Removal and installation the low beam shutter "V294"/"V295"
The low beam shutter is located in the headlight housing and cannot be replaced separately in the event of a malfunction.
Replacing the front turn signal bulb "M5"/"M7"
Right: remove the air duct housing. filter. Remove the housing cover "1" from the headlight housing "arrow". Unlock the socket on the left by turning it clockwise; on the right - turn the "arrow" counterclockwise. Remove the cartridge from the housing. Remove lamp "2" from socket "3".
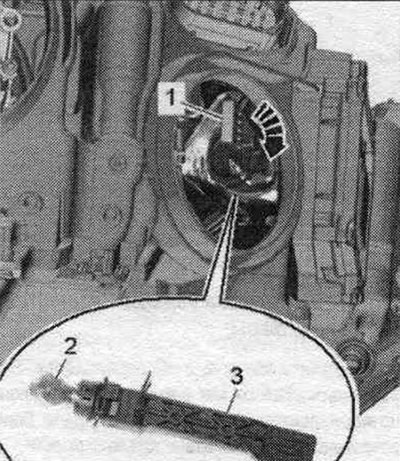
Installation in reverse order. Insert the new lamp into the socket, being careful not to touch the glass bulb of the lamp with your bare hands. Close the housing cover. Right: Install the air duct housing. filter.
Removal and installation the gas discharge lamp control unit "J343"/"J344"
Remove the headlight housing. Unscrew the "arrow" bolts. Remove the used "4" from the headlight housing. Disconnect adapter wire "2" and plug connection "3". Remove used.
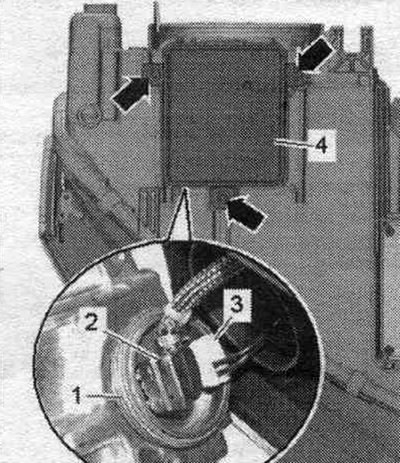
Installation in reverse order. Check the seal. ring "1" between the used and the headlight housing for damage. Install the headlight housing.
Removal and installation the headlight power module "J667"/"J668"
Remove the headlight housing. Unscrew the "arrow" bolts. Remove the headlight power module "2".
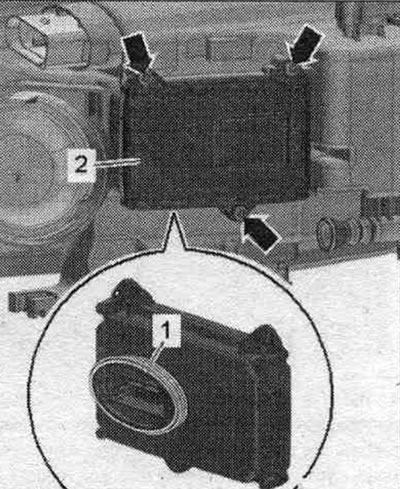
Installation in reverse order. Check the seal. ring "1" between the power unit and the headlight housing for damage. Install the headlight housing.
Removal and installation the control unit for the daytime driving and parking light lighting system "J860"/"J861"
Remove the headlight housing. Unscrew the "arrow" bolts. Remove the used "1" from the headlight housing. Disconnect plug connector "4" by pressing release button "3". Remove used.
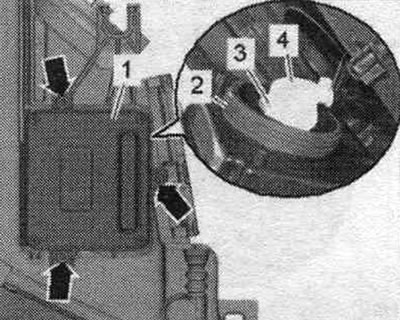
Installation in reverse order. Check the seal. ring "2" between the used headlight and the headlight housing for damage. Install the headlight housing.
Removal and installation the actuator motor of the dynamic adaptive lighting system "V318"/"V319"
Exec. email engine syst. the dynamic adaptive lighting is located in the headlight housing and cannot be replaced separately in the event of a malfunction.
Replacing the front side marker light bulb "M33"/"M34"
The front side marker light bulb is an LED and is installed in the headlight housing. Replacing the LEDs is not possible, the headlight must be replaced completely.
Removal and installation the headlight range control actuator motor V48-/"V49" - vehicles from the 2013 model year
Remove the headlight housing. Remove the gas discharge lamp. Use pliers to knock out contacts "1, 2" from the headlight housing, holding the contact inside and pushing it. Unscrew the arrow bolts through the holes.
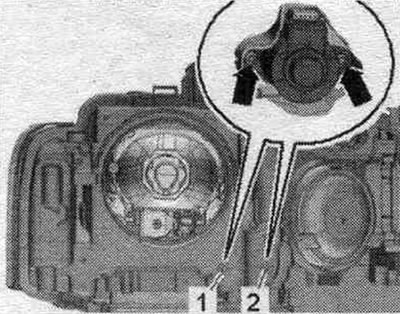
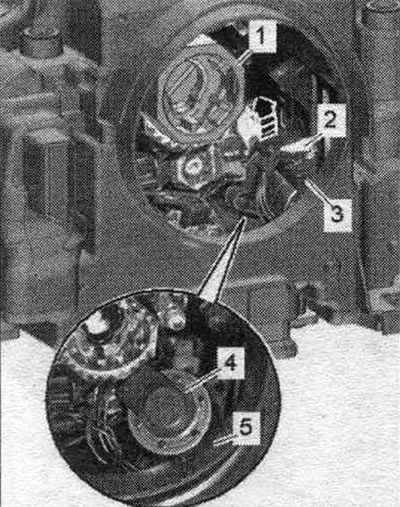
Remove the actuator motor "1" of the headlight corrector by removing the ball head of the actuator axis by retracting the actuator. engine upwards "arrow" out of the ball joint retainer and at the same time push the reflector "3" forward. Remove the actuator motor "4" from the headlight housing "5" as shown in the illustration. Disconnect the plug connection "2".
Installation
Installation in reverse order. When entering, connect the plug connection and insert the actuator motor. First, place the ball head of the adjusting axis from below into the reflector ball head mount by pulling the reflector back. Tighten the bolts. Close the hole in the headlight housing "1" with attachments "2, 3" from the repair kit.
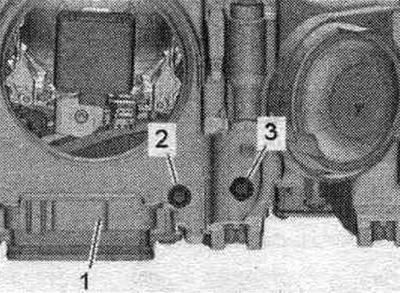
Installation of a gas discharge lamp. Install the headlight housing.
Removal and installation the inner headlight housing bracket
Remove the lock support trim. Unscrew the bolts "arrows". Remove bracket "2" upwards from headlight housing "1".
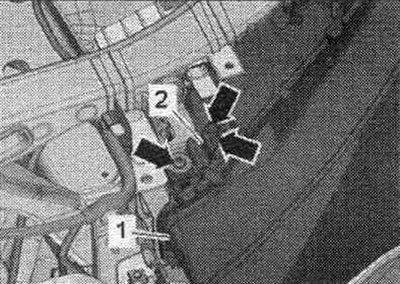
Installation in reverse order. Install the lock support trim.
Removal and installation the upper headlight housing bracket
Unscrew bolts "2, 3". Unscrew bolt "1" and remove it as far as possible. Remove bracket "4" upwards from the headlight housing. The bolt may only be removed together with the bracket.
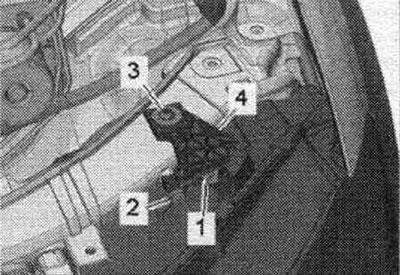
Installation in reverse order.
Removal and installation the control unit "J431"/"J745"
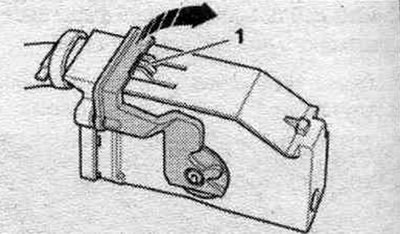
The used parking assistant, depending on the design, since the 2013 model year is integrated into the used on-board network "J519" and cannot be replaced separately in the event of a malfunction. Replace the used on-board network. When replacing a used one, select the Guided search for faults mode. or the Guided Functions function. Replace the corresponding used one. Remove the front drawer. Unlock the "arrow" latches and remove the used one "pos. 1" from the frame. Disconnect the plug connection "2".
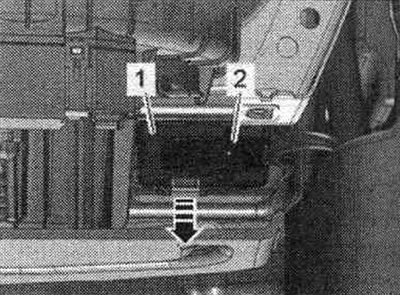
To disconnect the el. press the locking button "1" of the plug connection, turn the locking bracket in the "direction of the arrow" and disconnect the plug connection.
Installation in reverse order: install front. box.