
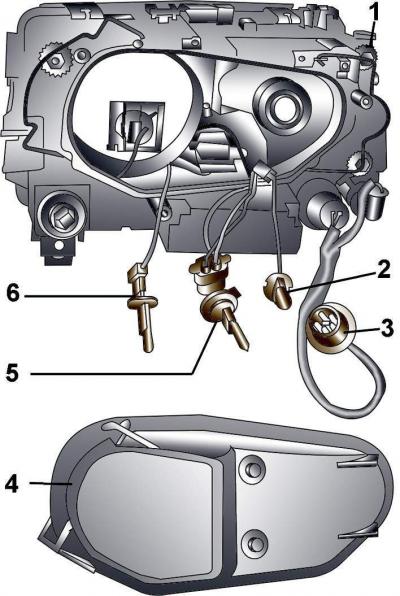
Pic. 18–33. Headlight with halogen lamp: 1 - headlight housing; 2 - fog lamp H3 (12 V, 55 W); 3 - 5-pin electrical connector; 4 – a back cover of a headlight; 5 - high beam lamp; 6 - low beam lamp H1 (12 V, 55 W)
The device of headlights with halogen and gas-discharge lamps is shown in fig. 18-33 and 18-34.
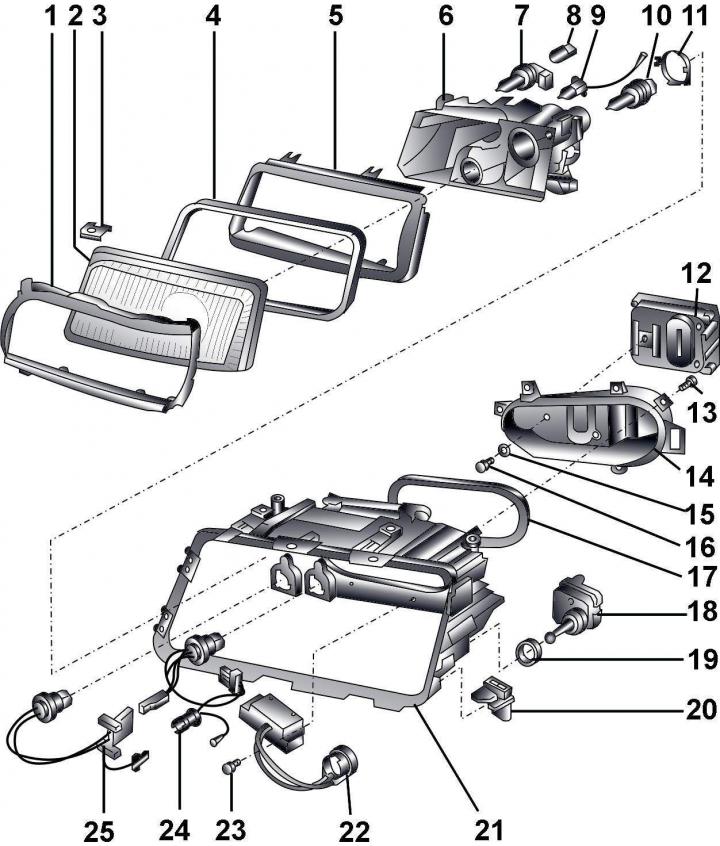
Pic. 18–34. Headlight with gas discharge lamp: 1 - rubber pad; 2 – headlight glass; 3 - clamp; 4 - gasket; 5 – reflector frame; 6 - reflector; 7 - high beam lamp (12 V, 65 W); 8 - front marker lamp (12 V, 5 W); 9 - fog lamp (12 V, 55 W); 10 - low beam lamp (gas discharge 12 V, 35 W); 11 - spring holder; 12 - headlight control unit with a gas discharge lamp; 13 - Torx bolt; 14 - back cover; 15 - plastic washer; 16 - bolt; 17 - gasket; 18 – headlight corrector motor; 19 - seal; 20 – latch bracket; 21 - headlight housing; 22 - activation block of a gas-discharge lamp; 23 - Torx bolt; 24, 25 - wiring harnesses
Withdrawal
Tape the bumper near the headlight to avoid damaging the paint on the bumper.
Unscrew the bolts securing the front bumper and slide it forward from the bracket by 5–10 cm.
Remove direction indicators.
Disconnect the headlight harness 5-pin electrical connector from the headlight.

Pic. 18-35. Elements of fastening of a headlight: 1 – the screw; 2 - bottom pad; 3 - headlight mounting bolt
Unscrew screw 1 (pic. 18–35) and remove trim 2 headlights.
Unscrew four bolts 3 and remove the headlight forward from the car.
Installation
Install the headlight on the car in such a position that the gap around the perimeter of the headlight is the same.
Further installation is carried out in the reverse order of removal.
Check and, if necessary, adjust the headlights.
Visitor comments