
Table of contents: Removal ↓ Installation ↓
Headlight with beam adjustment mechanism
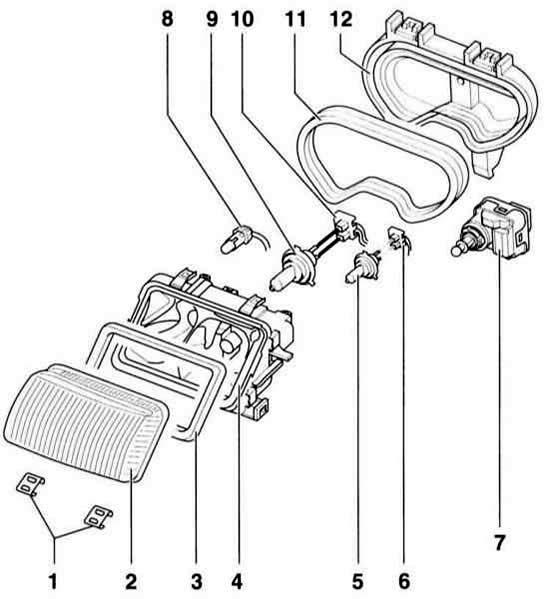
- 1 - clamps (6 pcs.)
- 2 - diffuser
- 3 - diffuser seal
- 4 - headlight housing
- 5 - low beam lamp
- 6 - connector
- 7 - electric motor for adjusting the range of light
- 8 - parking light lamp
- 9 - high beam or high beam with fog light
- 10 - connector
- 11 - housing cover seal
- 12 - body
Rear light
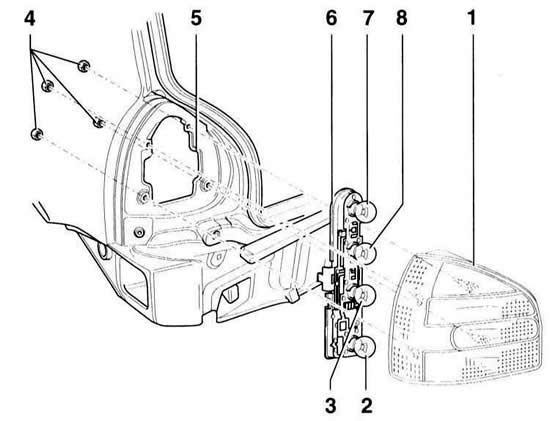
- 1 - rear light housing
- 2 - brake light/tail light
- 3 - Reversing light bulb
- 4 - nuts, 4 Nm
- 5 - body
- 6 - lamp holder
- 7 - fog lamp lamp
- 8 - turn signal lamp
The diffuser and headlight housing can be replaced independently of each other.
Removal
1. Remove the turn signal, refer to subsection Removal and installation the front turn signal.
2. To avoid damaging the paintwork when removing the headlight, tape the bumper in the area of the headlight.
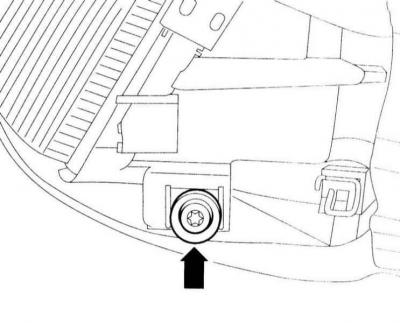
3. Remove the side mounting bolts (arrow on the illustration) with a Torx T30 key.
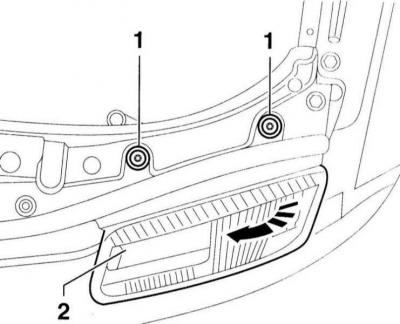
4. Remove the upper mounting bolts –1– using a T30 Torx key.
5. Turn the headlight –2– towards the centre of the vehicle (arrow) and then pull it forward out of the vehicle body.
6. Disconnect the headlight and beam adjustment connector.
Installation
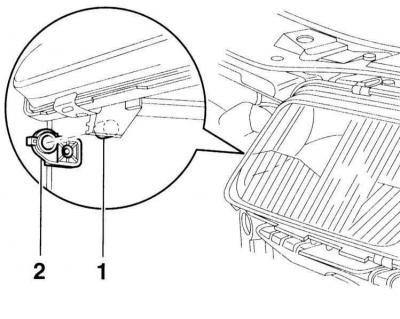
1. First insert the headlight in the area of the central part of the vehicle with the pin –1– into the guide –2–.
2. Connect the headlight connector and the headlight range adjustment mechanism.
3. Loosely secure the headlight, align it with the contour of the body and tighten to a torque of 6 Nm.
4. Install the direction indicator, refer to the subsection Removal and installation the front turn signal.
5. Check the headlight adjustment at a service station.
(The original article is posted on the resource: «AUDImanual.ru»)