

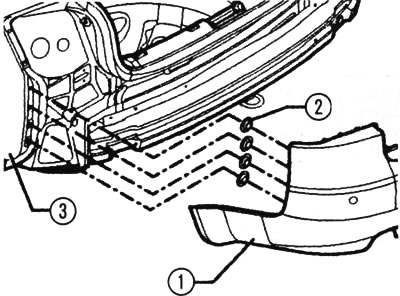
Rear bumper installation diagram: 1 - screw with non-falling washer (20 Nm), 2 - crossbar, 3 - lining, 4 - screw (1 Nm), 5 - clamp, 6 - guide part, 7 - screw (1 Nm), 8 - wheel cover, 9 - nut (4 Nm), 10 - hexagonal nut with flange (4 Nm).
2. After removing the trim, unscrew the screw with washer 1 and pull the cross member 2 out of the side members.
3. When installing, which is carried out in the reverse order, pay attention to the fastening of clamps 5 on the side part, and also to the tightening torques of the screw connections.
4. To dismantle and install the guide part, remove the bumper. Then unscrew the screws 1 and remove the guide part 2. The tightening torque when installing this part is 1.5 Nm, pay attention to the clamps 3.
Guide piece: 1 - screws (1.5 Nm), 2 - guide piece, 3 - clamp
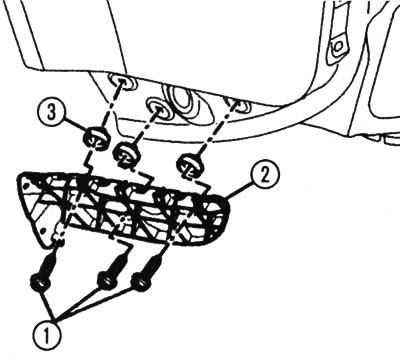
5. To attach the bumper to the side part 3, before installing the trim 1, it is necessary to press the spacer clamps 2 into the side part.
Fastening to the side part: 1 - facing, 2 - spacer clamps, 3 - side piece
[This article was copied from an online resource: AUDIMANUAL]