
The gears of the drive and driven shafts are mounted on so-called needle bearings, which provide a soft connection between the gears and shafts. When a gear is engaged, a connection is created not between the gears, but between the gear and the shaft. To synchronize the number of revolutions of the shaft and the gear, the shaft, rotating at a high speed, is braked using friction elements. Due to the fact that the synchronization of the rotation of the cotton wool and the gear is performed in a matter of fractions of a second, it is recommended that when the engine is cold, gear shifting be performed softly, without abruptly pushing the gear shift lever.
If gear shifting is difficult or if the transmission suddenly starts to cause problems during a long trip, the clutch is usually to blame, not the transmission itself. The situation can be corrected, for example, by adjusting the position of the gearshift lever and switching.
1. Place the gear shift lever in neutral position.
2. Unscrew the ball head of the gear shift lever.
3. Using a knife, remove the cover on the parking brake lever and unscrew the Phillips head bolt located under the adjustment. This will allow the shift lever console cover to be removed.
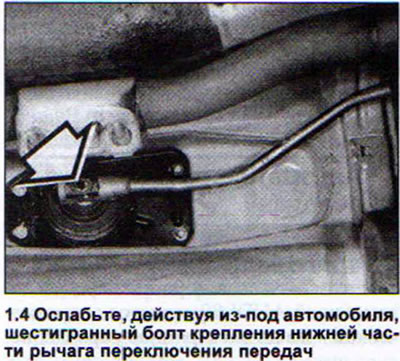
4. Loosen the hex bolt securing the lower part of the gear shift lever from underneath the vehicle. This will allow the gear shift lever and the gear shift fork shaft to move relative to each other (see arrow in illustration).
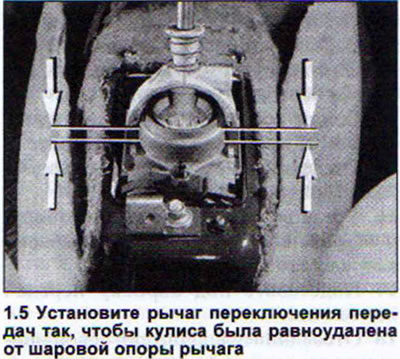
5. Place the gear shift lever in a vertical position and align it so that the shift lever is at an equal distance from the ball joint of the lever (see illustration).
6. Tighten the lower gear shift lever mounting bolt. Tighten carefully so as not to disturb the position of the lever and rod.
7. Check the gearshift lever travel and gearbox operation. With neutral engaged, the gearshift lever should be at 3/4 gear.
8. Shift through all gears one by one. Pay special attention to the reverse gear lock. If necessary, loosen the ball joint mounting bolts and move the joint slightly.
The original source of the article can be found on the website AudiManual.ru