



Removal
1. Disconnect the negative (-) battery terminal.
2. Remove the engine splash guard.
3. Place the front right side of the vehicle on jack stands.
4. Disconnect all wires from the starter solenoid. If equipped, remove the bracket from the front of the starter as viewed from the front (see illustration).
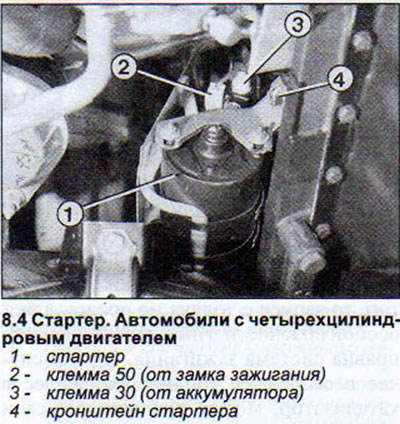
5. Loosen the nuts and unscrew the starter mounting bolts (from its rear side, if you look in the direction of the car's movement).
6. Remove the starter.
If the starter does not work, one of the reasons for the failure may be wear of the starter brushes. The starter brushes are supplied complete with brush holders. Due to the fact that after replacing the brushes, the starter housing must be sealed, it is recommended to purchase the D3 sealing compound at the same time as purchasing the brushes. In addition, a fairly powerful soldering iron will be required for the work.
7. Remove the two screws securing the starter shaft cover and remove the cover.
8. Remove the shaft thrust washer and axial free play adjusting washer located on the end of the starter shaft.
9. Unscrew the two bolts of the rear cover of the starter and remove the cover (see illustration).
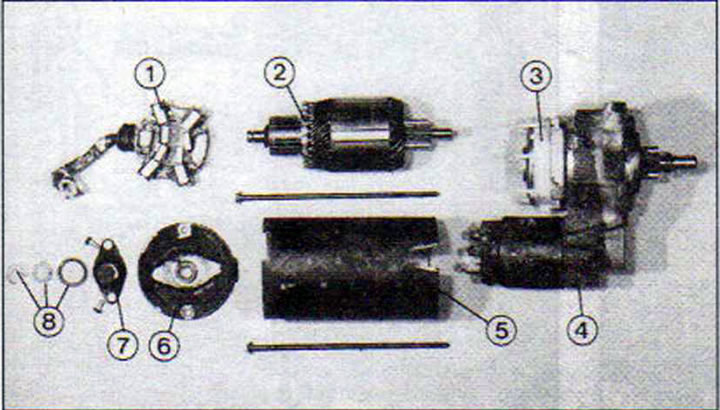
8.9 Starter parts of a car with a five-cylinder engine
1 - brush holder
2 - anchor
3 - toothed gear
4 - traction relay
5 - body
6 - housing cover
7 - shaft bearing cover
8 - lock washer, adjusting washer and gasket
10. Measure the length of the carbon contact brushes. The minimum brush projection length should be 8 mm.
11. Disconnect the brush holder on the traction relay to replace the brushes.
13. Assemble the starter. Apply sealing compound to the starter cover, cover mounting bolts and starter shaft cover. To remove the traction relay, the starter must also be dismantled.
14. Disconnect the corresponding wires from the starter.
15. Unscrew the three bolts securing the traction relay to the flange.
16. Move the traction relay back and disconnect the starter gear drive lever shaft.
[The original article is available on the website: audimanual]