
Table of contents: Interior light ↓ Interior light with slow-down switch ↓ Reading light ↓ Trunk light ↓ Instrument cluster illumination ↓ Heater control handle illumination… ↓ Ashtray/cigarette lighter lights ↓ Glove compartment light bulb ↓ Automatic transmission shift lever… ↓ Additional instrument illumination… ↓ Engine compartment light bulb ↓
Interior light
When the door is opened or the switch is turned on, the 10 W interior light bulb should light up.
When removing this light, it is recommended to first remove the corresponding fuse to prevent a short circuit.
Press the latch that holds the light in place, which is on the side opposite the switch, and remove the light.
In cars with a sunroof, the interior light is smaller than in models without a sunroof.
When installing the interior light, first place it with the side away from the switch and then snap it into place.
If the interior light does not light when the door is opened, this may be caused by a faulty contact switch on the door (provided that the lamp is not turned off).
The main reasons for the failure of the contact switch can be:
- bent or jammed push pin. In this case, the contact switch should be replaced.
- disconnect the plug from the wire. Secure the plug.
- oxidation of the contact surface of the switch. Clean the contact switch with a screwdriver or sandpaper.
The contact switch is secured to the door post with a Phillips-head screw. To remove the switch, unscrew the rubber seal and remove the screw.
Interior light with slow-down switch
This interior light is installed in combination with the central lock. Its operation is controlled by the central lock control unit. After the door is closed, the interior light remains lit for approximately 30 seconds. The exception is when the central lock was engaged or the ignition was switched on before closing the doors.
If the door remains open for more than four minutes, the light turns off.
After the ignition is turned off, the headlight bulb comes on.
Reading light
To replace a burnt-out light bulb, follow these steps:
1. Fold the handle above the door down and remove the two Phillips-head screws (see illustration).
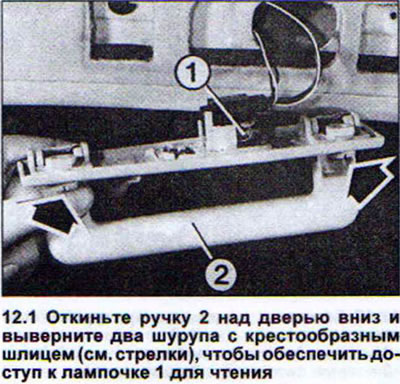
2. Use a screwdriver to pry up the plastic cover of the coat hook and remove the Phillips-head screw located under the cover.
3. Replace the incandescent light bulb with a 5W one.
Trunk light
The trunk light is located under the rear door glass guide or on the trunk lid.
4. Open the trunk lid or tailgate.
5. Insert a screwdriver into the hole on the side of the flashlight housing and disconnect the flashlight. Under the flashlight cover are also the terminals of the antenna cable and the power wire of the radio antenna amplifier (see illustration).
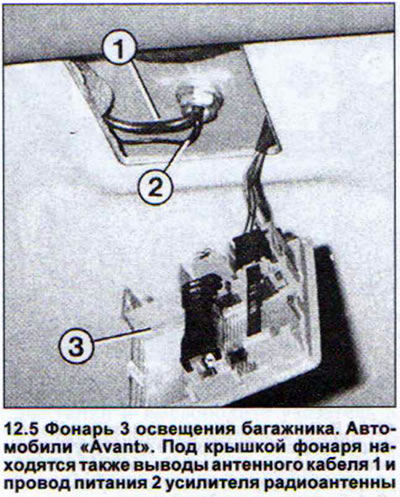
6. Replace the spotlight bulb with a 5W one and reinsert the lantern.
Instrument cluster illumination
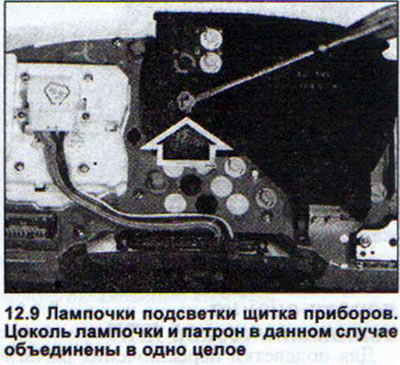
To remove the instrument panel backlight, you need to:
7. Remove the steering wheel.
8. Remove the instrument panel (see the relevant chapter). Turn the socket of the corresponding bulb on the back of the instrument panel to the left and remove the bulb. The socket and socket are combined in this case.
9. Insert the new bulb into the instrument cluster and turn it all the way to the right (see illustration).
Heater control handle illumination bulbs
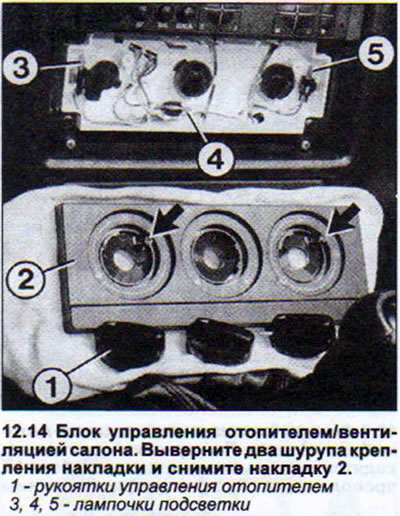
13. Remove the heater/ventilation control handles.
14. Remove the two screws securing the trim and remove the trim (see arrows in the illustration). Under the cover there are three backlight bulbs, which can be removed separately.
Ashtray/cigarette lighter lights
15. Remove the insert from the ashtray.
16. Use a long socket wrench to remove the hex head screw.
17. Turn the cigarette lighter cover and remove the socket with the bulb (see illustration).
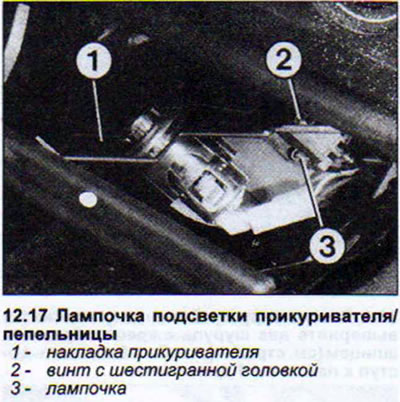
18. Remove the bulb from the socket. In vehicles equipped with additional instruments, the cigarette lighter is located next to the parking brake lever. In this case, remove the rear part of the center console to replace the bulb. In this case, you need to remove the center console to replace the ashtray light bulb.
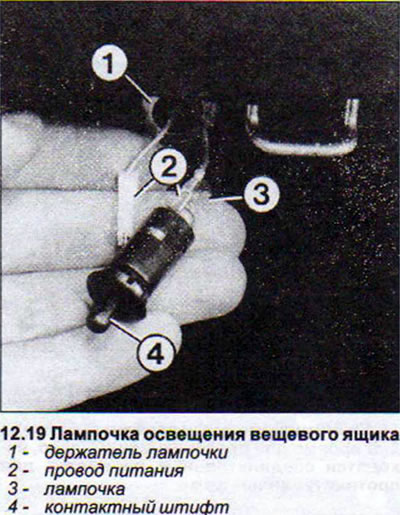
Glove compartment light bulb
The glove compartment light comes on when driving with the headlights on or when the parking lights are on. The light has a so-called bayonet mount and faces the direction of travel.
19. Turn the bulb to the left and pull it up, releasing it from the holder (see illustration).
Automatic transmission shift lever illumination
To illuminate the automatic transmission control lever when the ignition is on, a 1.2 W base bulb is used.
20. Remove the center console panel.
21. Unscrew the bulb holder from the control lever console.
22. Unscrew the light bulb from the socket.
Additional instrument illumination lamp
23. Remove the center console panel.
24. Turn the bulb holder to the left and remove it.
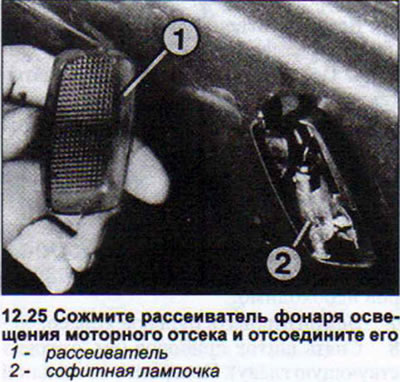
Engine compartment light bulb
25. Squeeze the diffuser and remove it. This will provide access to the bulb (see illustration).
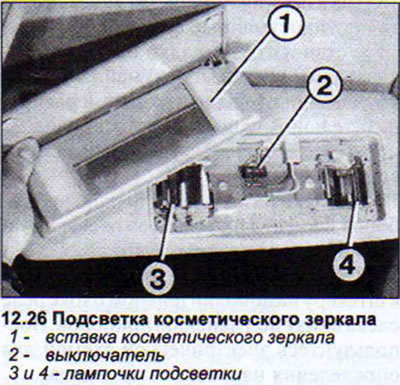
26. Some models have a vanity mirror light on the sun visor. The light bulb is located under the vanity mirror insert (see illustration 12.26.)
The original text of the material can be found on the website AUDImanual