
Table of contents: Steering column switches ↓ Pushbutton switches ↓ Switches for automatic mirrors and… ↓
Steering column switches
The steering column switches are a single unit and therefore cannot be replaced individually.
1. Remove the steering wheel. If the steering wheel is equipped with an airbag unit, additional safety precautions must be taken when removing the steering wheel.
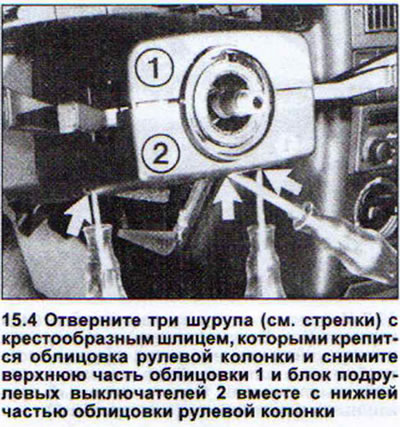
2. Remove the three Phillips-head screws that secure the steering column trim. You don't need to remove the screws completely.
3. Remove the top part of the trim.
4. Remove the steering column switch assembly together with the lower part of the steering column trim (see illustration).
5. Disconnect the two multi-pin plugs and one regular plug (see illustration).
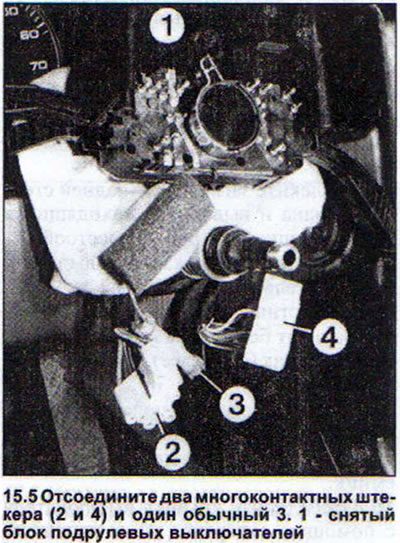
If the block is to be replaced, then completely unscrew the two screws that hold the lower part of the lining.
Pushbutton switches
Usually, there are three pushbutton switches under the central deflector on the instrument panel, and next to them there is a pocket that is used to install additional switches. Therefore, the removal and installation of pushbutton switches may differ only depending on whether the panel is completely full or there is still a pocket for additional switches.
6. Remove the plug and then remove the switch next to it by pushing it out from the back. If there is a pocket next to the switch, you will need to remove the pocket first.
7. Remove the plug from the back of the pocket and unscrew the Phillips head screw located under the plug. After removing the pocket, press out the switch held by the spring plates (see illustration).

8. Option without pocket: Remove the radio (see below) without disconnecting the wires.
9. Press out all switches by pushing them from the back. Switches can be removed without pulling out the radio.
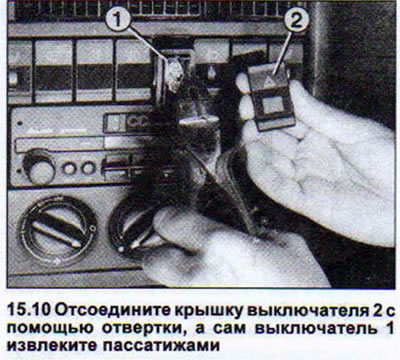
10. Remove the switch cover with a screwdriver and remove the switch itself with pliers (see illustration).
11. Disconnect the multi-pin plug.
The procedure for installing push-button switches is the reverse of their removal.
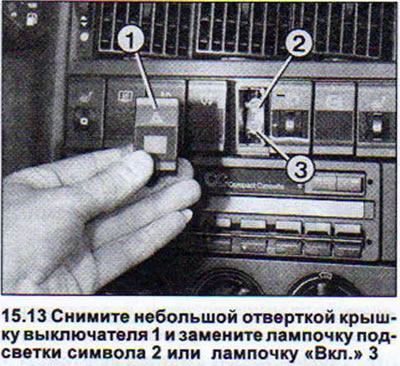
Under the covers of the pushbutton switches there is a light to illuminate the symbol on the cover and another one to illuminate the "On" inscription.
12. Use a small screwdriver to remove the switch cover to replace the burnt-out light bulb.
13. Remove the burnt-out bulb with tweezers and insert a new one in its place (see illustration).
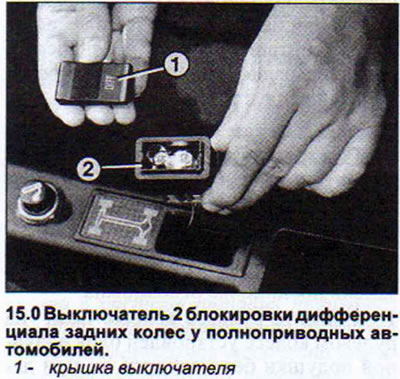
All-wheel drive vehicles with a non-central console have a push-button switch for locking the rear suspension wheel differential. Its design and the procedure for removing and installing it are the same as for the switches on the instrument panel (see illustration 15.0).
Switches for automatic mirrors and electric windows
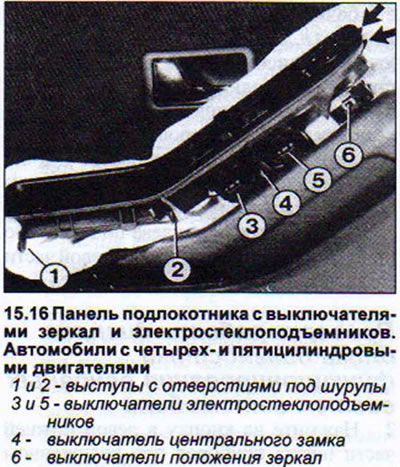
The switches for the automatically adjustable mirrors and electric windows are located on the panel at the top of the armrest.
14. Vehicles with four- and five-cylinder engines: Remove the two screws securing the lower part of the armrest and detach it.
15. Remove the two screws securing the armrest panel.
16. Push the top of the panel together with the switches back, applying sufficient force. This will release the tabs holding the panel in the trim (see illustration).
17. Remove the panel together with the switches by pulling it upwards.
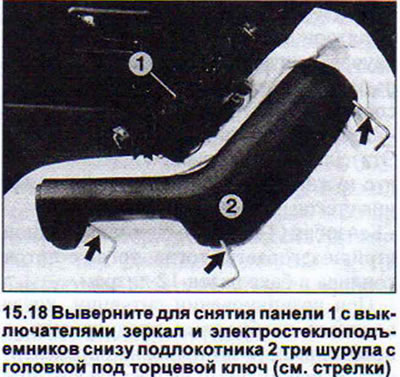
18. Cars with six-cylinder engines: Remove the three socket-head screws from underneath the armrest that secure the armrest and remove it (see illustration).
19. Remove the panel with switches from the armrest.
20. All models: Disconnect the multi-plug.
21. Release the switches from the clamps and remove them by pushing them downwards.
[Information obtained from this resource audimanual.ru]