
Table of contents: High and low beam headlights ↓ Parking lights ↓ Fog lights ↓ Front direction indicators ↓ Rear lights ↓ License plate light ↓
High and low beam headlights
All headlight bulbs are removed from the engine compartment. In order to remove the corresponding bulb, it is necessary to perform some actions to provide access to the bulb.
Depending on the engine type, to access the bulbs in the right headlight, you need to remove the rubber cuff from the headlight cover, press the retaining clips and remove the middle part of the cover. In some cases, you also need to remove the air intake sleeve. On cars with six-cylinder engines, you need to remove the battery cover to access the bulbs in the left headlight, and on cars with a five-cylinder engine, you need to remove the cover above the radiator to make room for working on the left headlight.
The headlight cover on cars with four- and five-cylinder engines is removed from the engine compartment by turning it to the left.
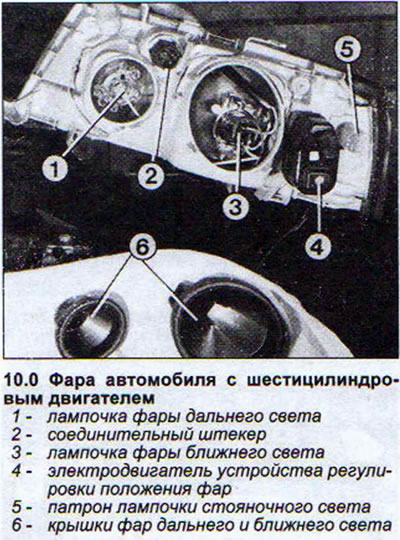
In cars with six-cylinder engines, the low and high beam headlight bulbs are covered with separate covers secured with wire clips (see illustration 10.0).
Access to the bulbs of some headlights is difficult. For this reason, the headlights themselves have to be removed.
1. Disconnect the headlight plug.
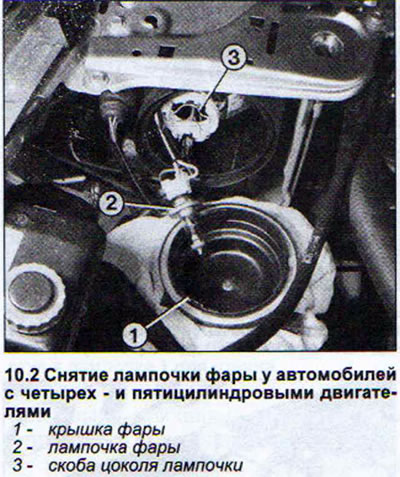
2. Press down on the clip holding the bulb base and remove the bulb (see illustration).
The new headlight bulb should be installed so that the three contact projections form an inverted "i".
Install the new headlight bulb in a car with a six-cylinder engine so that its base fits into the hole in the socket.
Parking lights
3. Perform all actions to provide access to the headlights.
4. Cars with four- and five-cylinder engines. Remove the socket together with the parking light bulb from the reflector by pulling it backwards.
5. Cars with six-cylinder engines. Remove the socket together with the parking light bulb from the reflector by turning it to the left.
6. Remove the parking light bulb from the socket. To do this, press on the bulb and turn it to the left in the socket.
Fog lights
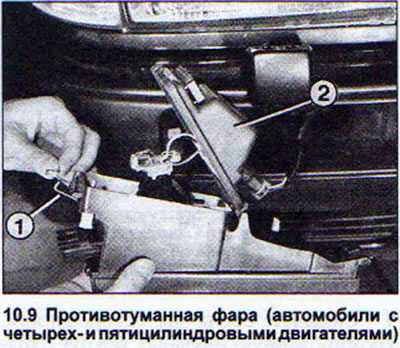
7. Cars with four- and five-cylinder engines. Remove the two screws securing the insert next to the fog lamp lens (see illustration).

8. Remove the fog lamp from the mounting opening in the bumper. Before doing this, remove the mounting tabs from the grooves.
9. Press the wire clip and open the fog lamp cover (see illustration).
10. Vehicles with six-cylinder engines: Remove the turn signal.
11. Remove the two screws and remove the fog light from the mounting hole in the bumper.
12. Press the wire clip and open the fog lamp cover (see illustration).
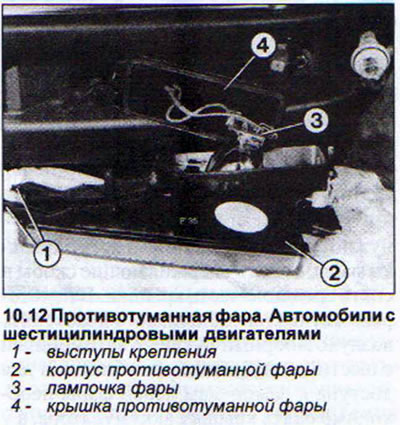
13. All fog lights: Press the clip holding the bulb and remove the bulb.
14. Install the new bulb so that its base fits into the hole in the socket.
When installing the fog light into the bumper mounting hole, first place the light in place and then insert the retaining tabs into the grooves.
Front direction indicators
Cars with four- and five-cylinder engines. Depending on the engine type, to access the bulbs of the right headlight, you need to remove the rubber cuff from the headlight cover, press the retaining clips and remove the middle part of the cover. In some cases, it is also necessary to remove the air intake hose, and on cars with a five-cylinder engine, the cover above the radiator to make room for working on the left headlight. If further work is difficult, it is recommended to remove the headlight.
15. Disconnect the turn signal lens by squeezing the lugs of the locking tabs and remove the lens from the guides in the headlight (see illustration).
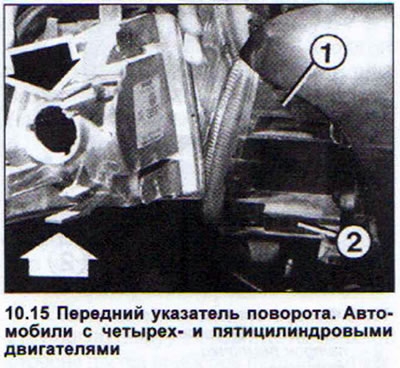
Disconnect the turn signal lens 1 by squeezing the lugs of the locking tabs (see arrows) and remove the diffuser from the guides 2 in the headlight.
16. Cars with six-cylinder engines. Remove the screw securing the turn signal lens.
17. Remove the turn signal lens. It is attached to the fog light (see illustration).

18. Direction indicators on all models. Turn the socket with the bulb to the left and remove it from the lamp (see illustration).
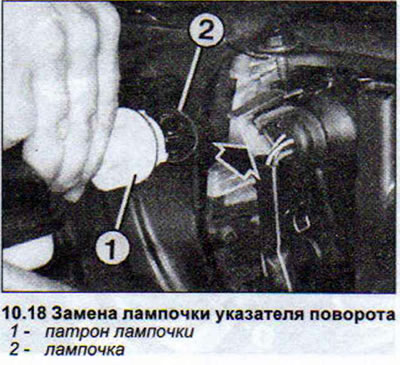
19. Remove the light bulb from the socket by pressing on it and turning it to the left in the socket.
20. Install the bulb into the turn signal socket and press it to the right.
21. Install the turn signal lamp in place and secure the retaining tabs into the grooves.
Rear lights
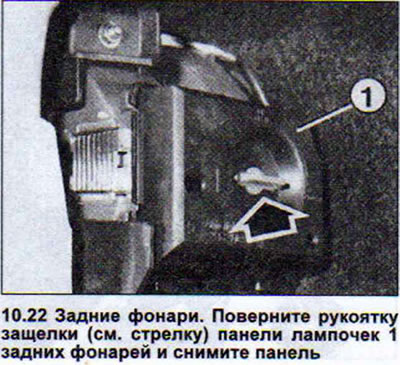
22. Turn the rear light panel latch handle and remove the panel (see illustration).
23. Trunk light. Remove the cover of the light, which is fixed to the trunk lid (see illustration).
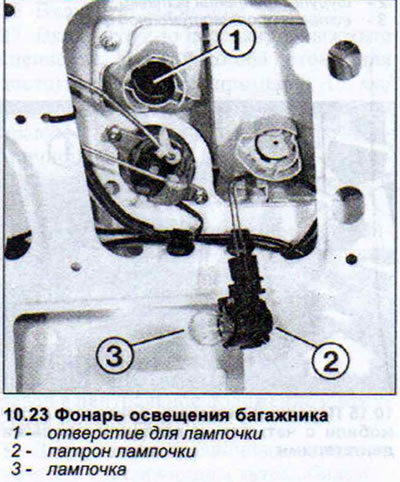
To replace the tail light and boot light bulbs, turn the bulb approximately 30° to the left and remove it from the panel/socket.
When installing a dual filament brake/tail light bulb, please note that the retaining tabs are at different heights and therefore the bulb can only be installed in a certain position.
License plate light
24. Remove both screws securing the diffuser to the trunk lid (see illustration).
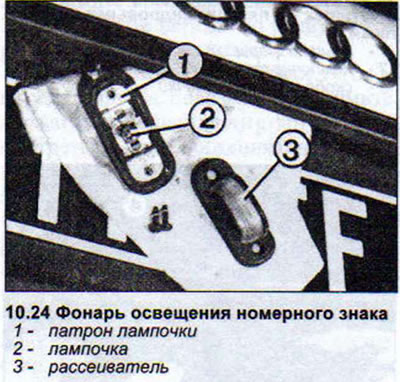
25. Remove the diffuser and take out the bulb holder.
26. Press on the light bulb and unscrew it by turning it to the left.
When installing the diffuser in place, remember that the longer part of the diffuser should be facing the back.