1. Move the hatch to an inclined position.
2. Press the pivot flap, then use a 300mm long hook to detach the flap tension springs.
3. Remove the flap notches, then push back and unclip the trim from the front track.
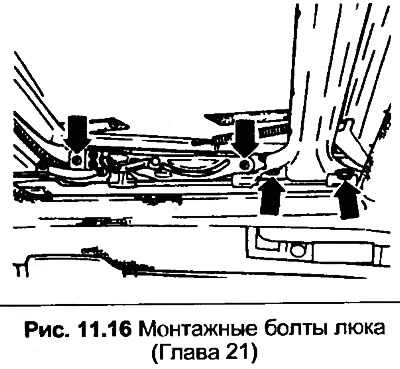
4. Close the hatch and remove the mounting bolts shown in Fig. 11.16 on each side to remove the hatch.
5. Reassemble in reverse order. Make sure the arrows on the guide plate and rear guide are connected to each other and that the drain plate is inserted into the guide rail on both sides. If the holes do not align, loosen the connecting rod head screws and move the guide plate as necessary. Check that the hatch moves smoothly.
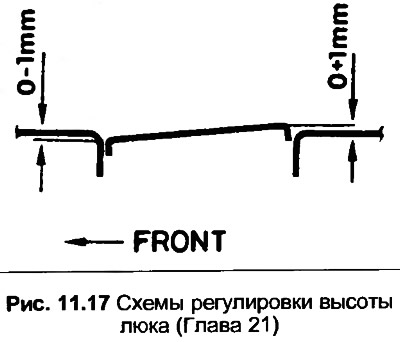
6. In the closed position, the front edge of the sunroof should be level with, or a maximum of 1.0 mm lower than, the roof panel. The rear edge should be level with, or a maximum of 1.0 mm higher than, the roof panel. The adjustment points are shown in Fig. 11.16.
7. Note that the height adjustment nut (A) must be lubricated with locking fluid applied to the threads before adjustment. When adjusting the rear edge height, tighten the bolt (D) before the bolt (C).
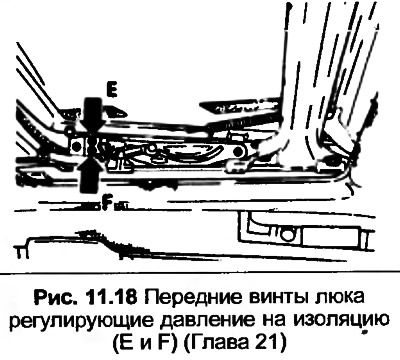
8. To adjust the pressure of the hatch against the front insulation, tilt the hatch and loosen the screws shown in Fig. 11.18. Close the hatch, open it approximately 50 mm, then close it slightly against the front insulation. Tighten screws E, then tilt the roof fully and tighten screws F.