
Table of contents: Electrically operated mirror ↓ Mirror with mechanical drive ↓
1. Remove the door trim panel (Chapter 14).
Electrically operated mirror
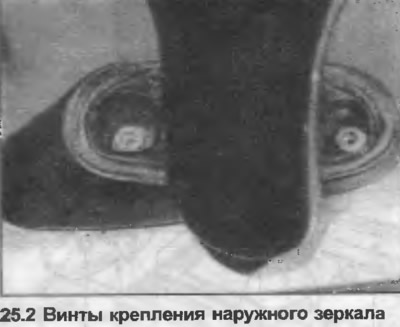
2. Rotate the mirror 90° to expose the mounting screws (photo).
3. Loosen the mounting screws, then disconnect the wiring and remove the mirror from the door. Installation is carried out in the reverse order.
Mirror with mechanical drive
4. Mark the exact position of the window regulator mounting plate relative to the door panel. Remove the front bolts, loosen the rear bolts and move the mounting plate slightly forward.
5. Pull out the bracket, remove the adjustment head and cables from the mounting plate.
6. Rotate the mirror 90° to expose the mounting screws.
7. Loosen the mounting screws and remove the mirror from the door.
8. The mirror glass can be replaced separately by prying it off using a thin adhesive strip. When installing the new glass, press it into the guide pins using a wad of cloth in the center of the mirror.
9. Installation is carried out in the reverse order, but if necessary, adjust it as follows.
10. Center the mirror so that it is parallel to the housing. Remove the control knob. See Fig. 11.23 and turn the screw 'AI' clockwise until you feel a slight resistance. Turn the screw 'AII' counterclockwise until you feel a slight resistance. Adjust the screw 'BI' counterclockwise, then screw 'BII' clockwise in the same way. Replace the control knob.

Material republished from the website Audimanual.ru