
Repair Chevrolet Repair Toyota Repair Honda Repair AvtoVAZ Repair Mercedes-Benz Repair BMW Repair Opel
Home  |  Contacts  |  Sitemap  |    
English Русский
Български
Беларускі
Український
Српски
Hrvatski
Română
Polski
Slovenský
Magyar
AudiManual.ru


  • AUDI 80
  • AUDI 100
  • AUDI A3
  • AUDI A4
  • AUDI A6
  • AUDI A8
  • AUDI Q
  • OTHER
  • ARTICLES
Q7 Typ 4L (2005-2015, diesel) Q5 Type 8R (2008-2017)

Turbocharger — removal, installation (Audi Q5-8R)

  • Home
  • Audi Q
  • Q5 Type 8R (2008-2017)
  • Power unit
  • Diesel 2.0 liter (CG/CJ/CM)
  • Turbocharger — removal, installation
            0
Table of contents: Removal ↓ All ↓ Installation ↓
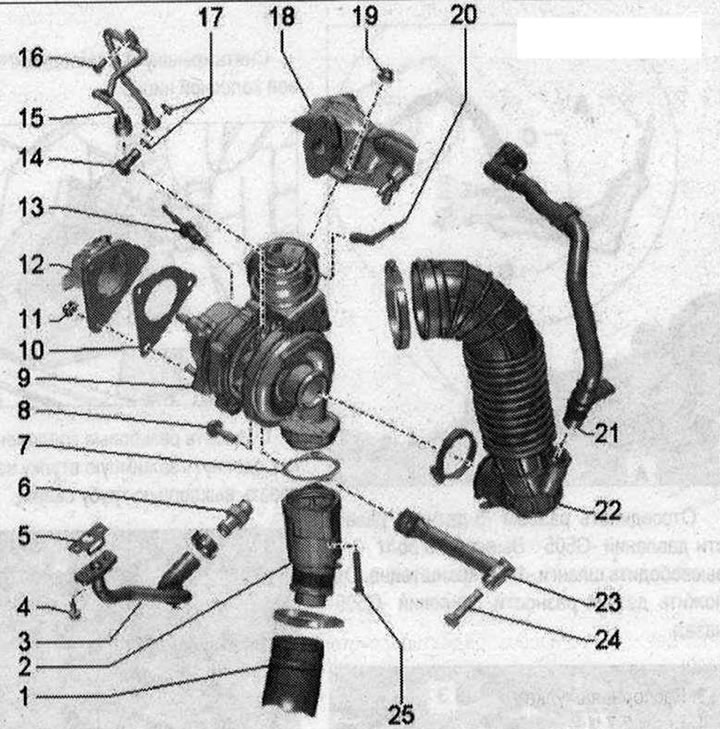
Turbocharger 1. Air duct hose; 2. Pulsation damper; 3. Return oil line; 4/16/25. Bolt: 9 Nm; 5.…

Turbocharger 1. Air duct hose; 2. Pulsation damper; 3. Return oil line; 4/16/25. Bolt: 9 Nm; 5. Gasket: replace; 6. Threaded nipple: 40 Nm; 7. Gasket: replace; 8. Bolt: 20 Nm; 9. Turbocharger: can only be replaced together with the vacuum drive; 10. Gasket: replace; 11. Nut: replace; lubricate the threads with heat-resistant paste; heat resistant paste; 24 Nm; 12. Diesel particulate filter; 13. Exhaust gas temperature sensor 1 "G235"; 14. Hollow bolt: 30 Nm; 15. Oil supply line: check for patency; before installing the turbocharger, fill the oil supply line nipple with oil; tighten the union nuts to 22 Nm; 17. O-rings: replace; 18. Exhaust manifold; 19. Nut: replace; lubricate the threads with heat-resistant paste; heat resistant paste; 24 Nm; 20. Vacuum hose; 21. Crankcase ventilation hose: equipment option for countries with cold climates: with resistive heating element of the crankcase ventilation system "N79"; 22. Air guide tube; 23. Turbocharger support; 24. Bolt: 40 Nm


Removal


Caution! If the turbocharger has mechanical damage (for example, damage to the impeller), it is not enough to simply replace the turbocharger. To prevent further damage, the following work must be performed. Check the air filter housing and filter element, as well as the air supply hoses for contamination. Check the entire boost air supply system and intercooler for foreign objects. If foreign objects are found in the boost air system, clean the boost air supply lines and replace the intercooler if necessary.


Remove the engine casing "arrows". Remove the air filter housing.
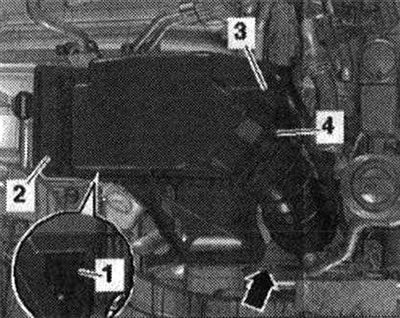
Remove the engine casing «arrows». Remove the air filter housing.


Disconnect the engine crankcase ventilation hose "2" and release it by pressing the release buttons. Remove the air duct hose by loosening the hose clamp "1".
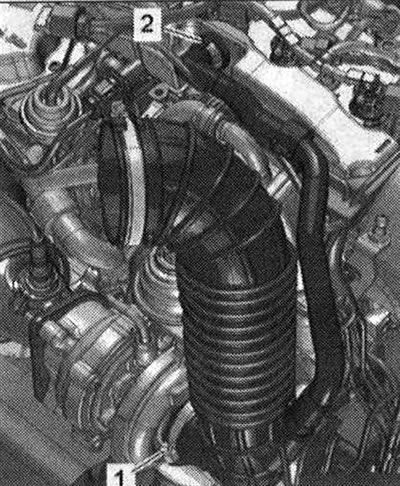
Disconnect the engine crankcase ventilation hose «2» and release it by pressing the release…


Remove noise insulation screens "1" and "2". Remove the exhaust pipe. Remove the right front wheel.
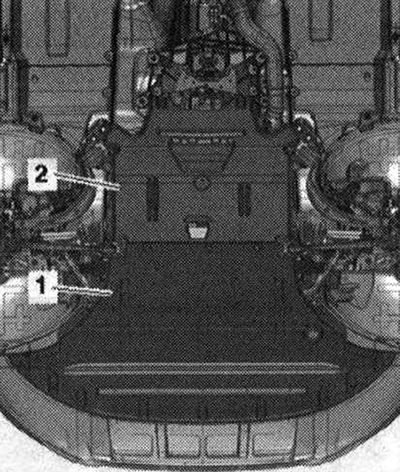
Remove noise insulation screens «1» and «2». Remove the exhaust pipe. Remove the right front wheel.


Disconnect connector "4" of exhaust gas temperature sensor 3 "G495". "Pos. 1, 2, 3" do not take into account.
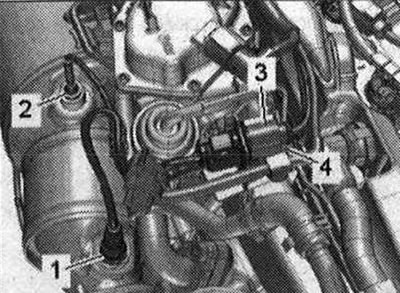


Disconnect connector «4» of exhaust gas temperature sensor 3 «G495». «Pos. 1, 2, 3» do not take…


Unclip and disconnect the plug connector "C" of the exhaust gas temperature sensor 4 "G648" H3 of the bracket "B". Ignore "Pos. A" and "arrows".
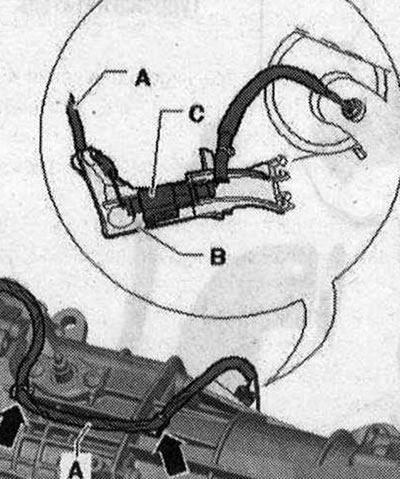
Unclip and disconnect the plug connector «C» of the exhaust gas temperature sensor 4 «G648» H3 of…


Disconnect connector "3" of differential pressure sensor "G505". Unscrew bolt "2" and release hoses "1" on the bracket. Put differential pressure sensor "G505" back.
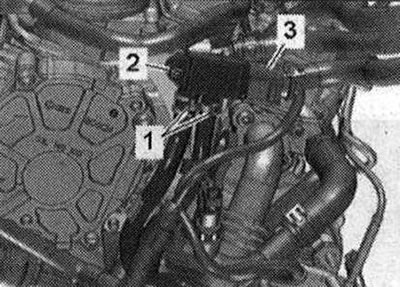
Disconnect connector «3» of differential pressure sensor «G505». Unscrew bolt «2» and release hoses…


Vehicles with SCR catalytic converter: Disconnect electrical plug connection "2". Ignore "Pos. 1,3".
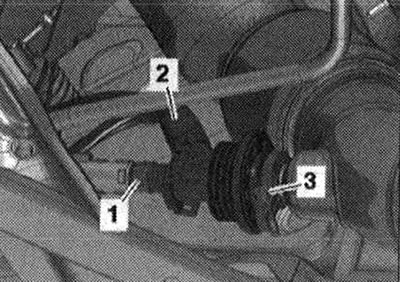


Vehicles with SCR catalytic converter: Disconnect electrical plug connection «2». Ignore «Pos. 1,3».


Release the exhaust pipe at the mount "2". Ignore "Pos. 1".
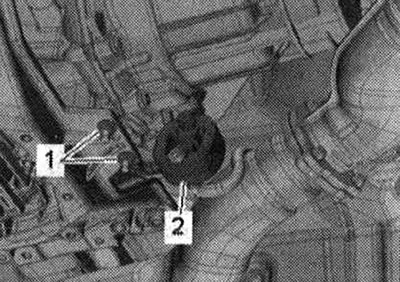
Release the exhaust pipe at the mount «2». Ignore «Pos. 1».


All


Remove cover "1" of the drive shaft in the right wheel arch.
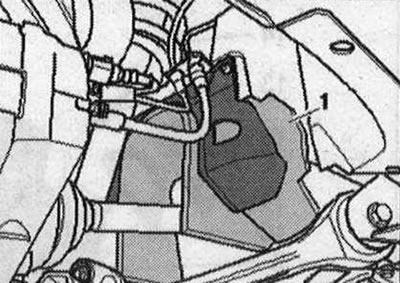
Remove cover «1» of the drive shaft in the right wheel arch.


Loosen the threaded connections "arrows", move the clamping sleeve back and tie the exhaust pipe from above.
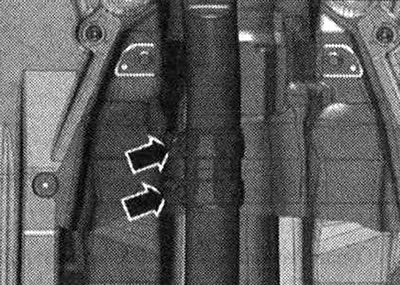
Loosen the threaded connections «arrows», move the clamping sleeve back and tie the exhaust pipe…


Unscrew bolt "2" of the diesel particulate filter hanger. Ignore "Pos. 1".
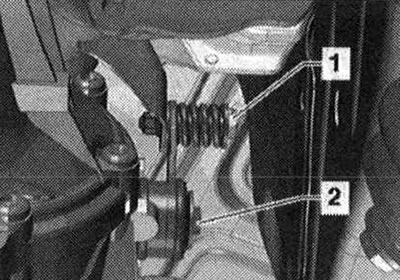


Unscrew bolt «2» of the diesel particulate filter hanger. Ignore «Pos. 1».


Remove the air duct hose and push it to the side; to do this, loosen the "arrow" clamp.
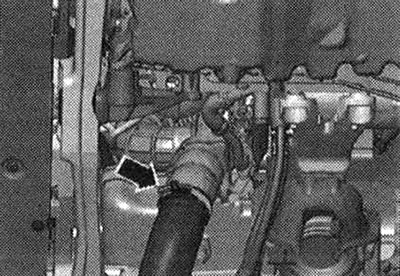
Remove the air duct hose and push it to the side; to do this, loosen the «arrow» clamp.


Unscrew bolts "1" and "2", remove the turbocharger support.
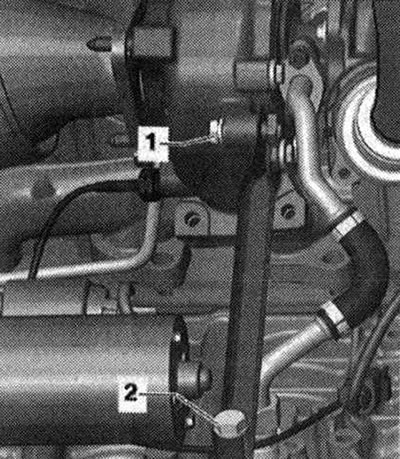
Unscrew bolts «1» and «2», remove the turbocharger support.


Unscrew the union nut "2". Remove from the holder and disconnect the electrical plug connection "3" of the exhaust gas temperature sensor 1 "G235", release the electrical wire. "Pos. 1" do not take into account.
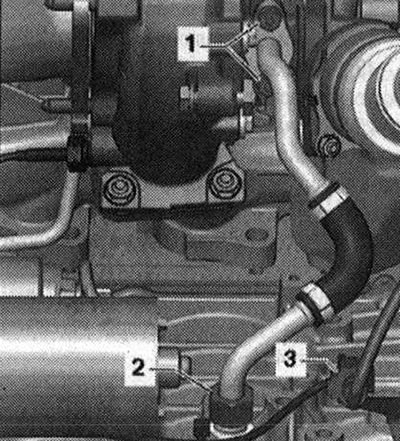


Unscrew the union nut «2». Remove from the holder and disconnect the electrical plug connection «3»…


Remove the lambda probe "G39" "pos. 1".
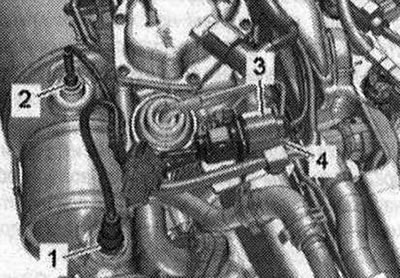
Remove the lambda probe «G39» «pos. 1».


Unscrew the "arrow" nuts and push the particulate filter back.
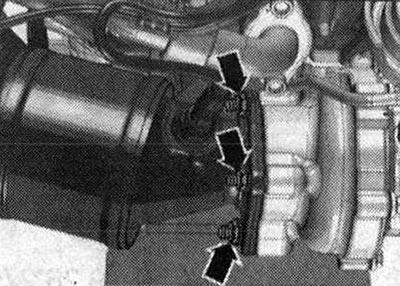
Unscrew the «arrow» nuts and push the particulate filter back.


Unscrew the union nut "2". Ignore "Pos. 1".
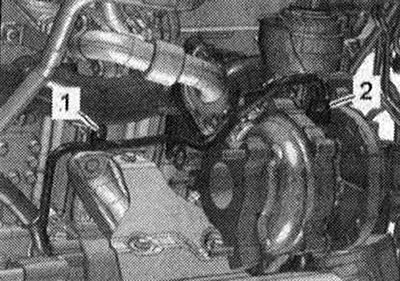
Unscrew the union nut «2». Ignore «Pos. 1».


Disconnect the electrical plug connection "1". Remove the vacuum hose "2". Unscrew the nuts "arrows", remove the pipe pump. Close the open lines and pipes with clean plugs from the plug kit for the engine "VAS 6122".
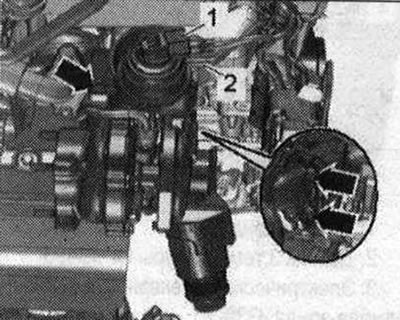


Disconnect the electrical plug connection «1». Remove the vacuum hose «2». Unscrew the nuts…


Installation


Installation in reverse order, note the following: Replace the gasket, nuts and O-ring. Fill the turbocharger with oil through the oil feed pipe nipple. To ensure that oil is supplied to the turbocharger, run the engine for about 1 minute at idle speed after installing the turbocharger; do not give the engine high revs. Install the particulate filter. Install the right front wheel. Install the exhaust pipe. Connect the air duct hose using threaded clamps.

The original article is available on the online resource AudiManual
The article was checked by auto expert Timur Bazhenov
This article is available at russian, bulgarian, belarusian, ukrainian, serbian, croatian, romanian, polish, slovak, hungarian

Share information:
Previous articles
Audi Q Q5 Type 8R: Diesel 2.0 liter (CG/CJ/CM)
Next articles

Supercharging system
Cooling system
Removal the oil pressure sensor
Oil filter bracket and oil cooler
Injection system
Parts and units of the fuel system (general diagram)
Intake manifold parts and components
Removal the Throttle Control Module


Similar articles on other Audi car models:
Turbocharger Audi 80 B4 (1991-1996)
Operating principle of turbocharger of MPI and MPFI injection… Audi 100 C4 (1990-1994)
Engine Management System 1.8L without Turbocharger Audi A3 Type 8L (1996-2003)
Turbocharger Audi A4 B5 (1994-2001, petrol)
Device, removal and installation of turbocharger Audi A6 C4 (1994-1997)
Device, removal and installation of turbocharger Audi A8 D2 (1994-2002)
Turbocharger — design description Audi A2 (1999-2005)
Link to this page in different formats


Visitor comments

No comments yet


How much will 32 + 47 =


Q7 4L(2005-2015, diesel) 
  • General information
  • Operating instructions
  • Maintenance
  • Power unit
  • Diesels 3.0 l (BUG, BUN, CAS)
  • Diesels 3.0 l (CATA, CCMA)
  • Diesels 3.0 l (CJGA/CJGC)
  • Diesels 4.2 l (BTR, CCFA/CCFC)
  • Cooling system
  • Fuel and exhaust system
  • Engine management system
  • Starting and charging
  • Transmission
  • Automatic gearbox
  • Drive shafts
  • Chassis
  • Brake system
  • Front suspension
  • Rear suspension
  • Steering system
  • Body
  • Air conditioner
  • Exterior
  • Interior
  • Electrical equipment
  • Equipment and devices
  • Electrical circuits
 
Q5 8R(2008-2017) 
  • General information
  • User manual
  • Power unit
  • Petrol engine 2.0 l
  • Petrol engine 3.2 l
  • Fuel system (petrol)
  • Diesel 2.0 liter (CA)
  • Diesel 2.0 liter (CG/CJ/CM)
  • Diesel engine 3.0 l
  • Fuel system (diesel)
  • Transmission
  • Manual gearbox 0B1
  • Manual gearbox 0B2
  • Automatic gearbox 0B5
  • Automatic gearbox 0B6
  • Chassis
  • Front suspension
  • Rear suspension
  • Brake system
  • Steering
  • Body
  • Exterior
  • Interior
  • Doors, locks and windows
  • Safety system
  • Ventilation and heating
  • Electrical equipment
  • Power devices
  • Equipment and devices
  • Lighting and alarm
  • Audio system
  • Electrical circuits
 
AudiManual.ru © 2017-2026 · Mobile version · Feedback · Sitemap: EN BG BY UA RS HR RO PL SK HU · Site search · News and articles
80 B2 · 80 B3 petrol · 80 B3 · 80 B4 · 100 C3 diesel · 100 C3 petrol · 100 C3 · 100 C4 petrol · 100 C4 · A3 Type 8L · A4 B5 petrol · A4 B5 · A4 B6 petrol · A4 B6 · A4 B7 · A4 B8 · A6 C4 · A6 C5 · A6 C5 Allroad · A8 D2 · Q5 Type 8R · Q7 Typ 4L · Audi A2 ·
This site uses cookies 🍪. Click the button to accept this fact.