



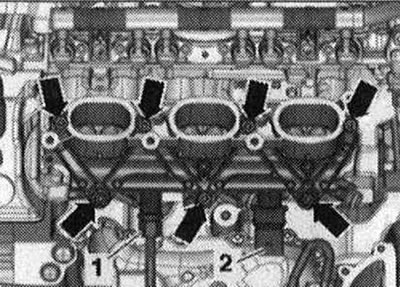
Unscrew the bolts "arrow" of the pulley of the poly V-belt of the impeller pump of the power steering, for this use the key for 2 holes "3212" as a stop.

Unscrew bolts "1" and "2", put the power steering impeller pump aside. "Pos. 3" and "arrow" do not take into account.
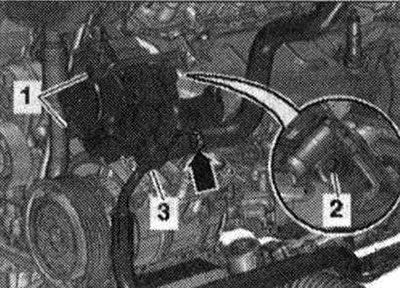
Disconnect connector "3" of coolant temperature sensor "G62". Unscrew bolts "1,2,4,5" of the front coolant pipe.

"Arrows" do not count. Unscrew the "arrows" nuts and remove the protective shield "1" of the high-pressure line.
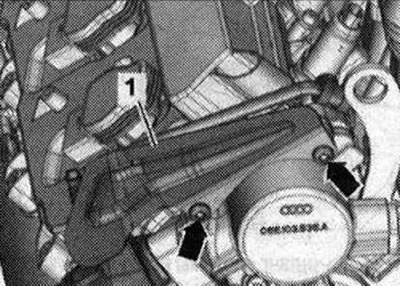
Unscrew the fastening "2" and move the fuel supply line to the side. Disconnect the electrical plug connections "1" and "6".

"Pos. 4, 3, 5" and "arrows" are not taken into account. Disconnect the electrical connections on the right and left of the "arrows" from the actuators of the timing phase adjustment system. Unscrew bolts "1" and "2" and release the wiring harness.
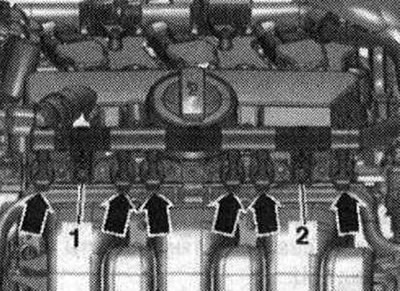
Remove the cylinder head cover: left, right. Disconnect electrical connector "3" of the Hall sensor "G40" on the right cylinder head. Unscrew bolt "4" of the ground cable.
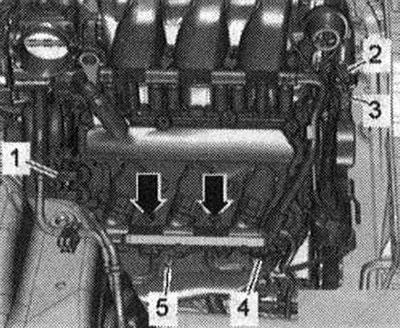
"Pos. 1, 2, 5" do not take into account. Unscrew the "arrow" bolts and remove the left connector holder. "Pos. 1...4" do not take into account.
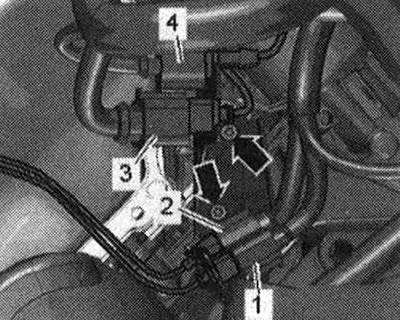
Unscrew the "arrow" bolts and remove the right bracket for connectors. "Pos. 1...4" do not take into account.
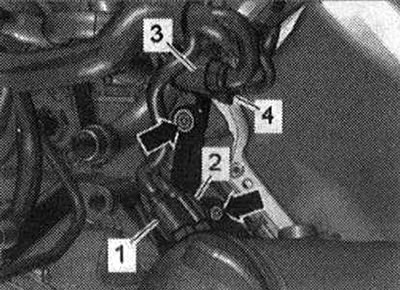
Unscrew the bolt "arrow" and remove the guide tube of the oil dipstick.
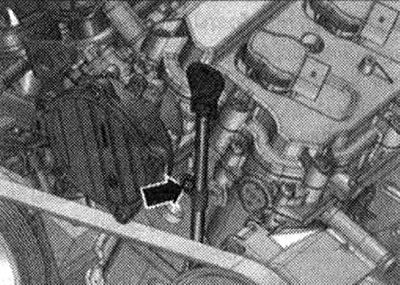
Remove the vacuum hose from the vacuum pump by releasing the clamp "arrow". Release the vacuum hose.

Unscrew the "arrow" bolts behind the cylinder head. Left cylinder head: 3 bolts. Right cylinder head: 4 bolts.

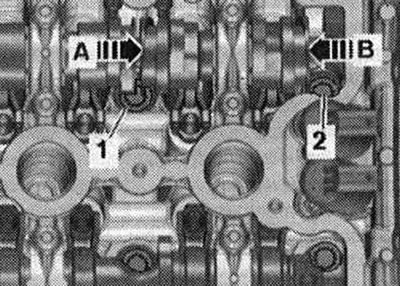
The intake camshaft lobes partially obstruct access to the cylinder head bolts, as shown in the example below "1" and "2". To remove bolt "1", the movable part of the camshaft must be pushed back with a plastic wedge in the direction of arrow A-. To remove bolt "2", the movable part of the camshaft must be pushed back with a plastic wedge in the direction of arrow B-. Risk of damage. The movable part of the camshaft may only be moved in the main part of the phase, i.e. the lever of the sliding part must not be loaded with the force of the cam. Therefore, to loosen the cylinder head bolts, proceed as described below. Otherwise, damage may occur. The movable part of the camshaft must not be moved by thin bridges.
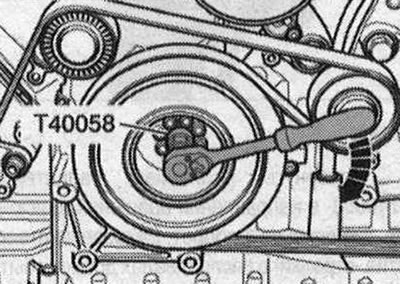
Insert the guide pins of the adapter "T40058" as shown below: the large diameter "arrow 1" faces the engine. The small diameter "arrow 2" faces the adapter.

Turn the crankshaft with the adapter "T40058" in the direction of engine rotation "arrow" until the camshaft position shown in the following figures is reached.
The "arrow" notches on the exhaust camshaft should point toward the outside of the engine, as shown in the figure.
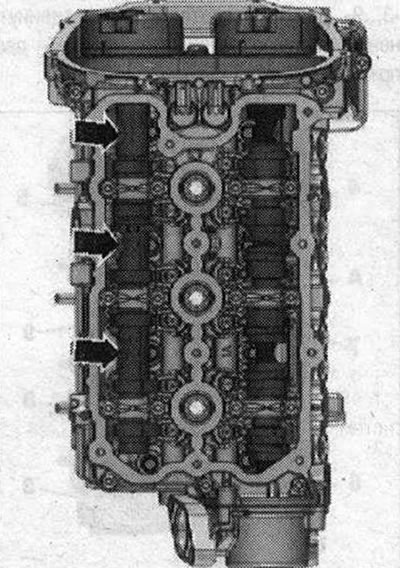
Left cylinder head: Move the unloaded movable part of the camshaft "B" in the "direction of the arrow" until it stops.
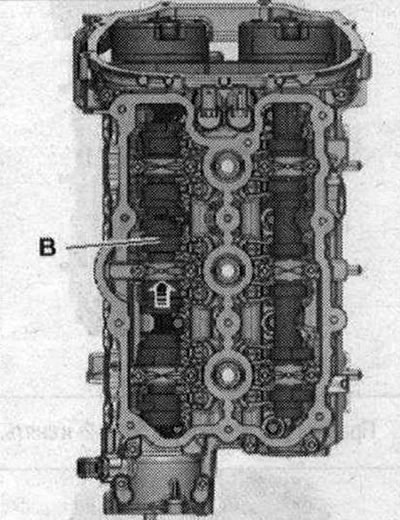
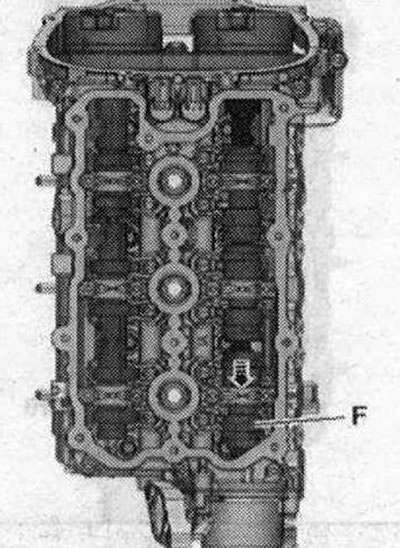
Right cylinder head: Move the unloaded movable part of the camshaft "F" in the "direction of the arrow" until it stops.

All
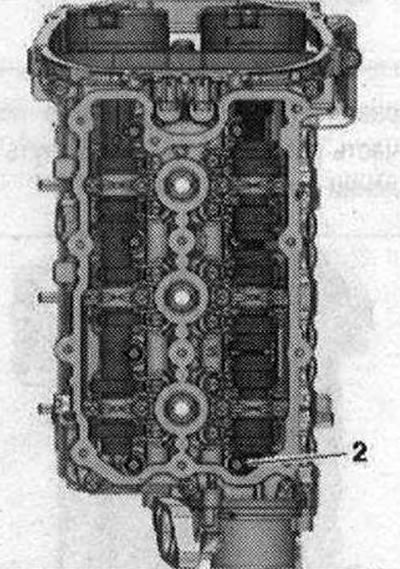
Turn the crankshaft with the adapter "T40058" in the direction of engine rotation arrow - by 1 revolution. The threaded holes "arrows" in the camshafts should be directed upwards.

Left cylinder head: Unscrew bolt "1" and remove.

Right cylinder head: Unscrew bolt "2" and remove.
All
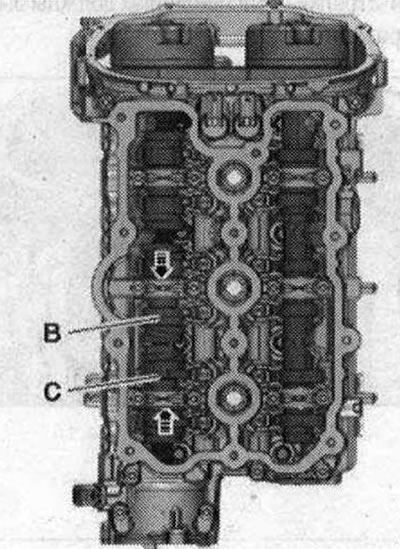
Turn the crankshaft with the adapter "T40058" in the direction of engine rotation "arrow" by 1 revolution. The notches "arrow" on the exhaust camshaft should be directed towards the side of the engine.
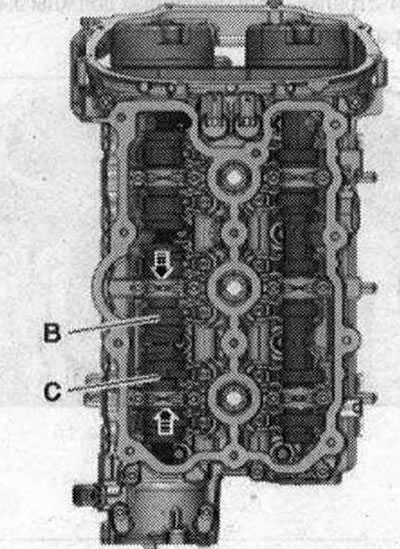
Left cylinder head: Move the unloaded moving parts of the camshaft "B" and "C" "in the direction of the arrow" until they stop.
Right cylinder head: Move the unloaded movable part of the camshaft "F" in the "direction of the arrow" until it stops.
All
Turn the crankshaft with the adapter "T40058" in the direction of engine rotation "arrow" by 1 revolution. The threaded holes "arrow" in the camshafts must be directed upwards. Remove the chains from the camshafts. Risk of damage to the valves and piston bottoms. Even if the chain is removed from only 1 cylinder head, it is prohibited to turn the crankshaft.
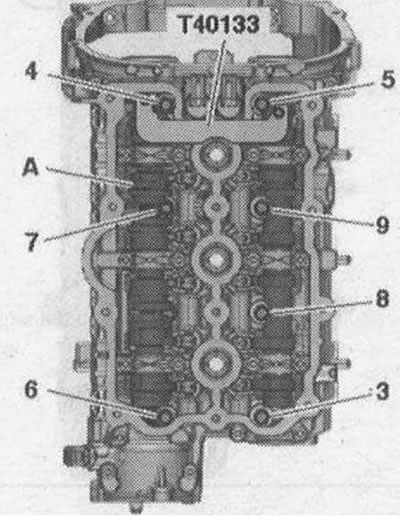
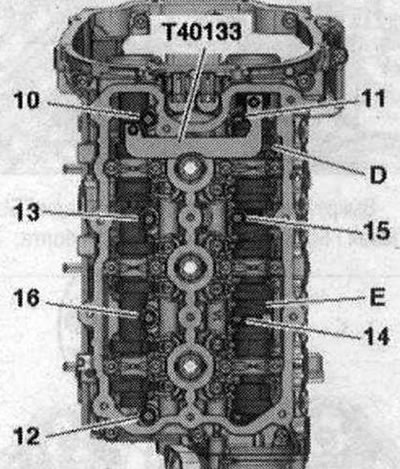
Left cylinder head: Unscrew and remove bolts "3...9", for which correspondingly move the unloaded movable part "A" of the camshaft. Remove the cylinder head.
Right cylinder head: Unscrew and remove bolts "10...16", for which move the unloaded moving parts "D" and "E" of the camshaft accordingly. Remove the cylinder head.
Installation
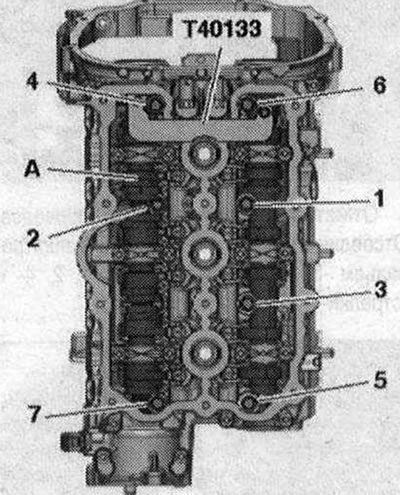
Caution! Risk of damage to the sealing surface. Carefully remove any remaining sealant from the cylinder head and cylinder block. Avoid the formation of long scratches or scoring. Risk of damage to the cylinder block. There must be no oil or coolant in the blind holes of the cylinder head fastening bolts. Risk of a leaky cylinder head gasket. Carefully remove any residue after sanding and grinding. Remove the new cylinder head gasket from the packaging immediately before installation. Handle the gasket with particular care to prevent damage to the silicone layer and the grooves of the cylinder head gasket. Risk of damage to open valves. When installing an exchange cylinder head, remove the plastic base to protect the open valves only if it comes into direct contact with the cylinder head. Risk of damage to the valves and piston crowns after working on the valve mechanism. Carefully turn the engine at least 2 turns to ensure that none of the valves come into contact with the cylinder head during operation. Replace any bolts that were tightened further. Replace the self-locking nuts, lip seals, gaskets and sealing rings. Take into account different sealants for sealing surfaces and cylinder head bolts. Before installing the exchange cylinder head, lubricate the mating surfaces of the hydraulic compensators, rocker arms and the working surface of the cams with oil. Secure all hose connections with hose clamps of the appropriate series. If the cylinder head or cylinder head gasket was replaced, it is necessary to replace the coolant and oil. Before installing the cylinder head, set the crankshaft and camshafts to "TDC", for which mount the camshaft locks "T40133" on both cylinder heads and tighten them to a torque of 25 N·m "arrows".

The camshaft lock "T40133" is installed correctly if the holes directed to the cylinder head bolts remain free. The locking bolt "T40069" must be screwed into the crankshaft.

Apply the cylinder head gasket. Pay attention to the centering pins "arrows" in the cylinder block.
Mounting position of the cylinder head seal: marked "top" or the cylinder head part number. Install the cylinder head.
Left cylinder head: Insert bolts "1...7", for which correspondingly shift the unloaded movable part "A" of the camshaft. Tighten the bolts in the sequence "1...7" in 3 steps.
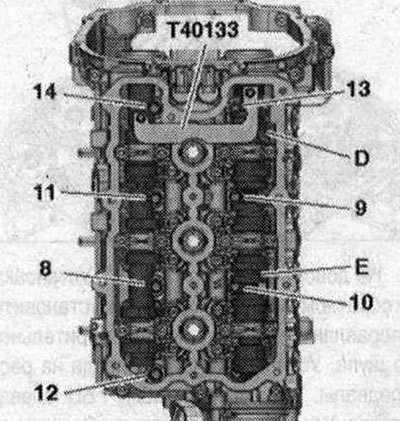
Right cylinder head: Insert bolts "8...14" by moving the unloaded movable parts "D" and "E" of the camshaft accordingly. Tighten the bolts in the sequence "8...14" in 3 steps.
All
Install the drive chains on the camshafts. Remove the camshaft locks "T40133" and the locking bolts "T40069". Turn the crankshaft with the adapter "T40058" in the direction of engine rotation "arrow" by 1 revolution. The notches "arrow" on the exhaust camshaft should be directed toward the side of the engine.
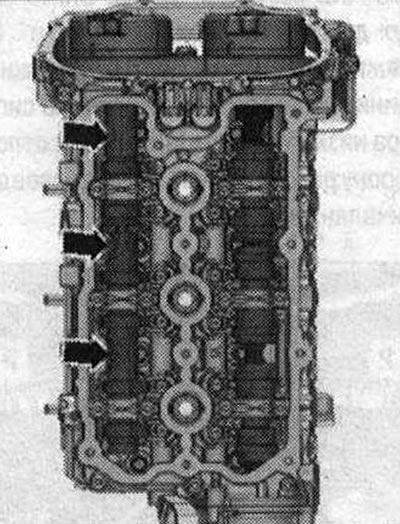
Left cylinder head: Move the unloaded moving parts of the camshaft "B" and "C" "in the direction of the arrow" until they stop.
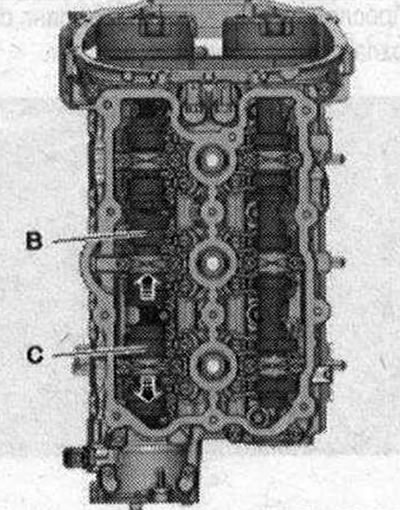
Right cylinder head: Move the unloaded movable part of the camshaft "F" in the "direction of the arrow" until it stops.
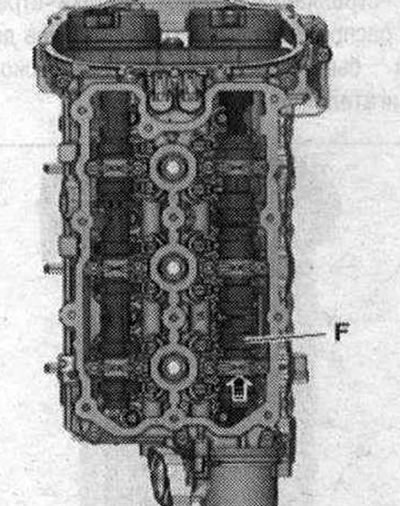
All
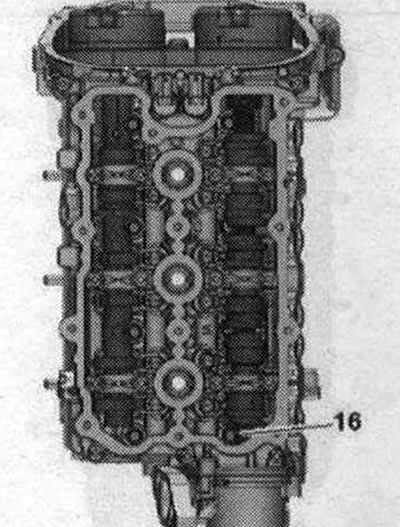
Turn the crankshaft with the adapter "T40058" in the direction of engine rotation "arrow" by 1 revolution. The threaded holes "arrow" in the camshafts should be directed upwards.
Left cylinder head: Insert bolt "15" and tighten it in 3 steps.

Right cylinder head: Insert bolt "16" and tighten it in 3 steps.
All
Turn the crankshaft with the adapter "T40058" in the direction of engine rotation "arrow" by 1 revolution. The notches "arrow" on the exhaust camshaft should be directed towards the side of the engine.
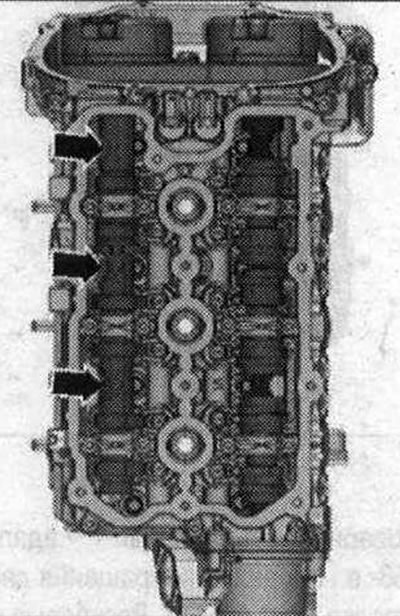
Left cylinder head: Move the unloaded movable part of the camshaft "B" in the "direction of the arrow" until it stops.
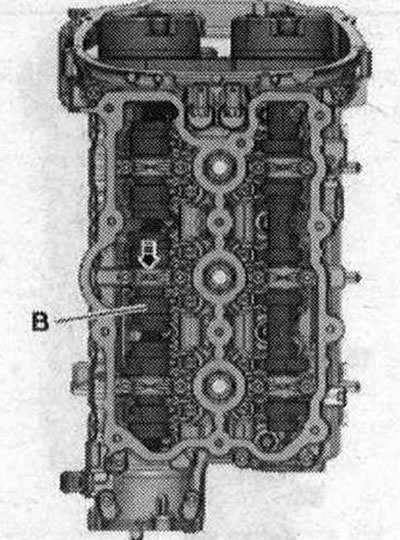
Right cylinder head: Move the unloaded movable part of the camshaft "F" in the "direction of the arrow" until it stops.
All
Tighten the "arrow" bolts. Left cylinder head: 3 bolts. Right cylinder head: 4 bolts.
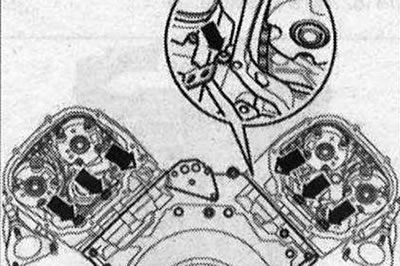
Do not tighten the cylinder head bolts. Install in the reverse order, while installing the dipstick guide tube. Install the drive chains on the camshafts. Install the cylinder head cover: left, right. Install the upper coolant supply pipe. Install the power steering pump. Install the additional muffler. Install the fuel injection hose and the lower part of the air intake. Install the poly V-belt. Install the upper coolant pipe. Change the oil. Change the coolant.
[Read the original source on the website: audimanual]