



Table of contents: Removal the auxiliary drive chain ↓ Installation ↓
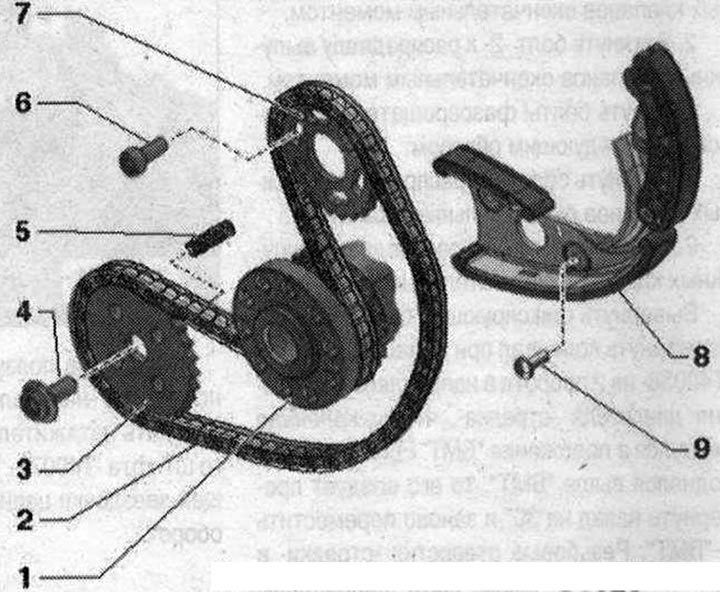
Auxiliary drive chain 1. Crankshaft; 2. Auxiliary drive chain. Before removing, mark the direction of travel with paint; 3. Oil pump chain drive sprocket. Mounting position: label side facing the engine; 4. Bolt. Replace. 30 Nm + 90° turn; 5. Pressure spring; 6. Bolt. Replace. 15 Nm + 90° turn; 7. Balance shaft sprocket. Mounting position: the side with the inscription faces the gearbox; 8. Chain tensioner with a guide bar; 9. Bolt. Replace. 10 Nm + 45° turn
Removal the auxiliary drive chain
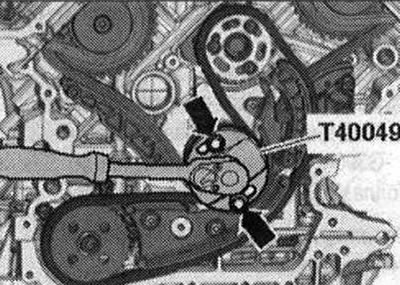
Gearbox removed. Remove lower cover of drive chains. Risk of damage to drive chain. Place washers under bolt heads so that drive chain does not catch on bolts. Install key "T40049" with 2 old bolts "arrows" for driven disk on back of crankshaft.
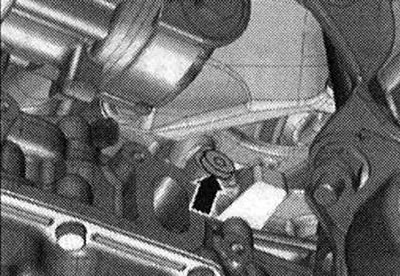
Unscrew the threaded plug "arrow" for the "TDC" mark from the cylinder block. Turn the crankshaft in the direction of engine rotation to "TDC".
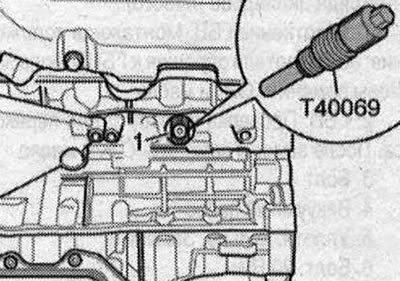
When the engine is installed, the crankshaft fixing hole is barely visible. Therefore, turn the engine so that the small notch "1" on the torsional vibration damper to the left of the direction of travel on the left is located opposite the butt weld on the housing "2" between the cylinder block and the camshaft frame. Thanks to this, it is easier to screw in the fixing bolt "T40069".
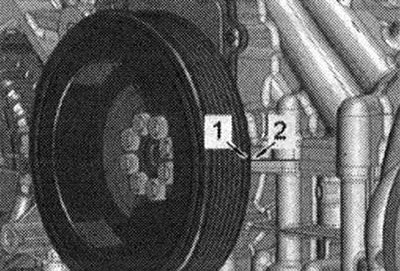
The mark on the torsional vibration damper is only an auxiliary means. The exact position of the "TDC" mark can only be achieved by turning the fixing screw "T40069". Screw the fixing bolt "T40069" with a torque of 20 Nm into the hole, if necessary. To completely center the bolt, slightly turn the crankshaft "1" in both directions.
Press the chain tensioner slider in the "direction of the arrow" and secure the chain tensioner with the locking pin "T40071".
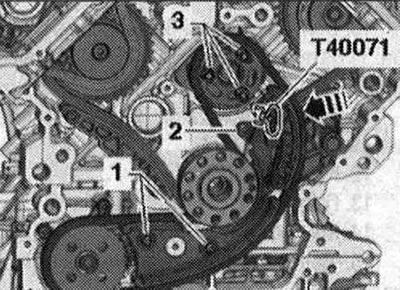
Risk of failure due to reverse running of the drive chain already in use. For reassembly, mark the direction of the drive chain with an arrow, use paint for this. Do not make notches with a center punch or similar tools. Unscrew the bolts "arrows" and remove the balance shaft sprocket. Unscrew bolts "1" and "2" and remove the tensioner with the drive chain.
Installation
Crankshaft "1" is fixed in the "TDC" position using the "T40069" lock screw. Replace the "TDC" threaded plug sealing ring. Install the tensioner and balance shaft sprocket. To protect against cuts, wrap the cutting edge of an 8 mm diameter drill with electrical tape. Fix the balance shaft with an 8 mm diameter drill "pos. 2" in the "TDC" position. The longitudinal holes in the balance shaft sprocket must be centered to the threaded holes of the balance shaft. If necessary, move the chain by 1 tooth. Tighten the chain tensioner bolts. Tighten bolts "1" and "3" of the sprocket.
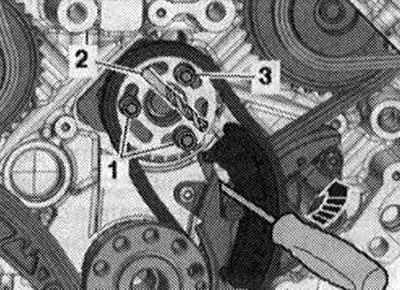
The sprocket should rotate on the balance shaft, but should not tilt to the sides. To unlock the chain tensioner, remove pin "T40071". Press the chain tensioner slider "arrow" with a screwdriver and simultaneously tighten bolts "1" and "3" of the sprocket. Pull out drill "2" from the balance shaft. Installation in reverse order: install the threaded plug for marking "OT". Install the lower cover of the drive chains.