
Table of contents: High-mounted brake light, license… ↓ Removal and installation the high… ↓ Removal and installation the license… ↓
High-mounted brake light, license plate light
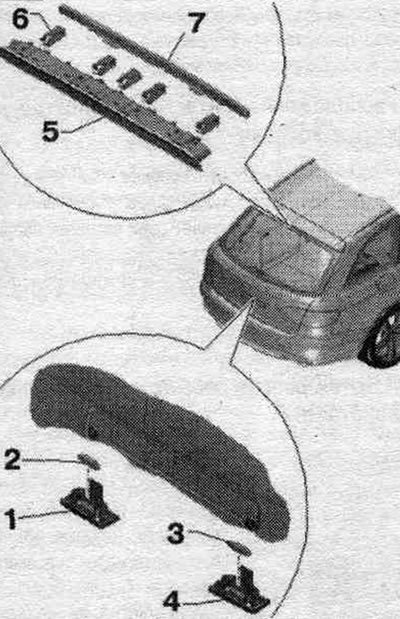
1. Left license plate light.
2. Left license plate light "X4": 12V, 5W.
3. Right license plate light "X5": 12V, 5W.
4. Right license plate light.
5. High stop light: High stop light bulb "M25".
6. Spring tabs: 5 pcs.
7. Mounting rail.
Removal and installation the high brake light bulb "M25"
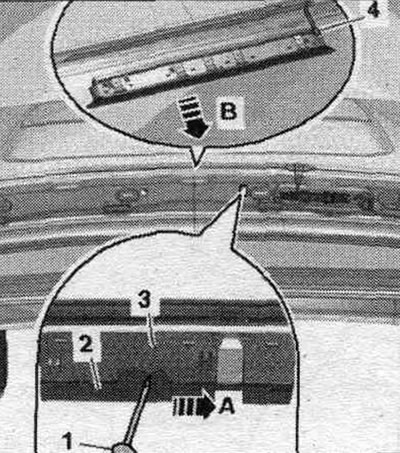
Do not press the brake pedal. To make the job easier when removing the high brake light, simply detach and bend back the trunk trim only from the top. To prevent damage to the trim, its temperature should be no lower than 20 V; if necessary, slightly warm the trim with a hair dryer. This applies primarily to older cars. Disconnect the trunk trim retainer and fold back the trim. Narrow screwdriver "1" unlock the mounting rail "2" by moving it to the right "arrow A". The mounting rail, springs and tweezers may fall into the luggage compartment frame when unlocking; if necessary, remove them from there using a magnet. Push out the upper brake light "3", starting from the left, out of the luggage compartment opening "arrow B". Do not pull the upper brake light out of the luggage compartment opening; the spring protrusions must be unlocked from the outside to the upper brake light. Disconnect the plug connection "4".
Installation
Installation in reverse order. If the high brake light bulb is "M25" (lEDs) if the high-mounted brake light is faulty, the entire high-mounted brake light must be replaced. The new high-mounted brake light assemblies are ready for installation and are supplied in the installation position. If, for example, after painting the trunk lid, the old upper brake light will be used, then it must be prepared for installation. Connect the connector and insert the high-mounted brake light bulb into the trunk opening. Press the upper brake light into the opening until it clicks into place. Install the trunk lid trim from above.
Preparing for installation of the upper brake light
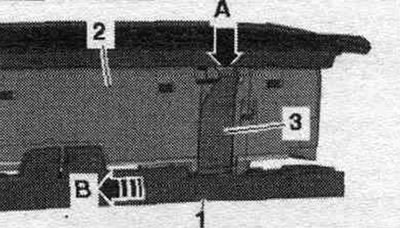
Since the upper brake light disintegrates into separate parts when removed, preparatory work must be carried out before reinstallation. Insert all spring tabs "3" into the light housing "2." The short side of the spring tab "arrow A" faces the underside of the high-mounted brake light. The number of spring tabs may vary depending on the design. Connect the mounting rail "1" and push it in until it stops in the direction of "arrow B".
Removal and installation the license plate light "X4"/"X5"
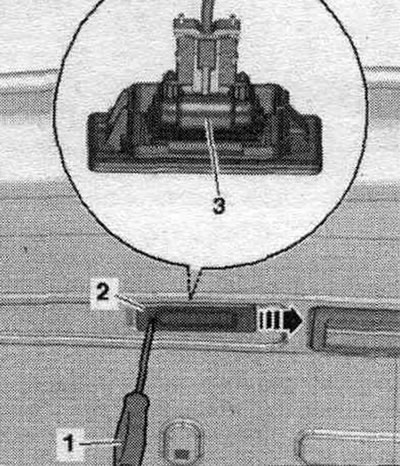
Set the light switch to position 0. Remove license plate light "2" from the trunk by inserting screwdriver "1" into the slot and sliding it in the direction of the arrow. Remove bulb "3" from the chuck.
Installation in reverse order. If the LED is damaged, replace the entire license plate light.