
Table of contents: Removal and installation the mirror… ↓ Removal and installation window… ↓ Driver's side interior door lock… ↓ Removal and installation the… ↓ Removal and installation of the… ↓ Removal and installation the door… ↓ Removal and installation the "K133"… ↓ Removal and installation the door… ↓ Removal and installation the front… ↓
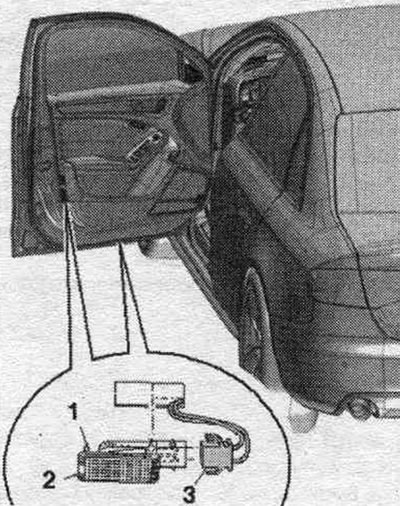
Lamps and switches in the front doors
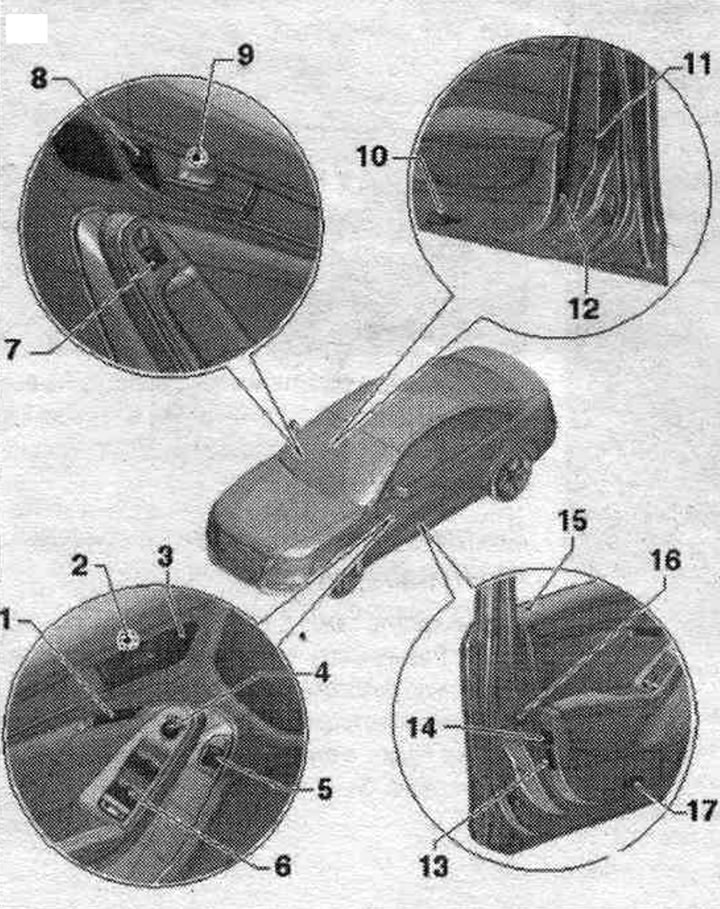
1. Remote control. driver's seats with memory function "E97".
2. The door opening handle illumination lamp is driving. "L108".
3. Door lock switch from the passenger compartment, on the driver's side. "E150".
4. Regulator switch. mirrors "E43" or reg. switch. mirrors with folding function "E168".
5. Remote trunk release switch "E188".
6. Control panel. the windows in the door are driven. "E512": with a front switch. left window lifter "E40" and front switch. the right window lifter in the door drives. "E81"; rear switch. the left door window lifter drives. "E53", rear switch. the right door window lifter drives. "E55" and rear window lock switch "E39".
7. Window switch in the front door. passage. "E107".
8. Door lock switch from the passenger compartment, from the front side. passage. "E198".
9. Doorway illumination lamp on the front side. passage. "L109".
10. Ceiling light for lane lighting. right threshold "W32": 12 V, 3 W.
11. Door limit switch on the front side. passenger. "F3": built into the door lock, cannot be replaced separately if faulty.
12. Warning lamp in the front door. passenger compartment "W36": 12 V, 3 W.
13. The warning light in the door is on. "W30": 12B, 3W.
14. System deactivation switch. interior security "E183"/anti-theft alarm switch "E217".
15. Control lamp of SAFE function center, lock "K133".
16. Door contact switch on the driver's side. "F2": built into the door lock, cannot be replaced separately if faulty.
17. Ceiling light for lane lighting. left threshold "W31": 12B, 3 W.
Removal and installation the mirror position adjustment switch "E43" or "E168"
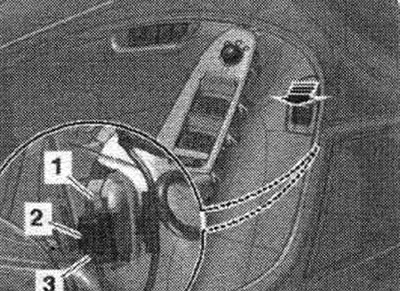
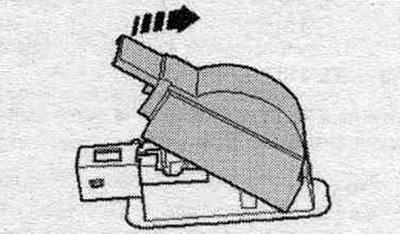
Turn off the ignition. Insert a screwdriver from below into the hole in the trim "1". Carefully, starting from the back. parts, pry off the trim from the door trim "arrow".
Disconnect plug connection "3". Carefully release the "arrow" latches with a small screwdriver. Press switch "2" for the mirror adjustment out of the switch mounting socket. "1".
Installation in reverse order. When installing, make sure that the strip with the icons is placed in front of the reg button. mirrors. Press the per. switch. mirrors into the socket until they snap into place. Install the armrest cover.
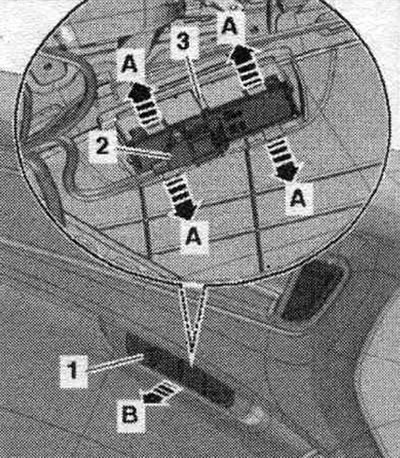
Removal and installation window switches "E512"/"E107"
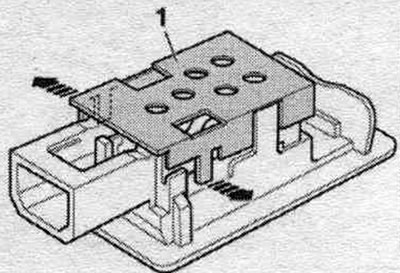
Turn off the ignition. Insert a screwdriver from below into the hole in the trim "1". Carefully, starting from the back. parts, pry the trim panel from the door trim "arrow". Disconnect the plug connection "3". Carefully move the clamps towards "arrow A". Press the window regulator "2" out of the mount "1" "arrow B".
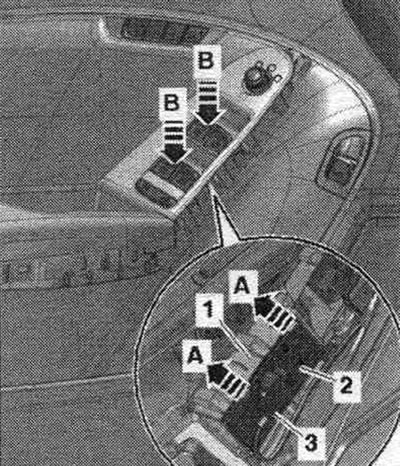
Installation in reverse order. Press the window switch until it locks into place. Install the armrest cover.
Driver's side interior door lock switch "E150" and front passenger's side interior door lock switch "E198" - removal and installation
Turn off the ignition. Remove the front trim. doors. Disconnect plug connection "1". Unlock the "arrow" latches and remove the interior door lock switch "2" from the door trim.
Installation in reverse order. Insert the internal lock switch into the mount, make sure it locks into place. Install the front trim. doors.
Removal and installation the driver's seat control panel with memory function "E97"
Turn off the ignition. Remove the front trim. doors. Disconnect plug connection "2". Carefully unlock the latches "arrows A" with a small screwdriver. Remove the control panel. driver's seat, with memory function "E97" "pos. 1" from fastening "3".
Installation in reverse order. Enter control panel. seat drives, with the "E97" memory function, into the key socket until the latch is activated. Install the front trim. doors.
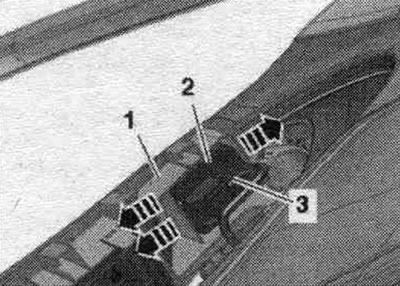
Removal and installation of the remote luggage compartment release switch "E188"
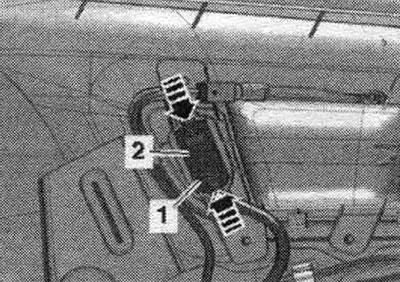
Turn off the ignition. Remove the trim panel. doors. Disconnect connector "3" from the remote trunk release switch. Unlock clamp "1" and push cover "2" with the remote trunk release switch out of the door trim "arrow".
Carefully release the arrow latches with a small screwdriver. Remove the remote trunk release switch "1" downwards from the cover "2".

Installation in reverse order: press in cover "2" with the remote trunk release switch until the latches lock into place. Install the front trim. doors.
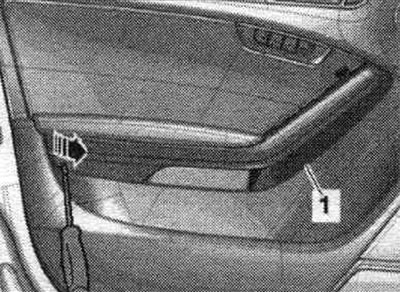
Removal and installation the door light "L108"/"L109"
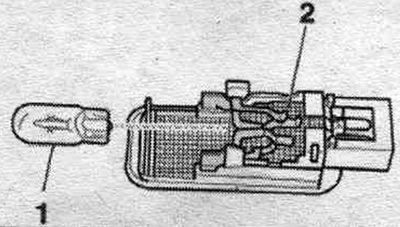
Remove the trim panel. doors. Disconnect plug connection "1". Turn lamp socket "2" to the left and remove it through the door release handle.
Installation in reverse order. Insert the door light bulb into the hole and snap it into place. Install the front trim. doors.
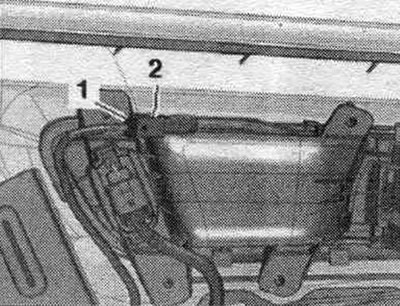
Removal and installation the "K133" central locking SAFE function indicator lamp
Turn off the ignition. Remove the trim panel. doors. Unlock the "arrow" clamps. Pull down the LED "1" center of the lock from the door trim "2".

Installation in reverse order. The new SAFE center lock function control lamp "K133" must be connected to the door trim wiring harness. Disconnect the electrical wire and connect a new electrical wire to the center SAFE function indicator lamp of the "K133" lock. Insert the LED into the center of the lock until you hear a click. Install the front trim. doors.
Removal and installation the door contact switch "F2"/"F3"
The door limit switch is located in the door lock and cannot be replaced separately if it malfunctions.
Removal and installation the front door sill light "W31"/"W32" and the warning lamp in the front door "W30"/"W36"
Press in the locking tab "1" with a flat-head screwdriver and, using a lever, remove the door lock button illumination lamp or, respectively, the threshold illumination lamp "2". Disconnect the plug connection "3".
Door signal light: Carefully pry off the cover over the "arrow" lamp.
Door sill light: Unlock the "arrow" clamps and remove cover "1" above the lamp.
All
Remove lamp "1" on the back of the door signal light and/or threshold light from socket "2".
Installation in reverse order. Install the door signal light and/or sill light cover. Insert the door signal light and/or the threshold light into the hole and snap it into place on the other side.