
Table of contents: Lighting and switches in the… ↓ Removal and installation the "L31"… ↓ Removal and installation the vanity… ↓ Removal and installation the front… ↓ Replacement of front reading lights… ↓ Removal and installation of the… ↓ Removal and installation a diffused… ↓ Removal and installation the J530… ↓ Removal and installation the J530… ↓ Removal and installation of the… ↓ Rear ceiling light - removal and… ↓ Removal and installation the rear… ↓
Lighting and switches in the headlining
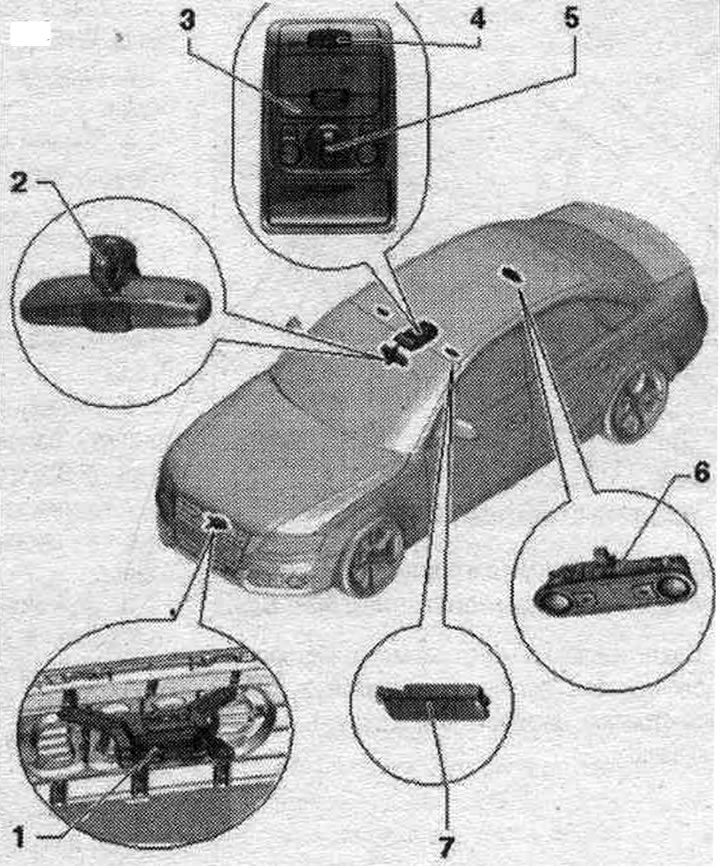
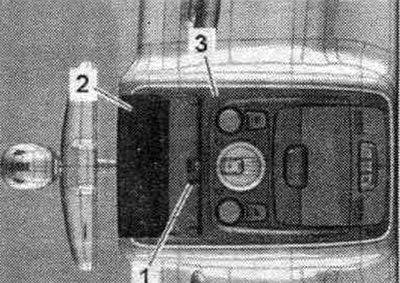
1. Used garage door opener "J530".
2. Air humidity sensor "G355".
3. Front interior/reading light: front interior/reading light. parts of the "W1" salon; individual reading lamp on the lane side. passage. "W13"; individual lamp on the driver's side. "W19".
4. Control panel. garage door opening system "E284".
5. Sliding sunroof position regulator "E139".
6. Interior light/rear reading light: rear left light "W47", rear right light "W48", rear light.
7. Vanity mirror light "L31": 12 V, 5 W.
Tightening torque, interior light/front reading light
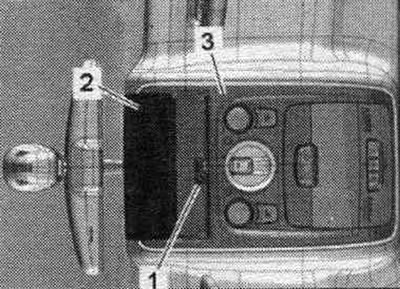
1. Bolt - 1.6 Nm.
2. Compartment for glasses.
3. Front interior light/reading light.
Tightening torque of the sliding sunroof position adjuster "E139"
Tighten the arrow bolts to 1 Nm.
Removal and installation the "L31" vanity mirror light
Carefully pry the vanity mirror light bulb out of the "arrow" recess using a flat-head screwdriver. Disconnect the plug connection.
To replace the bulb, remove the "arrow" cover. Remove the bulb from the socket on the back of the vanity mirror light.
Installation in reverse order.
Removal and installation the vanity mirror contact switch "F147"/"F148"
The contact switch for the vanity mirror is located in the sun visor support and cannot be replaced separately if defective. Replace the sun visor.
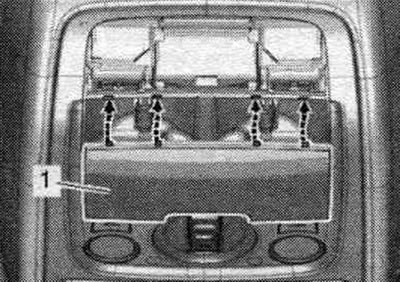
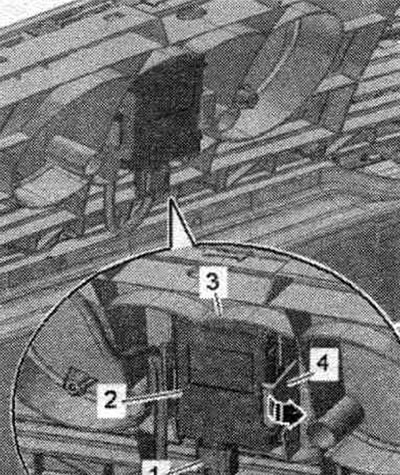
Removal and installation the front interior/reading lamp
Turn off the ignition. Open the glasses compartment "2". Unscrew the bolt "1". Turn the interior light/front reading lamp "3" downwards and remove it from the headlining. Disconnect the plug connections.
Installation in reverse order. Hang and secure the interior lighting fixture.
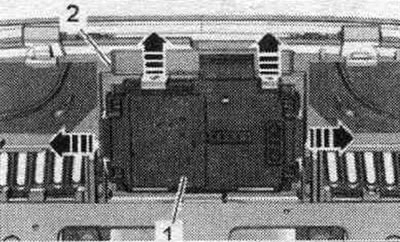
Replacing the front interior light bulbs "W1"
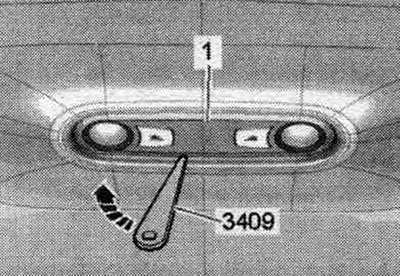
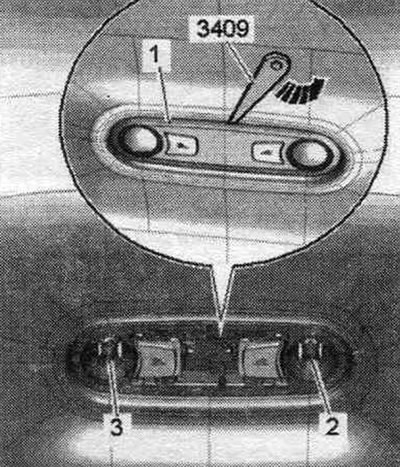
Place the tip of wedge "3409" onto the ribbing of pad "1" for the hands-free microphone. The felt tape underneath the pad should not be damaged. Carefully pry up the "arrow" shield.
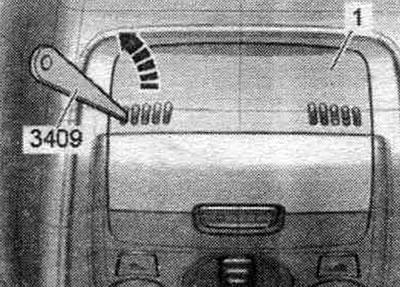
Carefully push the tip of the wedge "3409" into the middle under the diffuser "1", unlock just four locking tabs and remove the "arrow" diffuser.
Remove lamp "1" or "2" (12 V, 10 W) from the chuck.
First, install the four fixing tabs of the diffuser "1" into the housing of the "arrow" lamp and press them back. edge until fixed.
Installation in reverse order.
Replacement of front reading lights "W13"/"W19"
Remove interior light/reading lamp in lane. parts of the cabin. Unscrew the socket "1" or "2" from the interior light/individual lighting "3". Remove the bulb (12 V, 5 W) from the cartridge.
Installation in reverse order. Install interior light/reading lamp in lane. parts of the cabin.
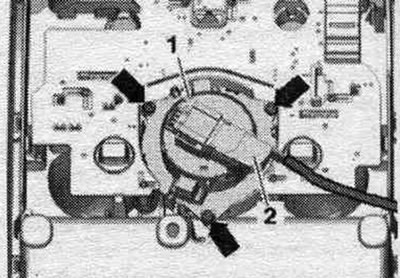
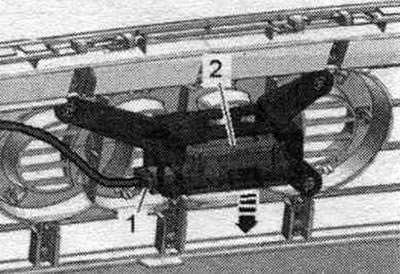
Removal and installation of the sunroof regulator "E139"
Remove interior light/reading lamp in lane. parts of the cabin. Disconnect plug connection "2". Unscrew the "arrow" bolts. Remove the sliding sunroof position regulator "E139" "pos. 1" from the front interior light/front reading lamp.
Installation in reverse order. Install interior light/reading lamp in lane. parts of the cabin.
Removal and installation a diffused LED light
The ambient light LED is located in the interior light/reading lamp in the front. interior parts and cannot be replaced separately if a defect occurs.
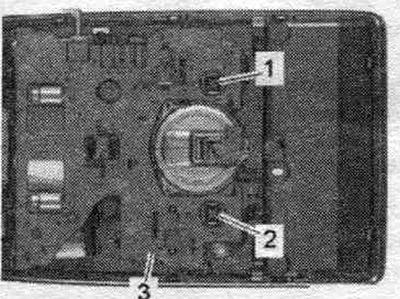
Removal and installation the J530 garage door opener control unit - vehicles up to model year 2012
Remove the lock support trim. Disconnect plug connection "1". Unlock the "arrow" latches and remove the used garage door opener "J530" "pos. 2" from the mounting frame.
Installation in reverse order. Install the lock support trim.
Removal and installation the J530 garage door opener control unit - 2013 and later models
Remove the lock support trim. Unlock the "4" "arrow" fastening bracket and remove the used "2" from the "3" fastening. Disconnect the plug connection "1".
Installation in reverse order. Install the lock support trim.
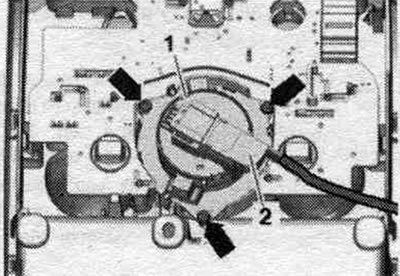
Removal and installation of the garage door opener control unit "E284"
Remove interior light/reading lamp in lane. parts of the cabin. If present, remove the anti-theft alarm sensor. "G578". Unlock the "arrow" clamps and remove the control panel. for opening the garage door "E284" "pos. 1" from the interior lighting lamp/individual front lighting lamp "2".
Installation in reverse order. Install interior light/reading lamp in lane. parts of the cabin.
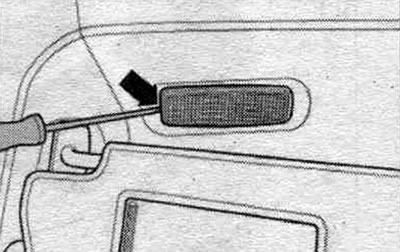
Rear ceiling light - removal and installation
Carefully pry off the interior light/reading light lens "1" using the release lever "80-200" in the hole in the roof "arrow". Disconnect the plug connection.
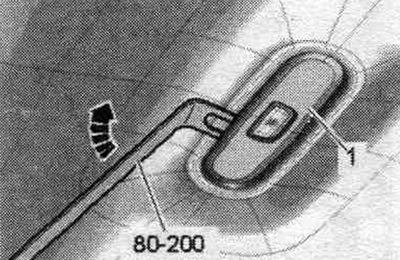
Installation in reverse order. Insert the interior light/reading lamp into the ceiling opening and secure it in place.
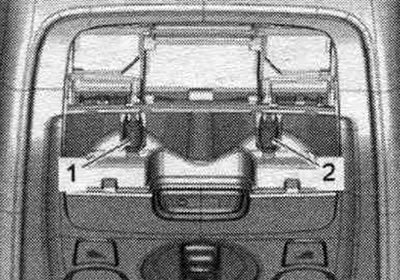
Replacing the rear interior light bulb "W47"/"W48"
Unlock the diffuser "1" of the interior light using the release lever "80-200". Unscrew the bulb "2" or "3" (12 V, 5 W) from the cartridge.
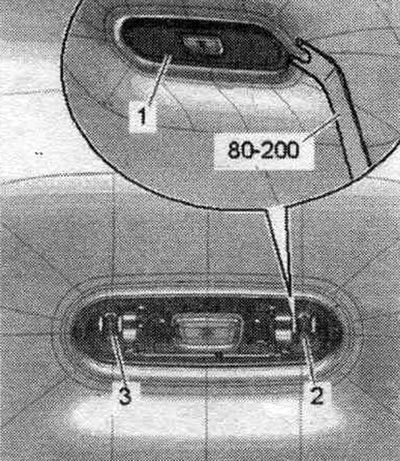
Installation in reverse order. Press the interior light bulb diffuser until it clicks into place.
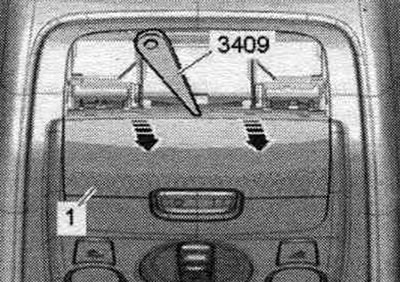
Removal and installation the rear interior light/reading light
Carefully remove the interior light/reading lamp "1" using the mounting tool. wedge "3409" from the hole in the ceiling "arrow". Disconnect the plug connection.
Installation in reverse order. Insert the interior light/reading lamp into the ceiling opening and secure it in place.
Replacement of the interior light/rear reading lamp bulb "W47"/"W48"
Unlock diffuser "1" for the interior light/individual lighting lamp using wedge "3409" "arrow". Remove lamp "2" or "3" (12 V, 5 W) from the cartridge.
Installation in reverse order. Press the interior light bulb diffuser until it clicks into place.