
Table of contents: Lights and switches on the center… ↓ Removal and installation the… ↓ Removal and installation the "E408"… ↓ Removal and installation the engine… ↓ Removal and installation the… ↓ Removal and installation the center… ↓ Rear heated seat adjustment switch… ↓
Lights and switches on the center console
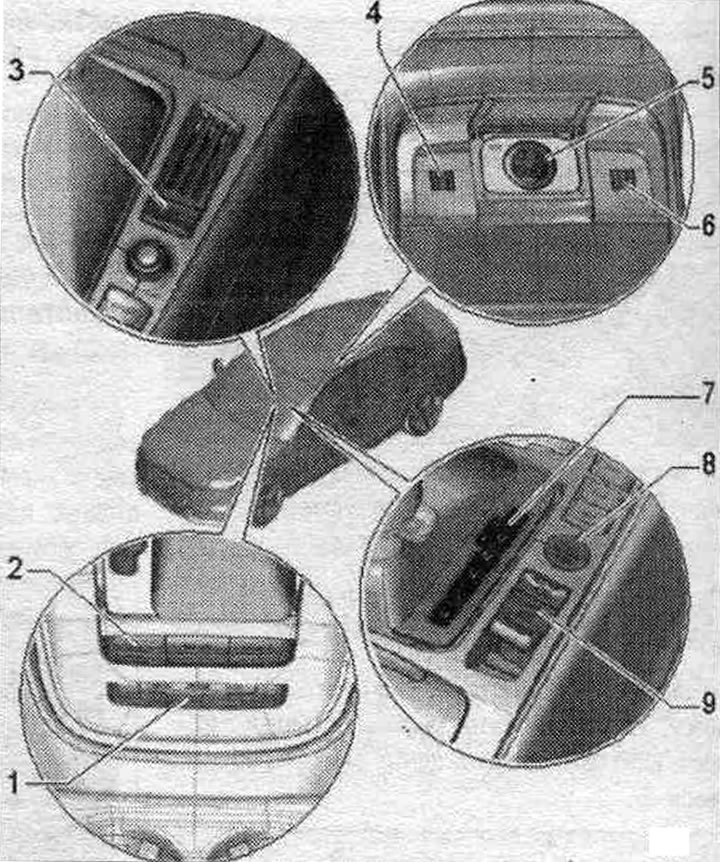
1. Switch block for Charisma "E592": only for MMI-Basis configuration: depending on the configuration: with key 1 of the switch block for Charisma "E593", key 2 of the switch block for Charisma "E594".
2. Keyboard: only for MMI-Basis equipment; depending on the configuration, with a rear curtain switch. glass "E149", button for ASR and ESP "E256", button for parking assistant "E266".
3. Engine start/stop mode key "E693".
4. Regulator switch. rear left seat with heating "E128".
5. Socket; depending on the configuration with a 2 x 12 V "U18" socket or with a 230 V socket for an inverter with a socket. 12V-230V "U13"; with a lamp for illuminating the socket "L42".
6. Regulator switch. rear right seat with heating "E129".
7. Selector position indicator "Y26" with selector scale illumination lamp "L101".
8. Control button. right of access and starting of the E408 engine.
9. Electric key mechan. parking brakes "E538", AUTO HOLD key "E540".
Removal and installation the electromechanical parking brake switch "E538" and the AUTO HOLD switch "E540"
Cars equipped with MMI-Basis; removing the center console plug. Cars with basic MMI-Comfort equipment: removing the used multimedia system. "E380". Unlock the "arrow" clamps and press the el. mechanical parking brake "E538"/AUTO HOLD button "E540" "pos. 2" from the control panel, multimedia system. "E380" "pos. 1". The figure shows a typical control panel. multimedia system. "E380".
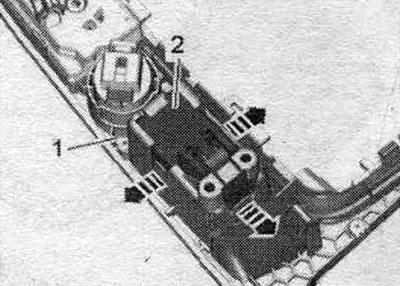
Installation in reverse order. Cars with MMI-Basic equipment: installation of the center console cover. Cars with MMI-Comfort basic equipment: installation of the used multimedia system. "E380".
Removal and installation the "E408" engine start and access control button
Cars equipped with MMI-Basis; removing the center console plug. Cars with basic MMI-Comfort equipment; removal of used multimedia system. "E380". Release the clamps of the "arrow" using a wire with a diameter of 2 mm "pos. 2". Press out the system key. control of access and right to start engine "E408" "pos. 1" from control panel, multimedia system. "E390" "pos. 3".
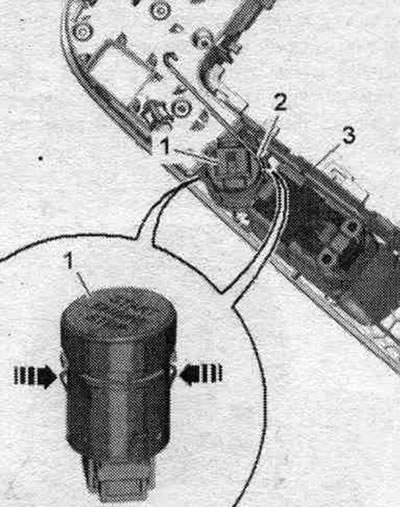
Installation in reverse order. Cars equipped with MMI-Basis; installing a center console plug. Cars with basic MMI-Comfort equipment; installation of a used multimedia system. "E380".
Removal and installation the engine start/stop switch "E693"
Cars with MMI-Basic equipment: removing the center console cover. Cars with MMI-Comfort basic equipment: removing the used multimedia system. "E380". Unlock the fastening clamps "arrow A" and press the engine start/stop mode button "E693" "pos. 1" from the control panel, multimedia system. "E380" "pos. 2" "arrow B".
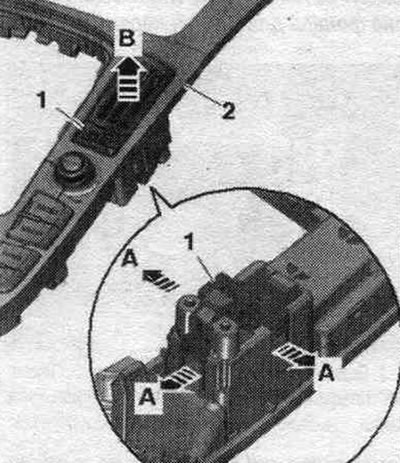
Installation in reverse order. Cars with MMI-Basic equipment: installation of the center console cover. Cars with MMI-Comfort basic equipment: installation of the used multimedia system. "E380".
Removal and installation the selector position indicator "Y26" with the selector scale illumination lamp "L101"
Move the selector lever to position S. Turn off the ignition. Carefully pry the gear selector boot to the side using a "3409" wedge or a small "arrow" screwdriver. Move the gear selector lever boot upward.

Release the spring lock "2" and remove the gear selector lever position indicator "V26" "pos. 1" "arrow". Disconnect the plug connection.
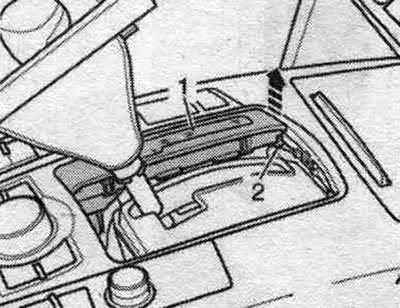
Installation in reverse order.
Removal and installation the center console keyboard - vehicles with MMI-Basis trim
Remove the center console trim. Carefully release the "arrow" latches with a small screwdriver. Press the keypad "1" out of the key slot.
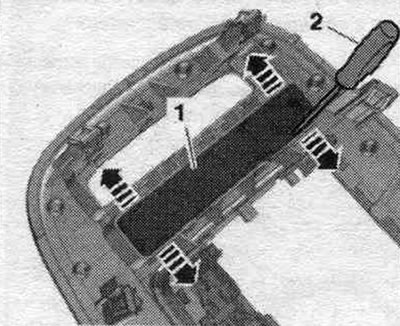
Installation in reverse order. Insert the key block into the switch housing until the latch engages with a clear click. Install the center console trim.
Rear heated seat adjustment switch "E128"/"E129"
Remove the rear center console trim. Unlock the "arrow" fastening clamps and remove the "2" switch for the rear heated seat adjustment from the rear. center lining, console "1".
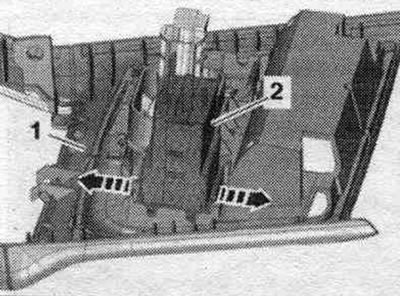
Installation in reverse order. Install the center trim, rear console.