
Note: After the ECM is disconnected, the values in its memory adapted to the operating conditions are erased. After replacing the control unit, it must be coded and programmed using special diagnostic equipment.
1. Turn off the ignition, remove the windshield wiper arms (see Chapter 12) and the windshield fairing grille located underneath them.
2. Unscrew the bolts (1 in illustration 5.33 Chapter 2) and remove the cover of the electronics compartment in the gutter.
3. Gently press the retaining clip with a screwdriver and fold the clip back (see illustration 5.34 Chapter 2).
4. To prevent non-professionals from accessing the ECM connectors (1 in the illustration), it is secured to the metal housing (5) by shear bolts (3 and 4) and is also held by a locking plate (2). The two shear bolts (4) not screwed into the ECM are secured with thread sealant and to remove them, they should be heated with a heat gun with a narrow nozzle for 20-25 seconds at 600°C and maximum flow. After heating, it is recommended to unscrew these bolts with an adjustable wrench. The two shear bolts (3) screwed into the ECM should not be heated. Unscrew the bolts (3 and 4).
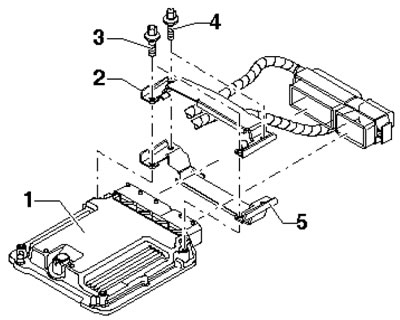
7.4 ECM Installation Details
5. Press the clamps (arrows in the illustration) and disconnect connectors (1 and 2) of the ECM. Remove the ECM.
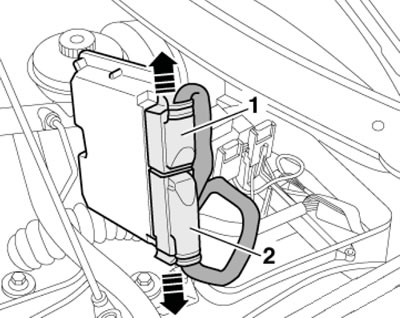
7.5. ECM connectors
6. Installation is performed in the reverse order of disassembly of the components. Use new shear bolts and remove the fixing sealant from the threaded holes before tightening them.