



2. Remove the driver's airbag and steering wheel (see Chapter 10).
3. Remove the driver's storage compartment (see Section 11).
4. Remove the instrument cluster (see Chapter 12).
5. Remove the main storage compartment (see Section 11).
6. Remove the front passenger front airbag (see Chapter 12).
7. Remove the center console and center section of the instrument panel (see Section 11).
8. Press the light control switch and turn it clockwise at the same time, then pull it out from this position and disconnect the connector.
9. Press the headlight leveling switch panel through the resulting hole. Disconnect the switch connector.
10. Remove the upper steering column cover (see Section 1).
11. Pry up the overlay (And in the illustration), unscrew the bolt (B) and disconnect the connector. Remove the sun sensor.
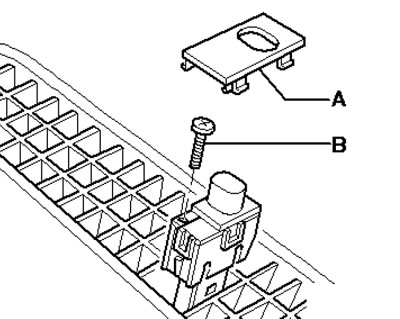
11/13 Removing the sun sensor
12. Unscrew the bolt (1 in the illustration) and remove the central glass deflector.
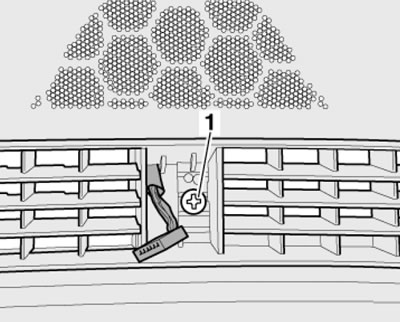
13.12. Removing the central windshield deflector
13. Remove the bolts (1 in the illustration), pull out the speaker, disconnect the connector and remove the speaker.
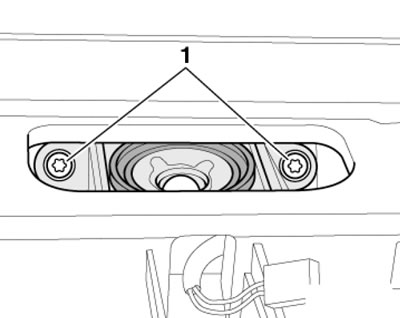
13.13. Speaker mounting bolts
14. Disconnect the connectors of the left and right air temperature sensors at the outlet of the climate control system (see illustration).
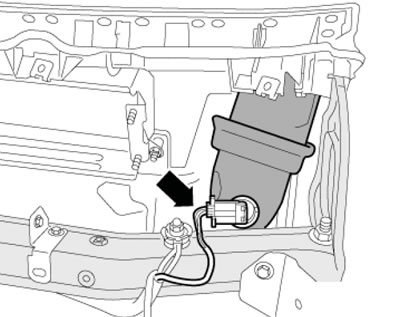
13.14. Temperature sensor on the front passenger side
15. Remove the left end trim of the instrument panel and unscrew the outer bolts securing the instrument panel (see illustration). In the same way, unscrew the right outer instrument panel mounting bolts.
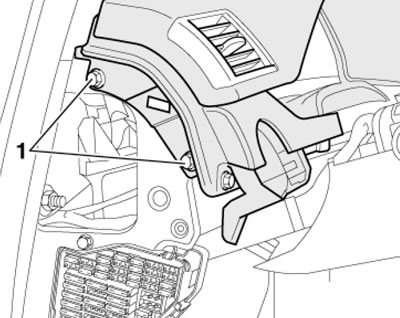
13.15. Left outer instrument panel mounting bolts
16. Remove the instrument panel mounting bolts in the instrument cluster area (see illustration).
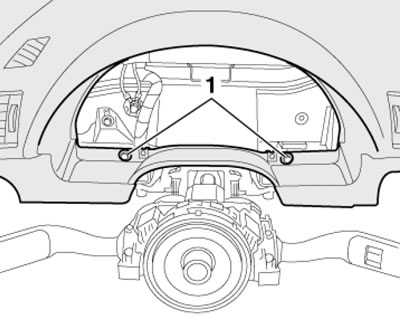
13.16. Fastening of the instrument panel in the area of the instrument cluster
17. Remove the instrument panel mounting bolts in the center console area (see illustration) and remove the instrument panel.
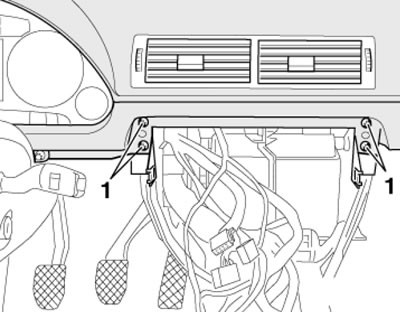
13.17. Fastening the instrument panel in the center console area
18. If necessary, loosen the fasteners shown in the illustration and remove the instrument panel beam, having first removed the parts attached to it.
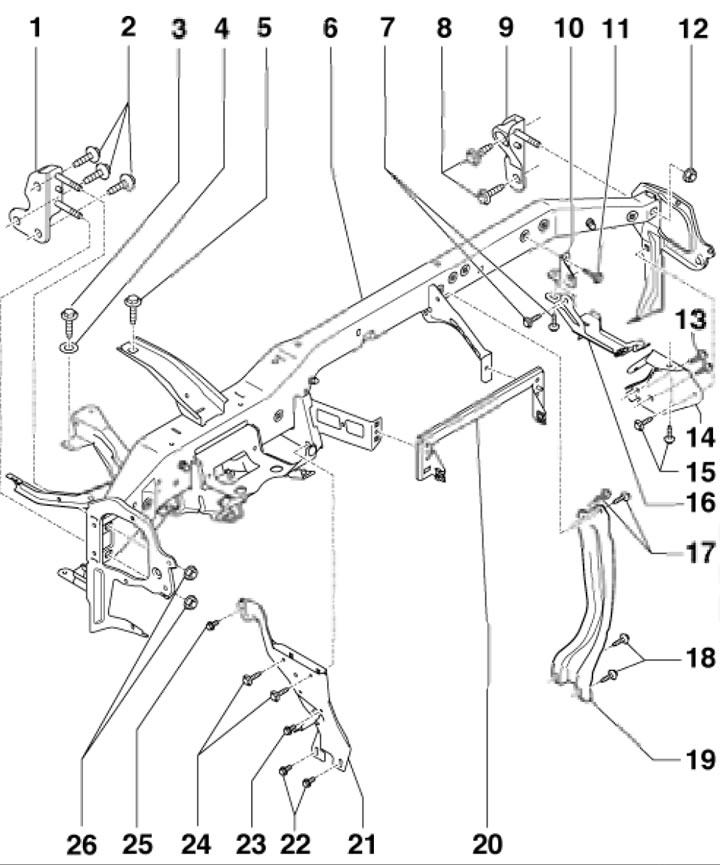
13.18. Instrument panel beam fastening parts1. Bracket; 2. Bolts, 3 pcs., 23 Nm; 3, 5. Bolt, 6 Nm; 4. Gasket; 6. Instrument panel beam; 7. Bolts, 2 pcs., 9 Nm; 8. Bolts, 2 pcs., 23 Nm; 9, 10. Bracket; 11. Bolt, 9 Nm; 12. Nut, 35 Nm; 13. Bolts, 2 pcs., 8 Nm; 14, 20. Bracket; 15, 17, 18, 22. Bolts, 2 pcs., 9 Nm; 16, 19, 21. Support; 23, 25. Bolt, 8 Nm 24 Bolts, 2 pcs., 9 Nm; 26. Nut, 35 Nm
19. Installation is carried out in the reverse order of dismantling the components.
(The article was copied from the website: «AudiManual»)