



Front seats
1. Slide the seat up, pull up and remove the cover (4 in the illustration).
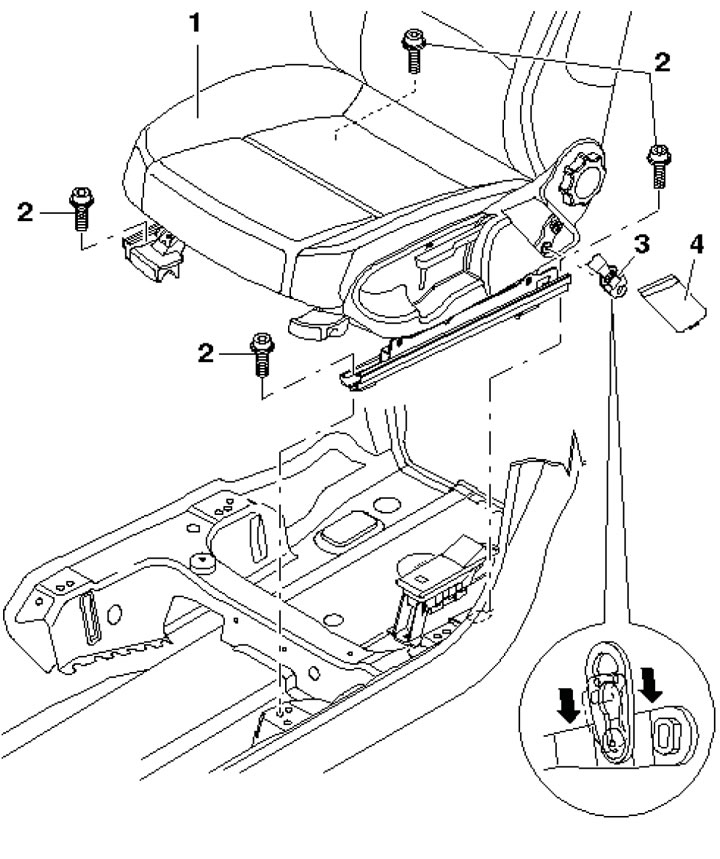
14.1. Front seat fastening parts
2. Pull down the lower belt anchor (3 in illustration 14.1) in the direction of the arrow and remove it.
3. Slide the seat all the way back and remove the two bolts (2 in illustration 14.1) from the front. Then slide the seat forward as far as it will go and remove the two bolts (2 in illustration 14.1) behind.
4. Disconnect the negative cable from the battery.
5. Tilt the seat back, disconnect the electrical connectors on it and remove the seat from the vehicle with the help of an assistant.
6. Installation is performed in the reverse order of component dismantling. Tighten the seat mounting bolts to 50 Nm.
Rear seat cushion
7. To remove the rear seat cushion, pull its front edge out of the clips (1 in the illustration), then unhook the seat cushion from the holders (4) by pressing it firmly backwards. Remove the seat cushion by disconnecting the electrical wiring connectors on it (heating and airbags).
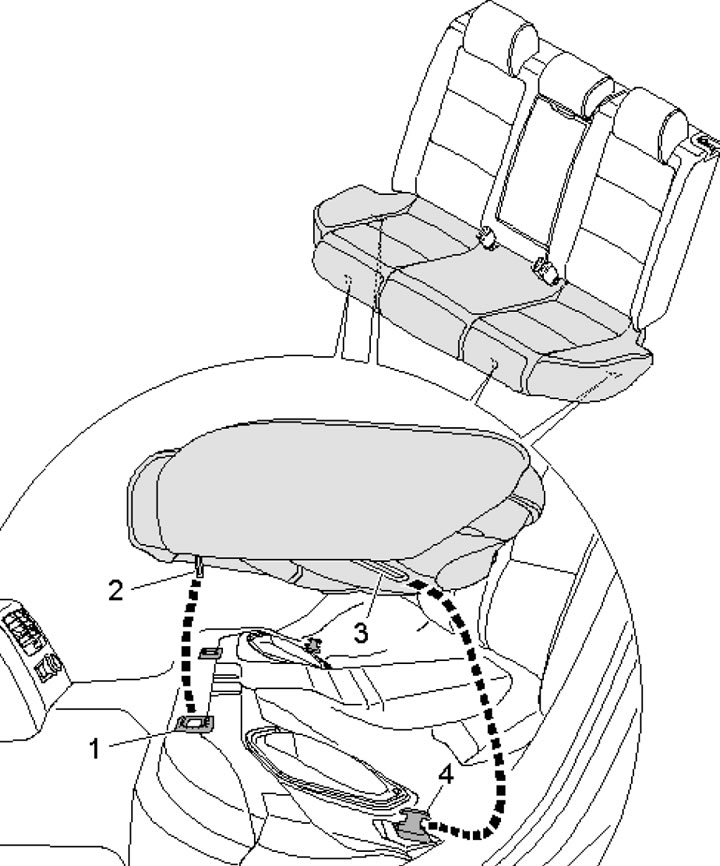
14.7. Rear seat cushion fastening
Backrest of the rear seat
Note: The description is given using 1/3 of the back as an example; to remove 2/3 of the back, proceed in the same way.
8. Fold both backrests forward.
9. Release the overlay (3 in the illustration) from behind in the direction of the arrow. If necessary, press it out through the hole at the back. Unscrew the bolt (1) and remove the clamp (2).
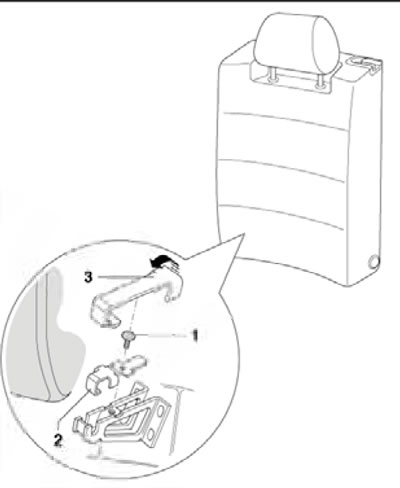
14.9. Removing the clamp 1/3 of the back of the rear seat
10. Raise the back (1 in the illustration) from the central bracket (2) in the direction of the arrow (A) and pull it out of the joint (3) in the direction of the arrow (B). If the backrest was removed together with the bushing (4), install the bushing in place.
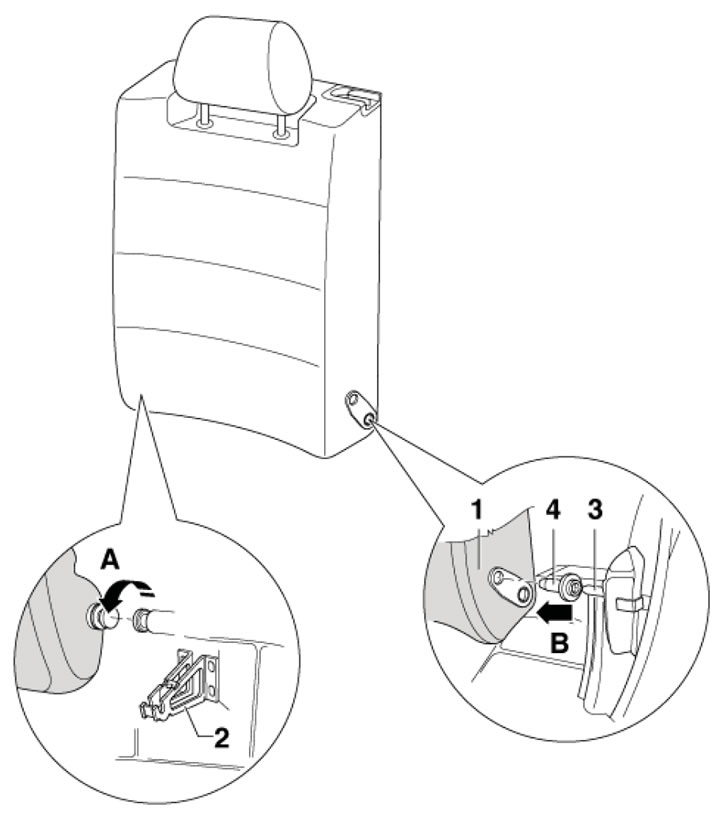
14.10. Removing 1/3 of the rear seat back
11. Installation is carried out in the reverse order of dismantling the components.