
Table of contents: Side doors ↓ Trunk lid ↓ Tailgate - Lower Trim Section ↓ Tailgate - Upper Trim Section ↓
Side doors
1. The installation details of the side door trim panels are shown in the illustrations.
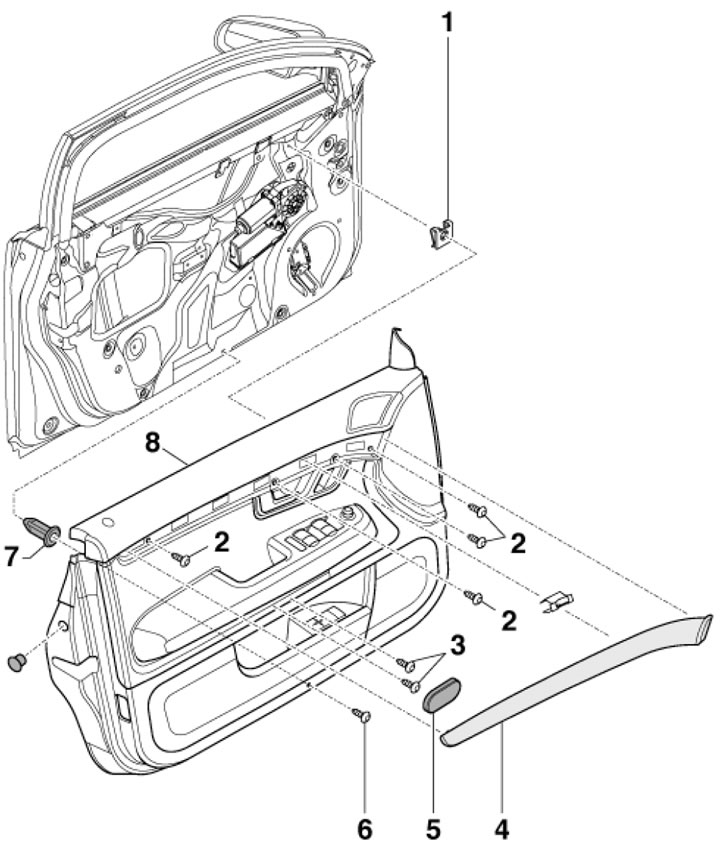
12.1a. Front door trim panel installation details 1. Spring nut; 2. Bolt, 4 pcs.; 3. Bolt, 2 pcs.; 4. Overlay; 5. Lower section of the armrest; 6. Bolt; 7. Expansion nut; 8. Door trim panel
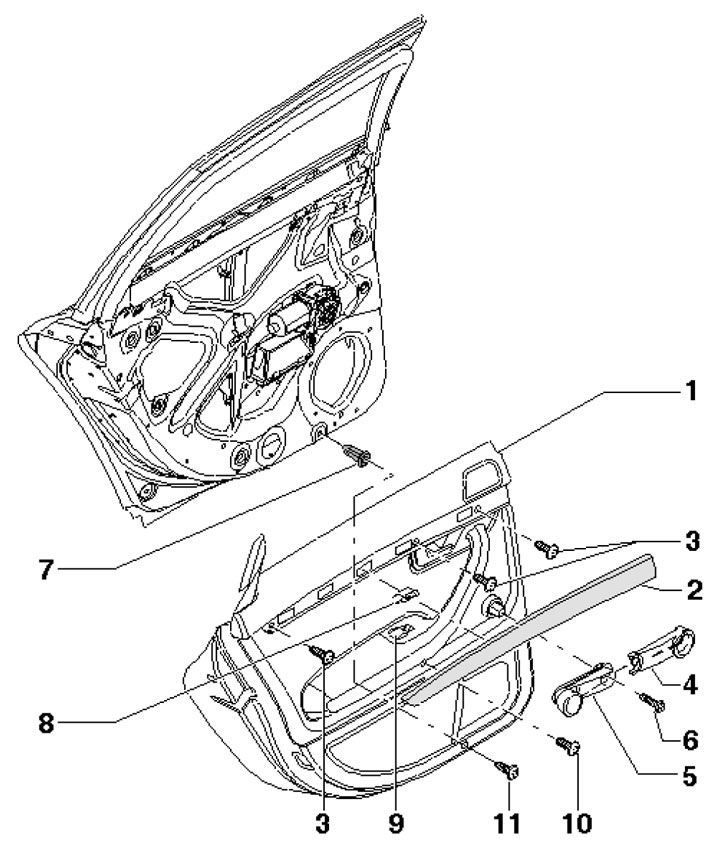
12.1b. Rear Door Trim Panel Installation Details 1. Door trim panel; 2. Overlay; 3. Bolt, 3 pcs.; 4. Lid; 5. Window lifter handle; 6. Bolt; 7. Expansion nut, 4 pcs.; 8. Spring nut, 4 pcs.; 9. Window lift switch; 10, 11. Bolts
2. To release the trim from the retainer, press the tab (2 in the illustration) and pull the lock (1) in the direction of the arrow. The following describes the removal and installation of the trim using the front door as an example (back - similar). References are given to the positions of Illustration 12.1a.
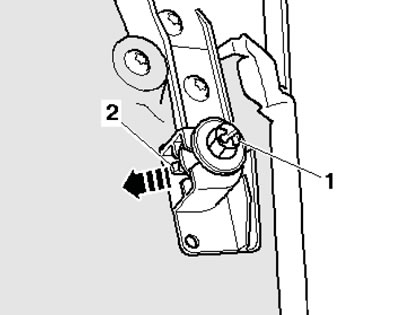
12.2. Removing the retainer
3. Remove the lower section of the armrest (5) and unscrew the two bolts (3) from the door section (8).
4. Unhook the cover and pull it forward.
5. Remove the four bolts (2) from the door trim (8) and release the trim from the clips.
6. Lift the trim panel approximately 20 cm and unhook the cable from the inside door release handle.
7. Disconnect the electrical wiring connectors and remove the trim panel.
8. Installation is carried out in the reverse order of dismantling the components.
Trunk lid
9. The installation details of the luggage compartment lid trim are shown in the illustration.
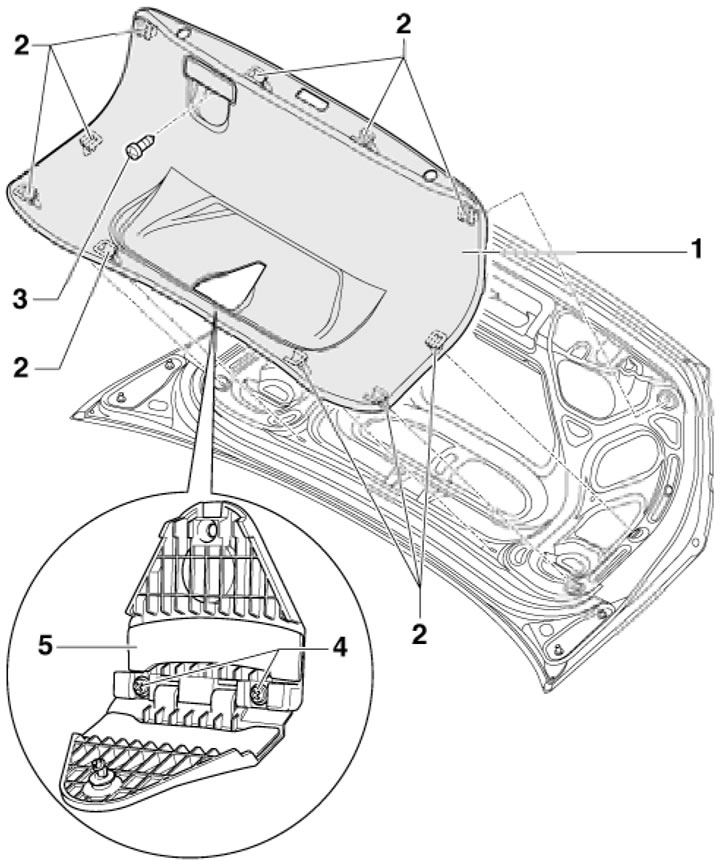
12.9. Trunk lid trim installation details 1. Trunk lid trim; 2. Fasteners, 10 pcs.; 3. Bolt in the handle, 2 Nm; 4. Bolts, 2 pcs., 2 Nm; 5. Emergency triangle bracket
10. Remove the lock panel and loosen the bolt (3) in the handle.
11. Remove the emergency triangle, unscrew the two bolts (4) and remove the emergency triangle bracket (5).
12. On models with manual release of the trunk lid, remove the trim (1 in the illustration), unscrew the bolt (3) and remove the handle (2).
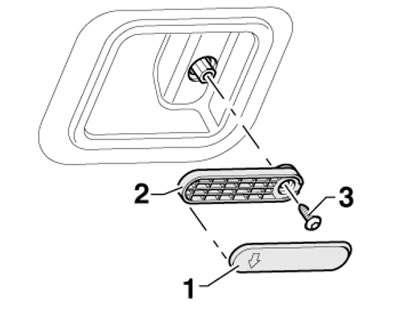
12.12. Removing the trunk release handle
13. Remove ten fasteners (2 in illustration 12.9) and remove the trim panel.
Tailgate - Lower Trim Section
14. The details of the fastening of the lower section of the tailgate trim are shown in the illustration.
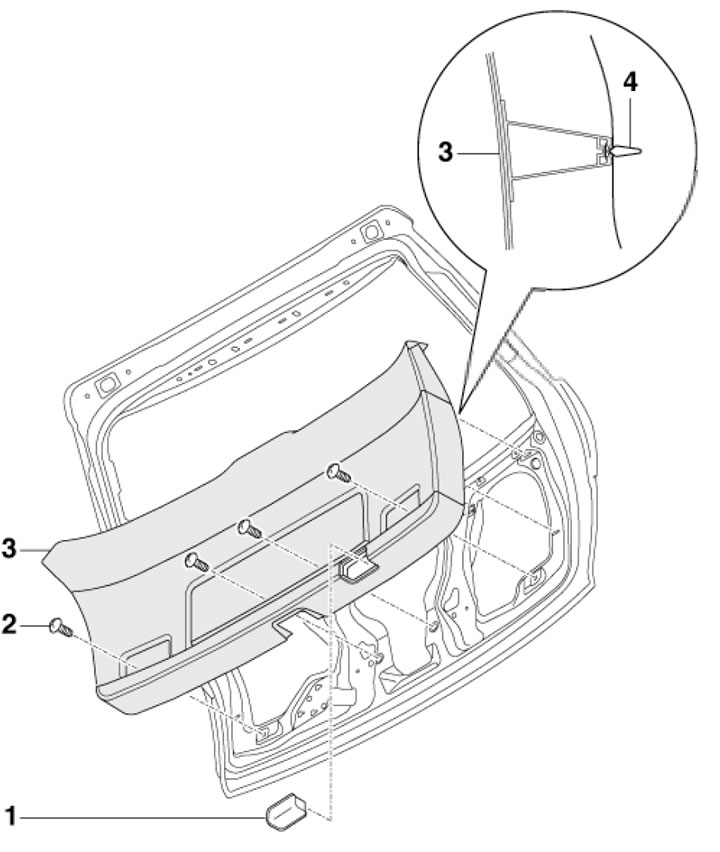
12.14. Details of installation of the lower section of the tailgate trim 1. Luggage compartment light; 2. Bolts, 4 pcs., 1.5 Nm; 3. Lower section of tailgate trim; 4. Spring clamps, 6 pcs.
15. Open the cover of the emergency triangle and remove it.
16. Remove the four bolts (2), unhook the left and right holders at the top of the trim panel.
17. Carefully pull out the spring clips (4) of the trim at the bottom left and right.
18. Reach between the trim and the tailgate and pull out the remaining four clips.
19. Installation is carried out in the reverse order of dismantling the components.
Tailgate - Upper Trim Section
20. The fastening details of the upper section of the tailgate trim are shown in the illustration.
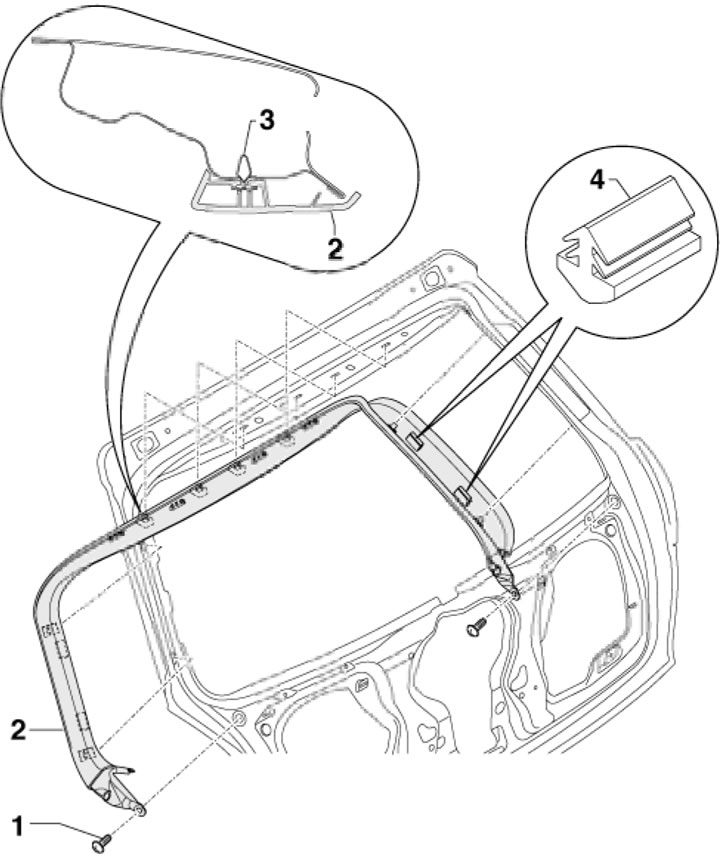
12.20. Details of installation of the upper section of the tailgate trim 1. Bolts, 2 pcs., 1.5 Nm; 2. Lower section of tailgate trim; 3. Spring clamps, 8 pcs.; 4. Rubber buffers, 8 pcs.
21. Remove the lower section of the tailgate trim (see above).
22. Remove the two bolts (1).
23. Press out the four spring clips on the side edges of the trim, separate the four spring clips (3) from the tailgate from the top.
24. Before installation, make sure the rubber buffers are in place.
25. First, place the trim behind the glass frame, secure the trim at the top, and then at the sides.
(Content source: the specified website: AUDImanual)