
Caution: Seals and O-rings must be replaced.
1. Remove the front bumper, refer to Section Removal and installation the front bumper.
2. Set the front panel to the maintenance position, refer to Section Setting the front panel to the maintenance position.
3. Remove the radiator, refer to the relevant Section.
4. Disconnect connectors (1) and (2). Move aside the electric wires of the fan motor.
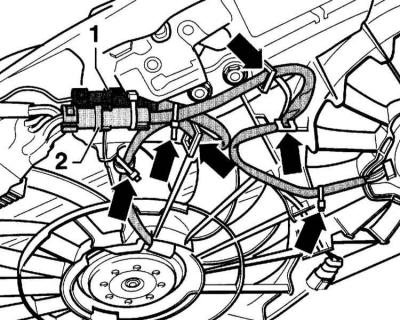
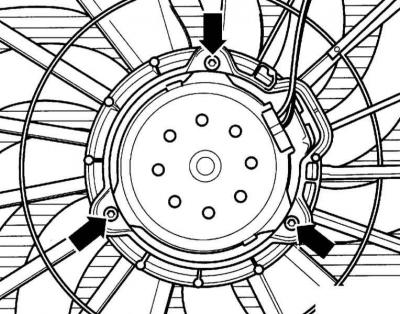
5. Disconnect the radiator fan from the casing (arrows in the accompanying illustration).
Installation
1. Installation is performed in the reverse order of removal.
Diesel engine 1.9 l
Warning: This section only describes the removal of the additional electric fan. Removal of the 1.9L diesel viscous fan is described in Section Removal and installation the timing belt, 1.9L engines (AVB, AWX, AVF).
All cable ties that have been removed or cut must be replaced during installation.
Removal
1. Set the front panel to the maintenance position, refer to Section Setting the front panel to the maintenance position.
2. Models with AT: Disconnect the AT fluid hoses at the top and bottom of the radiator. Drain the fluid into a container and tie the disconnected hoses to a crossmember to prevent further fluid leakage. Cap the hoses to prevent dirt from getting into them.
3. Disconnect the connector (3) to the additional fan.
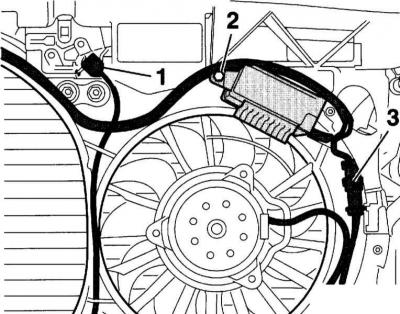
4. Disconnect the additional fan control unit (2).
5. Disconnect the connector (1) of the valve lock switch.
6. Move the electrical wires aside.
7. Remove the fan shroud (arrows in the accompanying illustration) and take it out.
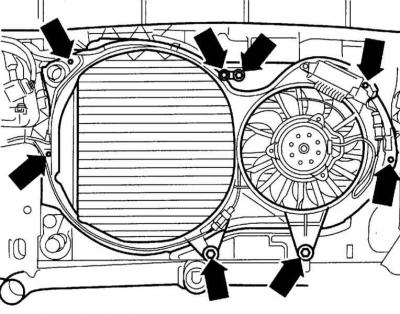
8. Disconnect the fan motor from the casing (arrows in the illustration).

Installation
1. Installation is performed in the reverse order of removal.