
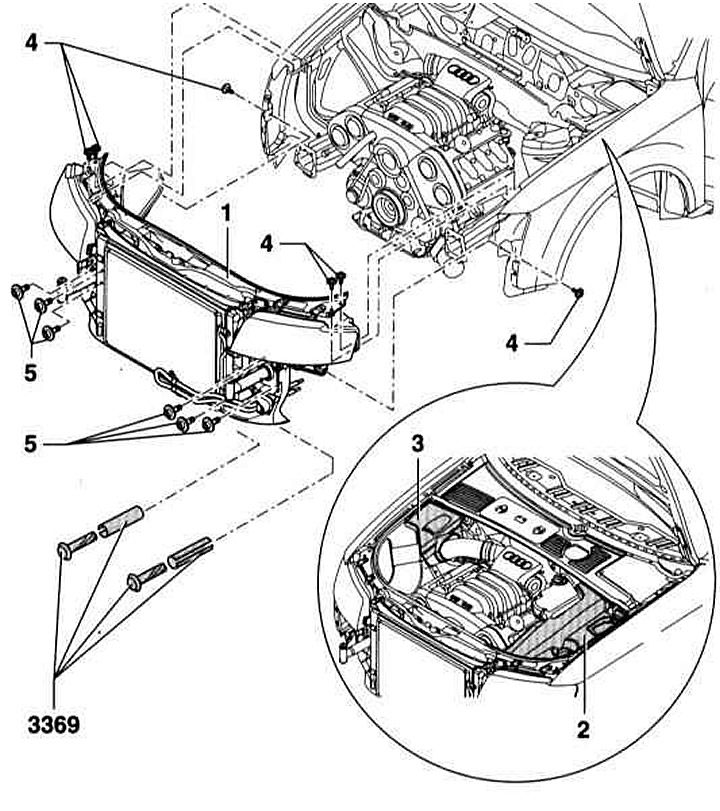
- 1 - Front panel
- 2 - Upper engine cover, left
- 3 - Upper engine cover, right
- 4 - Screw, 10 Nm
- 5 - Screw, 50 Nm
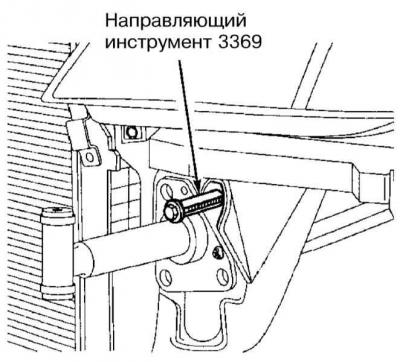
- 3369 - Service position: Screw the AUDI special tool into the holes in the bumper. Note: If the specified special tool is not available, you can use 2 M8 x 90 screws. Washers with a diameter of 24 mm and a thickness of 2 mm should be placed under the bolt head. In addition, 2 bushings with a length of 80 mm and a diameter of 17 mm are required.
When performing some adjustments, such as with a V-belt or toothed belt, the front panel must be set to the service position. In this case, the panel moves forward together with the radiator.
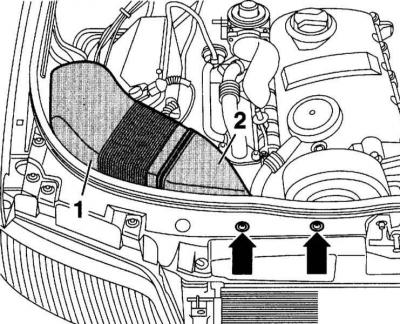
1. Disconnect the air ducts (1) and (2) between the front panel and the air filter on the front panel (arrows in the illustration).
2. Remove the top engine cover on the left (2) and right (3), refer to the illustration at the beginning of the section.
3. Detach the lower engine cover at the front without removing it. To do this, unscrew only 3 screws.
4. Remove the front bumper, refer to the relevant Section.
5. Screw special tool 3369 into the two upper holes on the right and left.
6. Remove the screws (5) on the left and right, refer to the illustration at the beginning of the section.
7. Remove the screws (4) on the left and right.
8. Pull the front panel forward so that the rear hole on the panel is covered by the front threaded hole on the fender. In this position, screw in the bolt on the left and right (arrow on the accompanying illustration) and secure the panel.
