
2. Remove the front bumper, refer to Section Removal and installation the front bumper.
3. Diesel engine 1.9 l: Remove the air duct in front of the charge air cooler.
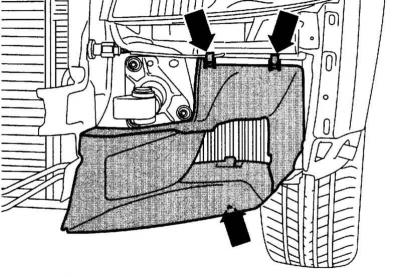
4. Disconnect the air ducts on the left and right side of the radiator (arrows in the accompanying illustration).
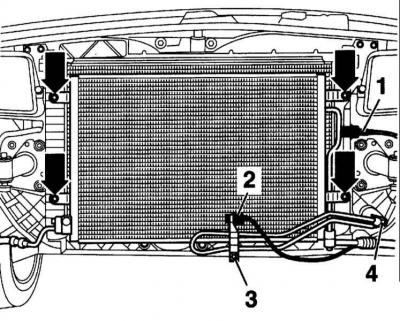
5. Disconnect the connector (1) of the air conditioner pressure relay.
6. Disconnect the connector (2) of the outside temperature sensor. (3) - condenser mounting bolts.
7. Move the two electrical wires to the side.
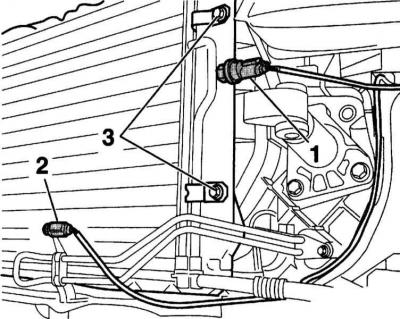
8. Engines 2.0, 3.0 l (ALT, AWA, ASN): Disconnect the hydraulic fluid coil of the power steering (3) and (4). (1) - low pressure sensor plug; (2) – outside temperature sensor plug.
Warning: Do not open the air conditioner cooling circuit. Risk of accident!
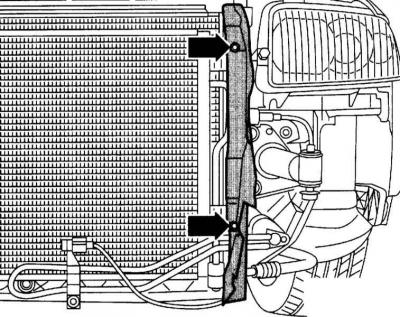
9. Disconnect the condenser from the radiator (arrows).
Warning: To prevent damage to the condenser and coolant hoses/lines, ensure that wires and hoses are not twisted, crushed or bent.
10. Tilt the capacitor carefully downwards and place it.
11. Engines 2.4, 3.0 l: remove the left upper engine cover.
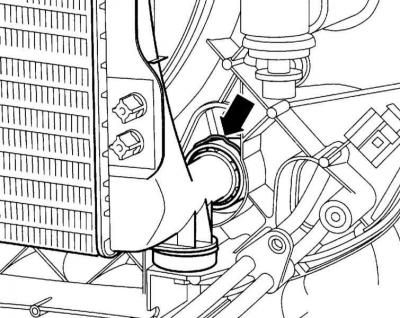
12. Disconnect the hose from the radiator by removing the retaining clip at the connecting flange (arrow on the accompanying illustration).
13. Models with AT: Disconnect the AT fluid lines from the radiator at the bottom and top and close them.
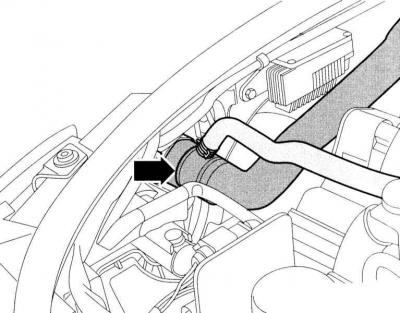
14. Disconnect the coolant hose at the top of the radiator by releasing the retaining clip at the connecting flange (arrow on the accompanying illustration).
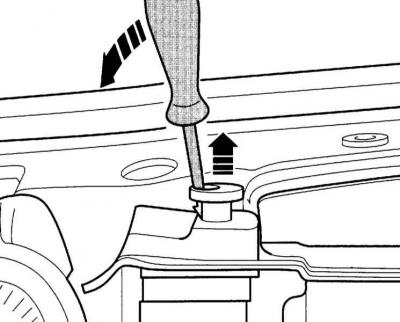
15. Release the upper radiator clamps and lift upward.
16. Tilt the radiator forward and remove it from the rubber mounts together with the fan ring and fan.
Installation
1. Replace worn rubber mounts on the radiator holders.
2. Installation is performed in the reverse order of removal.
Caution: If the radiator has been replaced, the entire volume of coolant must be replaced.
The original article is available on the online resource: AUDIMANUAL