
Caution! Before working with the headlight parts with a gas discharge lamp, which have yellow high voltage symbols, be sure to disconnect the negative cable from the battery!
1. To dismantle the starting control device, it is necessary to remove the headlight (see next section).
2. Remove the low beam housing cover from the headlight housing.
3. Remove connector 1 from the gas discharge lamp by turning the connector counterclockwise. The spring latch (arrow) for locking the lamp does not need to be removed.
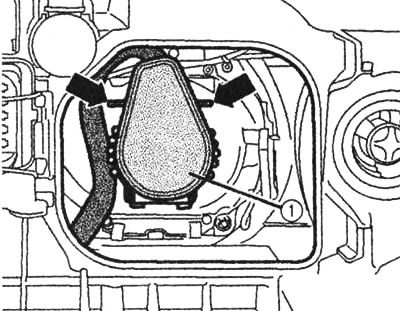
To remove the connector on the gas discharge lamp, it must be turned to the left
4. Remove the screws (arrows).
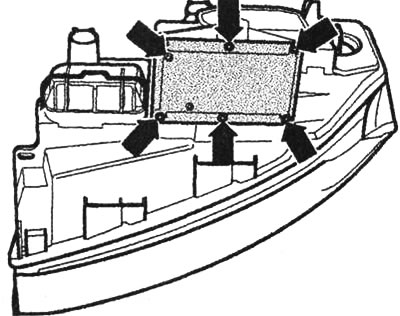
The N195 control unit is removed after unscrewing six screws
5. Remove the N195 ballast from the headlight housing. The connector on the gas discharge lamp can be routed through the headlight housing.
6. Installation of the starting control device is carried out in the reverse order.
[The text is based on materials from the website AudiManual]