
Warning! After installing a new headlight, be sure to check the headlight adjustment. As with all electrical work, disconnect the negative battery cable before removing the headlight!
1. To remove the main headlight, perform all work operations up to and including step 4, as when replacing the parking light bulb. Use the same four drawings as a guide.
2. To protect the varnish coating, cover the area under the headlight with adhesive tape.
3. Disconnect connector 3, unscrew screws 1 and 5, loosen screws 2 and 4 by a few turns (do not unscrew the screws completely).
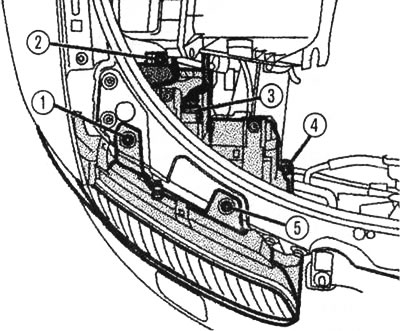
Fastening the main headlight to the body
4. Remove the headlight from the body forward.
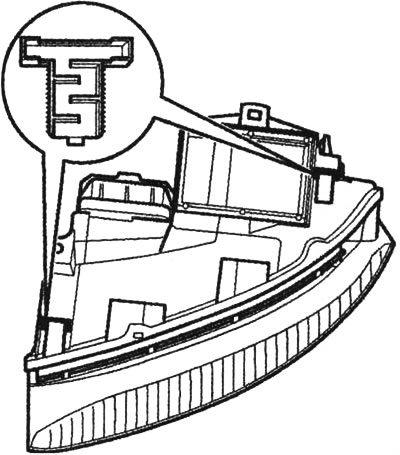
Ventilation elements at the bottom of the headlight
5. The headlight is removed in the reverse order. Check whether both ventilation elements are inserted from the bottom of the headlight.
6. Slide the headlight horizontally into the headlight opening until it stops.
7. Install the stop screw on the hood lock bracket. Use this screw to adjust the position of the headlight relative to the contours of the body (gaps). First of all, pay attention to the area near the cutout in the wing. Tightening torque of the screw: 6 Nm.
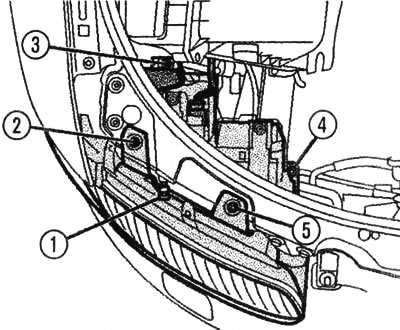
Five screws securing the main headlight
8. Tighten screws 2 through 5. Adjust the headlight.
(The original version is on the portal «AUDIMANUAL»)