



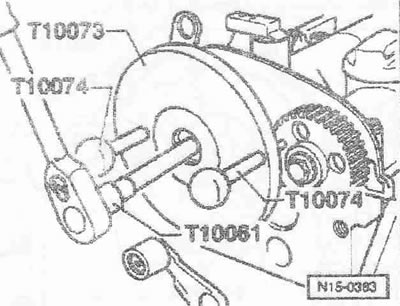
Remove the "T10074" locking pins from the intake camshaft gear with valve timing adjuster and the exhaust camshaft gear.
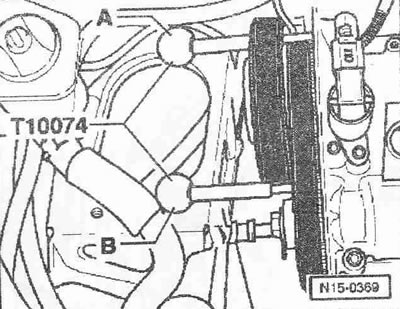
Place the mounting plate "T10073" on the intake camshaft gear with the valve timing adjuster.
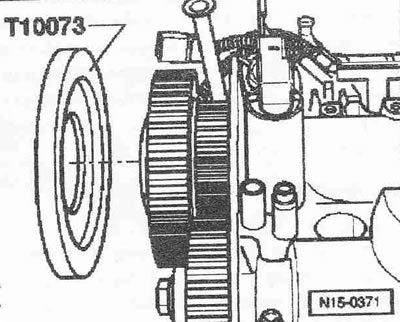
Re-insert the "T10074" locking pins into the gauge holes in the camshaft bearing housing as far as they will go as follows: Locking pin "A" through the locking hole of the intake camshaft gear with valve timing adjuster. Locking pin "B" through the locking hole of the exhaust camshaft gear.
Instructions: To make it easier to fit the locking pin "B", you can slightly rotate the exhaust camshaft gear on the bolt so that the gauge holes are opposite each other.
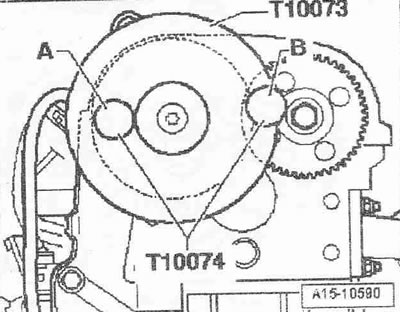
Unscrew the threaded plug "1" with the sealing ring "2". Risk of damaging the thread. The bolt for the intake camshaft gear with the valve timing adjuster has a left-hand thread. Unscrew the bolt for the intake camshaft gear with the valve timing adjuster using the socket wrench "T10061". Unscrew the bolt for the exhaust camshaft gear. Remove the locking pin "T10074" and remove the mounting plate "T10073".
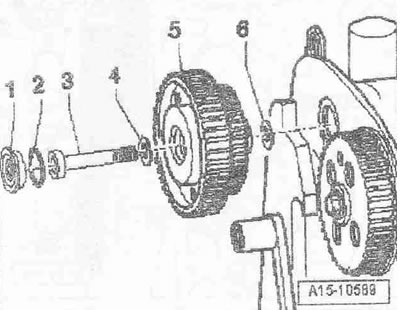
Unscrew bolt "3", remove washer "4", intake camshaft gear "5" with valve timing adjuster and, where available, washer "6". Place the intake camshaft gear with valve timing adjuster with the screwed-on surface on a clean surface. Remove the exhaust camshaft gear.
Installation
Not a single piston at TDC.
Instructions. Replace the bolts for the intake camshaft gear with variable valve timing and the exhaust camshaft gear. If a washer was installed between the intake camshaft gear with variable valve timing and the camshaft (only in old designs), then it should also be replaced. If the intake camshaft gear with the physical valve timing regulator is replaced, then the cuff must also be replaced. Install the exhaust camshaft gear and tighten the bolt by hand. Observe the position of the exhaust camshaft gear relative to the keyway in the exhaust camshaft.
Lubricate the thread and the bearing surface of the head of bolt "3" for the intake camshaft gear with valve timing adjuster. Insert bolt with washer "4" through intake camshaft gear "5" with valve timing adjuster until it stops. If washer "6" was installed between the intake camshaft gear with valve timing adjuster and the camshaft (only in old designs), then it should also be replaced.
Caution! Risk of thread damage. The bolt of the intake camshaft gear with the valve timing adjuster has a left-hand thread.
Screw the bolt for the intake camshaft gear with valve timing adjuster into the intake camshaft by several turns. Carefully push the intake camshaft gear with valve timing adjuster into the cuff. Be careful not to damage the cuff. Tighten the bolt for the intake camshaft gear with valve timing adjuster so that the intake camshaft gear with valve timing adjuster can still rotate. Remove the high-pressure pump. Install the "T10110" locking flange on the gearbox side on the camshaft bearing housing for the intake camshaft as follows: the "arrow" pin of the "T10110" locking flange must enter the small hole of the camshaft thrust bearing.
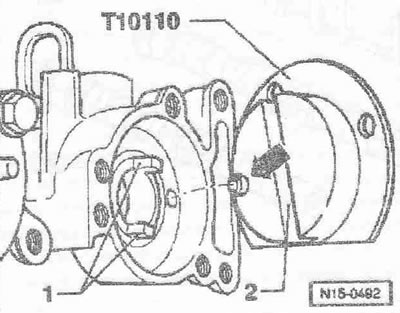
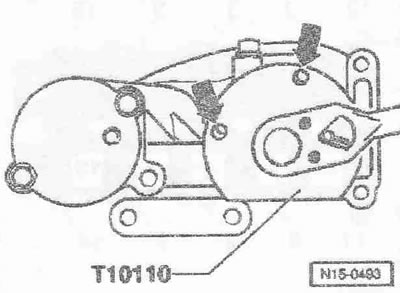
The journals "1" of the camshaft must enter the recess "2" of the fixing flange "T10110". Turn the intake camshaft against the direction of engine rotation by the hexagon of the fixing flange "T10110" so that the holes "arrows" in the fixing flange "T10110" become coaxial with the threaded holes in the camshaft bearing housing. Tighten the fixing flange "T10110" with two bolts M6x15 with a torque of 10 Nm.
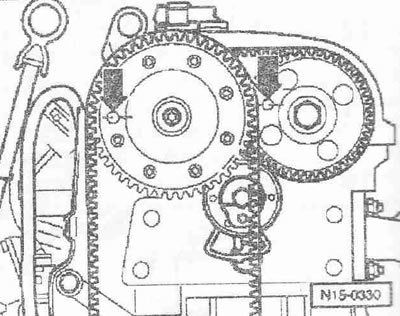
Rotate the camshaft gear of the intake valves with the valve timing regulator so that the gauge holes in the camshaft gear of the intake valves with the valve timing regulator are aligned with the holes in the camshaft bearing housing "arrow on the left".
Install the mounting plate "T10073" to: the intake camshaft gear with the valve timing adjuster.
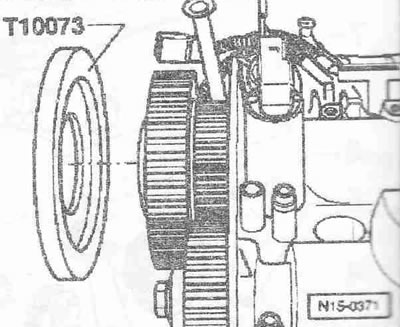
Insert the "T10074" locking pins into the gauge holes in the camshaft bearing housing as far as they will go as follows: Locking pin "A" through the locking hole of the intake camshaft gear with valve timing adjuster. Locking pin "B" through the locking hole of the exhaust camshaft gear.
Instructions: To facilitate the seating of the locking pin "B", you can slightly rotate the exhaust camshaft gear on the bolt so that the gauge holes are opposite each other.
Finally tighten the bolts for the exhaust camshaft gear.
Caution! Risk of thread damage. The bolt of the intake camshaft gear with valve timing adjuster has a left-hand thread.
Finally tighten the bolt for the intake camshaft gear with valve timing adjuster.
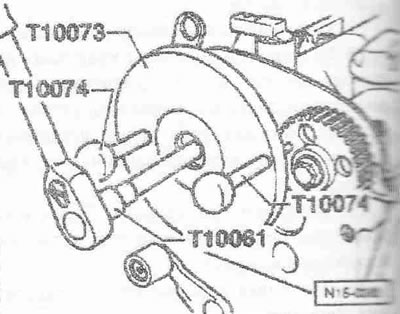
Remove the locking pin "T10074" and remove the mounting plate "T10073".
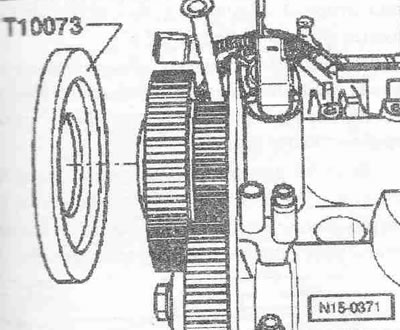
Again fix the intake camshaft gear with the valve timing adjuster and the exhaust camshaft gear with the locking pins "T10074". Installation is in the reverse order, in this case it is necessary to install the toothed belt for the coupled drive.
[This article was previously published on the resource: AUDIMANUAL]