
Table of contents: Lever switches ↓ Key switches ↓ Lighting switches ↓ Power window and mirror adjustment… ↓
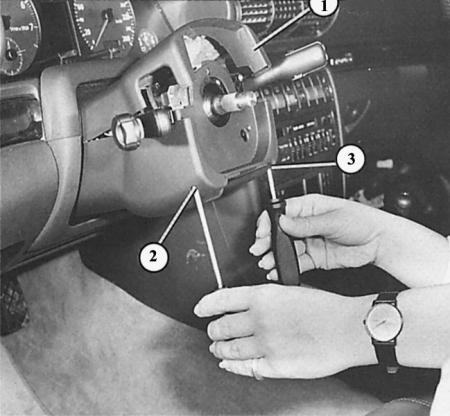
Removing the switch lever, step 1: After loosening the two Phillips-head screws (2 and 3), remove the upper steering column trim (1).
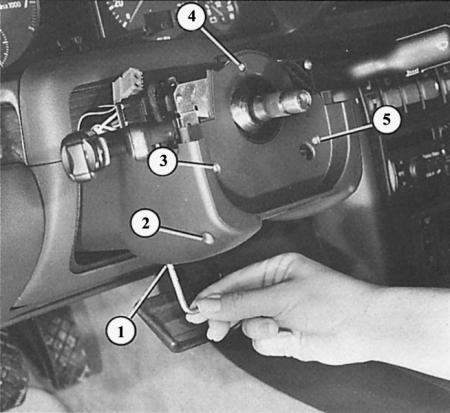
Removing the switch lever, step 2: loosen the Phillips head screws (3, 4, 5) and the TORX screw (1) to remove the lower steering column trim. 2 – hole in one of the upper trim mounting screws.
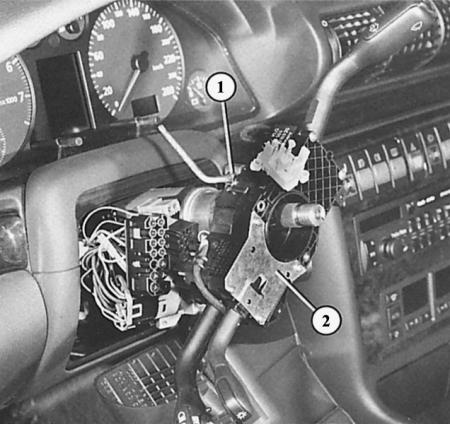
Removing the lever switch, step 3: After loosening the TORX bolt (1), the lever switch element (2) can be removed back.
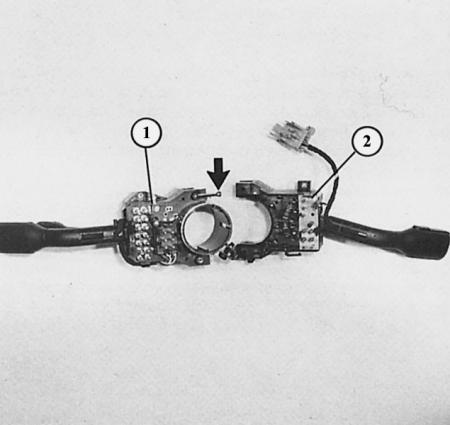
Removing the lever switch, step 4: The light/turn signal switch (1) can be disconnected from the windscreen wiper switch (2) after loosening the screw shown by the arrow.
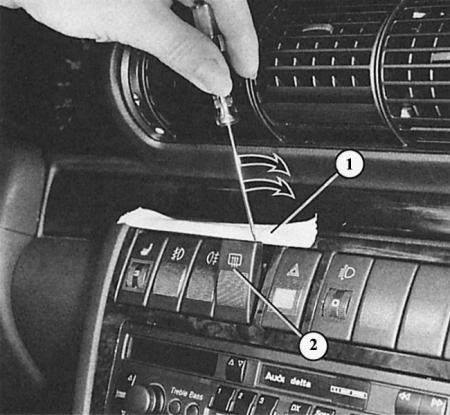
Removing the key switch, step 1: Press the push button (2) with a thin screwdriver (arrows). Protect the instrument panel with a strip of adhesive tape (1).
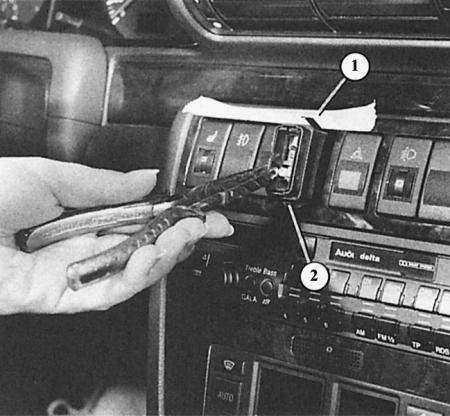
Dismantling the key switch, step 2: place the pliers on the edge of the switch, pull the switch out. Push switches are secured with spring clamps (1 and 2).
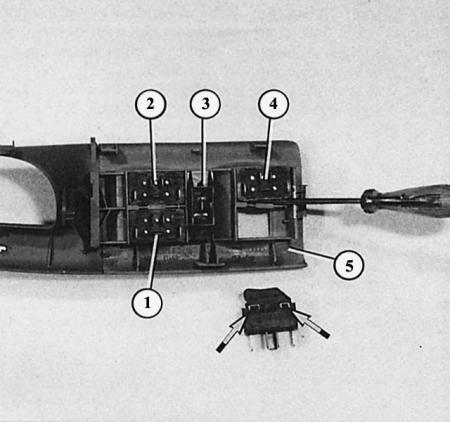
Dismantled decorative panel of the door handle (5) with switches: 1, 2 and 4 – switches for electric window lifters; 3 – blocking switch. Arrows – mounting clamps of the switch, removed from the slots with a screwdriver.
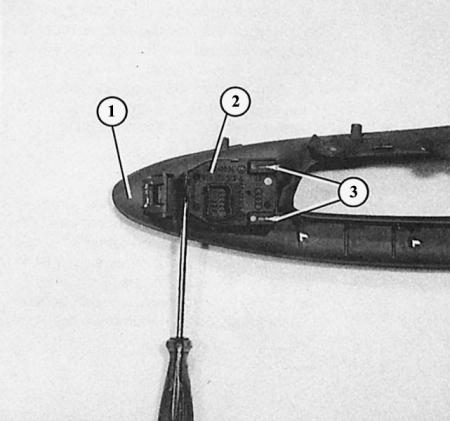
At the front end of the door handle decorative panel (1) is a switch (2) for adjusting the electric mirror. From the front side it is removed from the grooves with a screwdriver, at the back it is necessary to release two latches (3).
Lever switches
The lever switches under the steering wheel are removed after loosening
1. Remove the steering wheel (chapter Wheel suspension and steering).
2. Remove the upper steering column trim; to do this, unscrew the two Phillips-head screws from below and remove the trim piece from above.
3. Remove the lower steering column trim; to do this, unscrew the other three Phillips-head screws next to the steering column and loosen the TORX bolt from below.
4. Open the steering column lock, fold down the trim. Or, to completely remove the trim, unscrew the steering column lock handle.
5. At the top rear of the switch housings, slightly loosen the TORX bolt, but do not unscrew it completely.
6. Remove the toggle switch element.
7. Remove all switches.
8. If one switch needs to be replaced, loosen the Phillips head screw and disconnect one switch.
Key switches
The rocker switches and control knobs with similar housings are located in the Audi under the middle air outlets in the instrument panel. Removal:
1. Method 1: Use a thin screwdriver to pry the switch button away from the switch. Protect the dashboard with a strip of adhesive tape.
2. Place the pliers on the edge of the switch and pull out the switch.
3. Disconnect the multi-pin connector.
4. Method 2: Use a screwdriver to pry open the blind plug to gain access to the switch located next to it from below.
5. Press the switch out of the mounting hole from below.
6. Disconnect the multi-pin switch.
Lighting switches
Light bulbs for switches and symbols cannot be replaced separately; the entire switch must be replaced.
Power window and mirror adjustment switches
The decorative panel of the left door handle contains the switches for the electric windows and mirror adjustment. The other door handles contain only individual switches. Dismantling in the driver's door:
1. Remove the door trim (chapter Body parts). Remove the soundproofing film.
2. Window switch: Insert a narrow screwdriver or blunt knife from behind between the switch block and the frame.
3. In this way, the fastening clamps on the switch housings are removed from the grooves.
4. Remove the switch block.
5. The rear window lifter locking switch is removed from the slots in the same way. Both mounting clips are on the narrow sides of the switch.
6. Mirror adjustment switch: dismantling is the same as for the window switch, but you also need to release two latches.