
Instructions. Before installing the gearbox, press the clutch release lever toward the gearbox housing and secure with a mounting bolt or an M8x35 bolt. Unscrew after installing the gearbox. Then close the hole with the 3rd drive cable counter support mounting bolt.

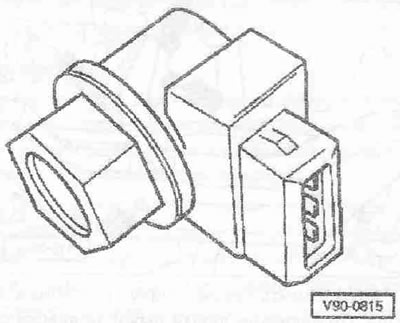
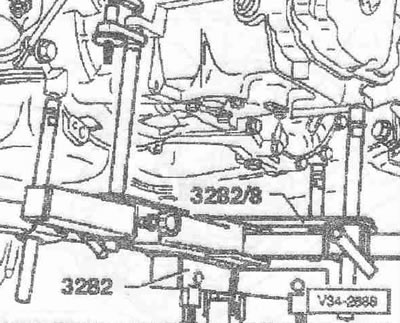
When replacing the gearbox, reinstall the speedometer sensor "G22" (Fig.), gear shift lever, intermediate gear selector lever, and the bracket of the connecting tube-hose line. Clean the splines of the input shaft and apply a thin layer of plastic grease for the splines of the clutch disc "G OOO 100" to them. The clutch disc should easily move back and forth on the input shaft. Check the cylinder block for fitted bushings for centering the engine/gearbox; insert bushings if necessary. When replacing the gearbox, pay attention to the correct installation of the metal spacer. Align the adjustment template "3282/8" and the gearbox parallel to each other and secure the locking support to the gearbox.
Install the gearbox lift under the vehicle. Arrow "B" on the installation template "3282/8" points in the direction of vehicle travel. Install the gearbox using the lead screws of the left gearbox grip "3282" in an inclined position. Install the gearbox. Screw in the lower engine/gearbox mount screws.
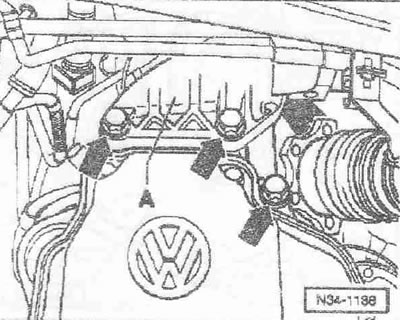
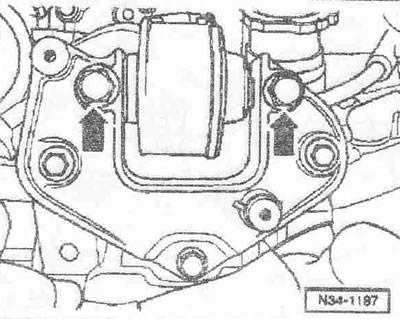
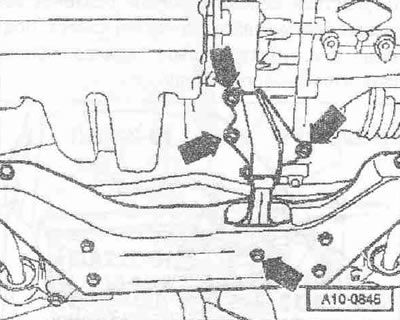
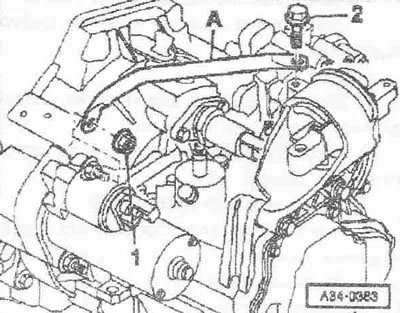
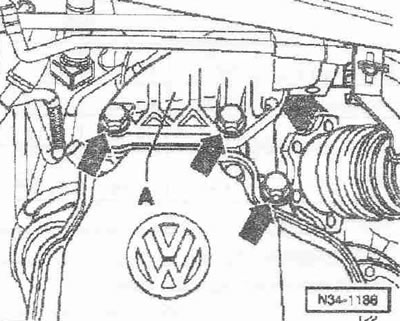
Secure the gearbox console "A" with new bolts "arrows". Screw in the upper engine/gearbox mounting bolts. Raise the power unit on the lead screws of the crossmember "10. 222 A". Bring the engine/gearbox to the installation position.
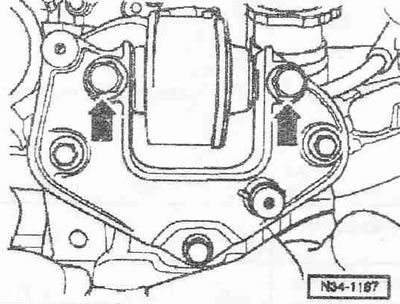
Install new hexagon head bolts "arrow B" of the left power unit support into the gearbox support.
Attention! Remove the crossmember "10.222 A" only after tightening the screws of the left gearbox console with the tightening torque.
Install the pendulum support "arrow". Use new screws for fastening.
Connect the plug connector to the speedometer sensor "G22" ("arrow").
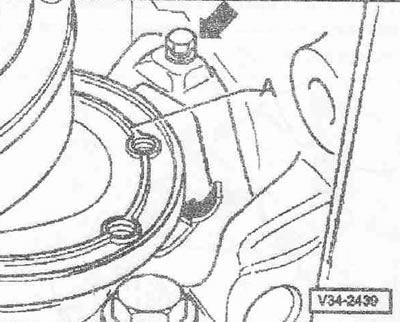
Install the small shield "A", if available, behind the right flange of the drive shaft "arrow". Attach the strut to the stabilizer and the lever to the steering knuckle. Secure the drive shafts to the gearbox. If available, install the protective cap of the right inner CV joint on the engine. Install the starter.
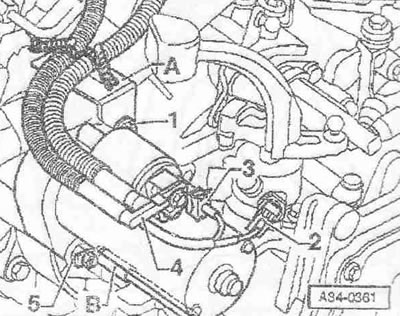
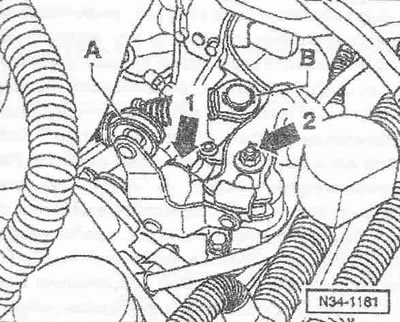
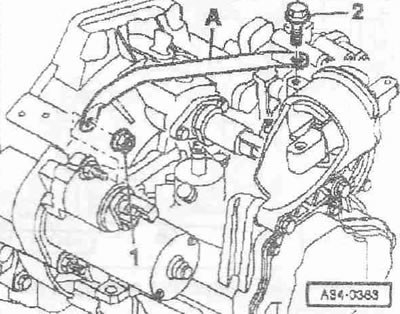
Unscrew the ground wire "B" from the lower starter mounting bolt. Insert the plug connector of the reverse light switch "F4" ("2") and plug connector "3" of the starter. Unscrew wire "4" of the electromagnetic switch of terminal 30.
Install the slave cylinder, secure the tubular-hose line to the gearbox bracket.
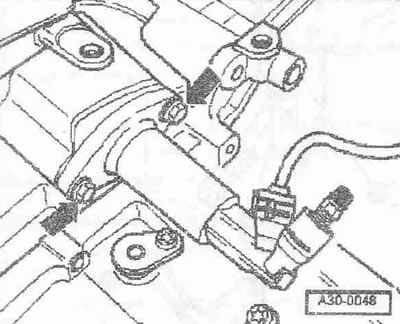
Screw the cable counter support to the "arrow" control point.
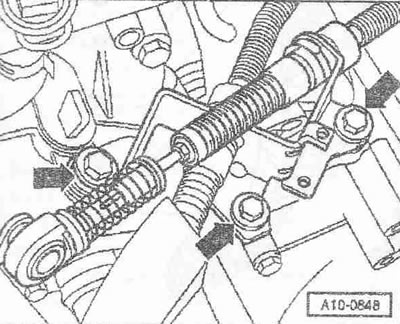
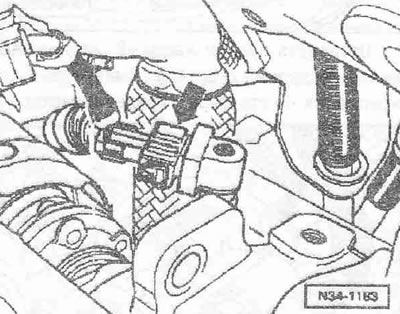
Install the gear shift lever and secure it with a new nut "arrow 2". Push in the intermediate gear selector lever and secure it with the clamp "arrow 1". Adjust the gear shift mechanism.
Install cross support "A". Install the engine cover. Connect the battery. After connecting the battery, check and activate all vehicle systems (radio, clock, electrics of the Comfort system). Check the transmission oil level in the manual transmission.
Install the soundproofing casing of the power unit, if available.
Tightening torques
Gearbox to engine
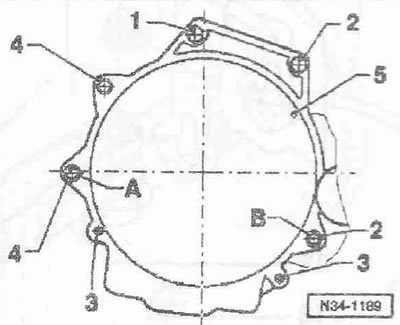
| Pos. | Screw | pcs. | Nm |
| 1 1) | M12x55 | 1 | 80 |
| 2 | M12x55 | 2 | 80 |
| 3 | M10x50 | 2 | 40 |
| 4 1) 2) | M12X150 | 2 | 80 |
| 5 3) | Mbh12 | 1 | 10 |
1) Bolt with threaded pin M8
2) Additionally, a starter for the gearbox.
3) Small flywheel lining.
Pos. A + B. Centering bushings. Gearbox console "A" to gearbox, replace bolts. Screws "arrows" 50 Nm + 90°.
Gearbox to body, replace bolts. Arrow bolts 40 Nm + 90°.
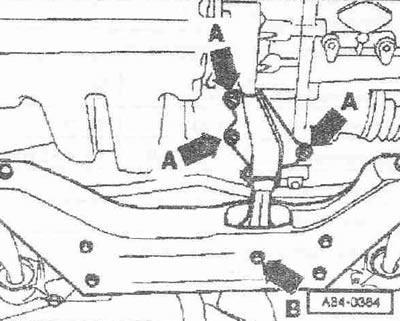
Lower support of the power unit, replace bolts. Bolts "A" 50 Nm. Bolt "B" 40 Nm + 90°.
Install cross support "A". Nut "1" 20 Nm. Bolt "2" 20 Nm.
- Drive shaft to flange shaft: M10
- Cable stops to gearbox: 23 Nm
- Gear shift lever to gearbox: 23 Nm
- Slave cylinder to gearbox: 23 Nm
- Bracket of connecting pipe-hose line to gearbox: 25 Nm
- Protective cap drive shaft to engine: 35 Nm