
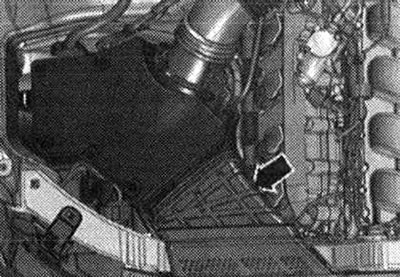
Remove air duct -arrow-.
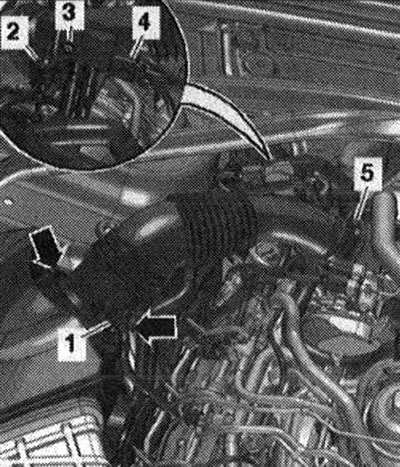
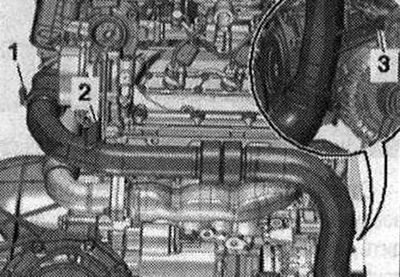
Disconnect connector -1- from air mass meter -G70-. Unscrew bolt -3- and release exhaust gas pressure sensor 1 -G450- -pos. 4- on the air duct pipe. Loosely lay connector -2- for exhaust temperature sender 4 -G648- on air duct. Remove air hose with air mass meter -G70- by loosening hose clamp -5- and opening clamps -arrows-.
Disconnect vacuum line -1-. Remove the air housing. filter and disconnect the connector -2- on the bypass air damper valve on the rear side. filter -N275-.
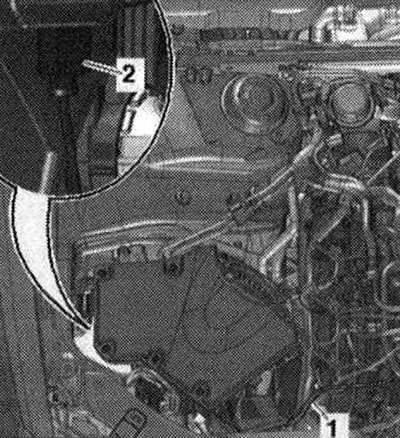
Remove bolts -2- and -3-. Remove the air duct pipe from the air duct hose by loosening the hose clamp -1-. Remove the right front wheel. Loosen the front part of the front right wheel arch liner and press it back.
Remove front soundproofing -1-.

Unscrew bolt -1 - and nut -3-. Remove spacer -2- for radiator frame on right.
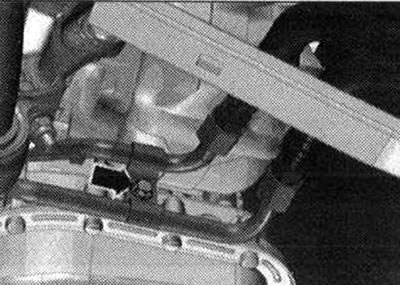
Vehicles with dual-clutch gearbox: Remove bolt -arrow- for ATF lines.
All
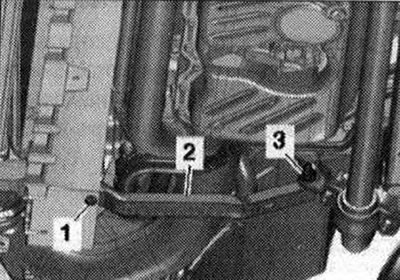
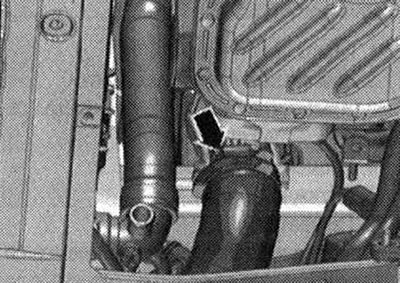
Disconnect connector -4- on right solenoid valve for electro-hydraulic engine mount -N145-. Remove fastening -5- el. connectors from bracket -3-. Unscrew the nut -1- and remove the wiring harness bracket from the subframe. Cut the cable tie -6- on the bracket and place the bracket with the thermal insulation to the side. Unscrew the nut -2- and remove the ground wire from the side member.
Disconnect the air duct hose from the air duct on the right and place it to one side by loosening the clamp -arrow-.
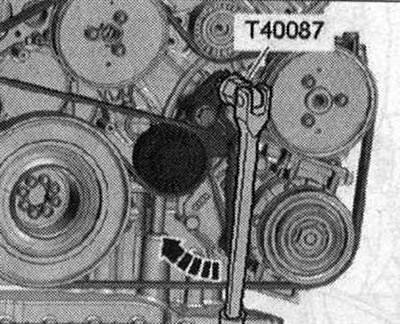
To loosen the poly V-belt, turn the tensioner clockwise -arrow-, to do this use the Torx socket T 60 -T40087-. Remove the poly V-belt from the generator pulley.
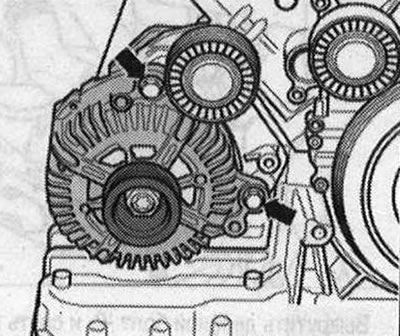
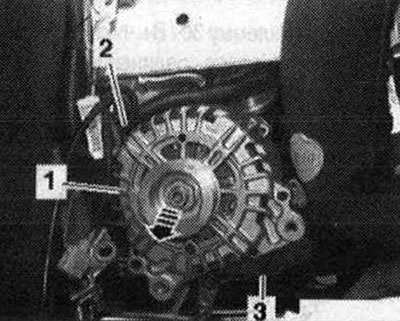
Unscrew the bolts -arrows- of the alternator approximately 6 turns. Carefully hit the bolt heads with a hammer to separate the alternator mounting bushings. Unscrew the bolts completely.
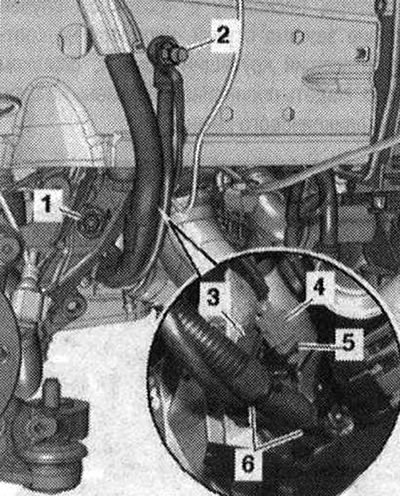
Remove the generator from the bracket. Remove the cover and unscrew the nut of terminal 30/B+ -pos. 1-. Disconnect email plug connection -2-.
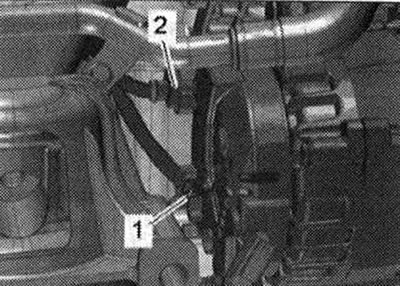
Pull out alternator -1- to the right between wiring harness -2- and ATF lines -3- -arrow-, as shown in fig.
Installation
Installation is in the reverse order; in this case, the movement of the generator mounting bushings should be eased, since otherwise the clamping force of the bushing, despite the corresponding torque, is too small. To make installation of the generator easier, move the bushings of the mounting bolts slightly back. Vehicles with dual clutch: secure ATF lines. Install the air duct pipe on the right. Place the serpentine belt onto the serpentine belt pulleys.
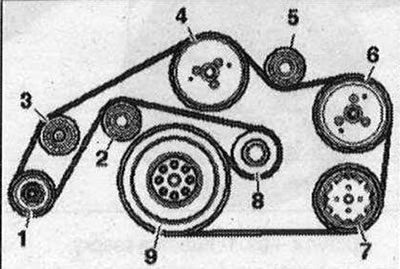
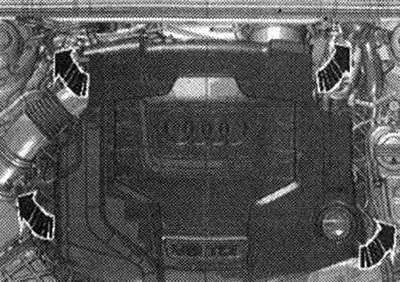
1. Generator; 2/3. Intermediate roller; 4. Water pump; 5. Intermediate roller (depending on model); 6. Vane pump of the hydraulic steering system; 7. Climate compressor, installations; 8. Poly V-belt tensioner; 9. Vibration damper
When installing the poly V-belt, you must ensure that it is positioned correctly on the pulleys. Connect the battery. Start the engine and check the belt movement.

Starter 1. Bolt; 2. Spacer (4-cylinder engines only); 3. Starter; 4. Terminal 30/battery+; 5. Nut. 15 Nm; 6. Electrical plug connection; 7. Bolt
Visitor comments