



Table of contents: The steering rack is installed and… ↓ Designs of tie rod end fastening nuts ↓
The steering rack is installed and removed together with the steering rod.
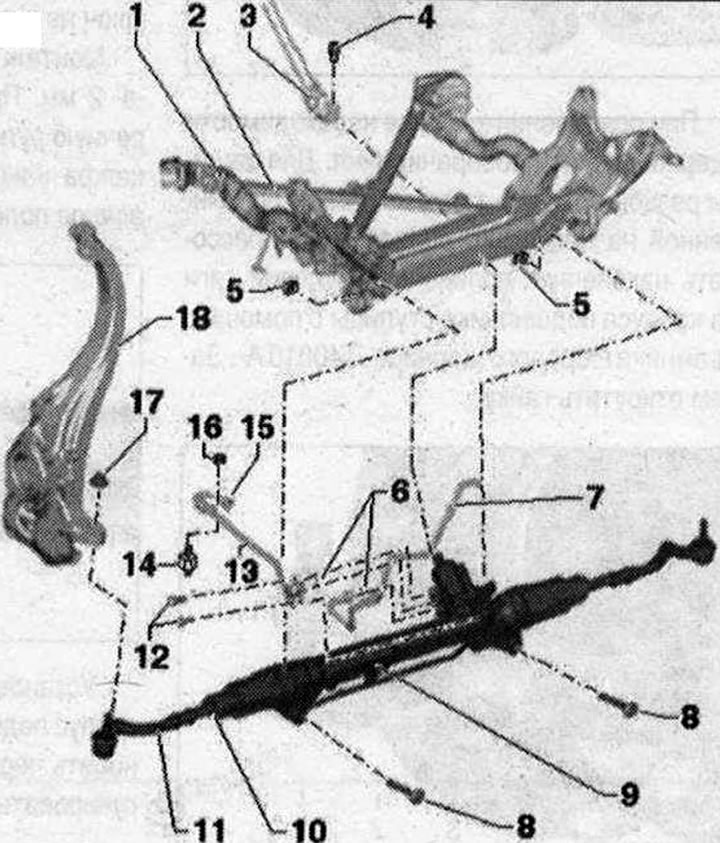
I 1. Subframe; 2. Crosspiece of stretchers; 3. Intermediate steering shaft; 4. Bolt. 30 Nm + 90°. Replace each time it is removed. Always clean the threaded hole under the bolt (for example, with a tap); 5. Nut. Replace each time it is removed; 6. Sealing ring. Replace each time when removed; 7. Return line. Insert the return line all the way when installing; 8. Bolt. 80 Nm + turn 180°. Replace each time when removing; 9. Power steering with steering rods; 10. Transverse thrust; 11. Tie rod end. Different designs with long or short threaded joint pin. When replacing, ensure that the thread on the tie rod end is long enough (there should be enough free threads left, approx. 5 mm). Otherwise, it is necessary to install a tip with a longer thread on the hinge pin, in accordance; 12. Bolt. 20 Nm; 13. Pressure line. Insert the pressure line all the way during installation; 14. Rubber cushion. 6 Nm; 15. Union nut. 40 Nm; 16. Nut. 6 Nm; 17. Nut. Various designs. Consider the features of nuts of various designs and the requirements for tightening torques. Replace each time when removing; 18. Hub bearing housing
Designs of tie rod end fastening nuts
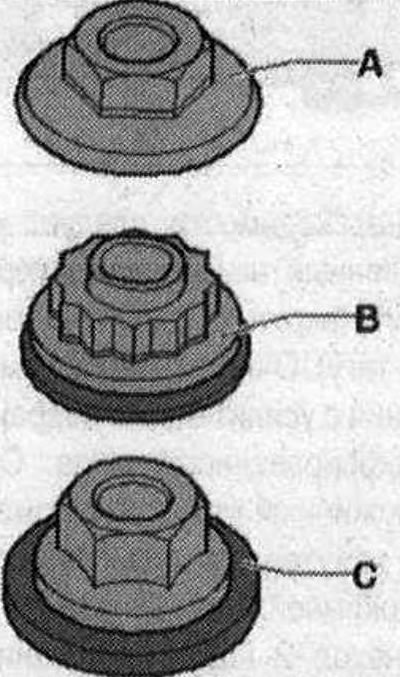
- Hexagon - nut with flange "A". Tightening torque: 20 Nm + +90°
- Twelve-point - combination nut "B". Tightening torque: 100 Nm
- Hexagon - combination nut "C". Tightening torque: 110 Nm
(Content source: the specified website: «AUDIMANUAL»)