
Table of contents: Removal ↓ Installation ↓
The front crossbar to which the bumper is attached is reinforced on the AUDI ALLROAD (see illustration 4.0).
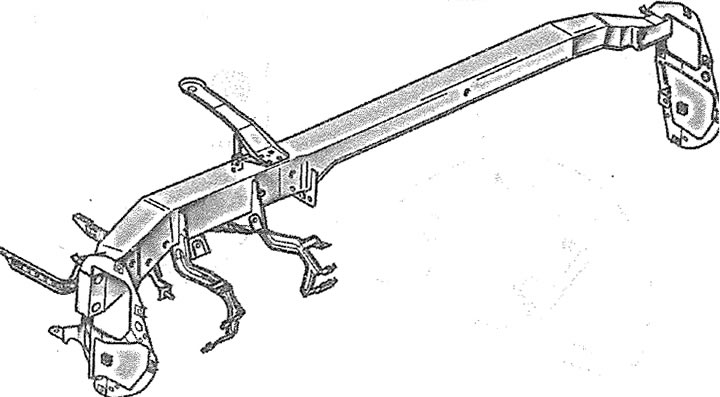
4.0. Front cross member
Removal
1. Mark the position of the front wheels on the hubs with paint. This will allow you to install the balanced wheel in its original position during assembly.
2. Loosen the wheel mounting bolts. The car should stand on its wheels.
3. Jack up the front of the car, place it on jack stands and, after unscrewing the mounting bolts, remove the front wheels.
4. Disconnect the front part of the mudguard, see the corresponding chapter.
5. Unscrew the hex nuts 10 on both sides of the bumper (see illustration 4.0a).
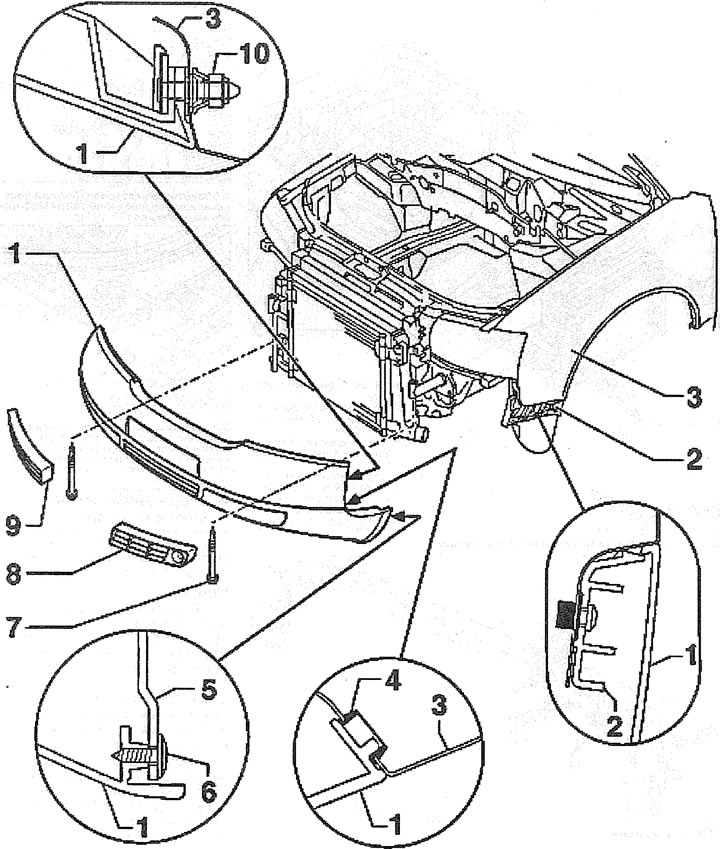
4.0a. Front bumper assembly:
1 - front bumper
2 - bumper side guide bracket
3 - wing
4 - retainer
5 - mudguard
6 - screw. Tightening torque 1 Nm
7 - Allen head bolt for socket wrench. Tightening torque 23 Nm
8 - ventilation grille
9 - ventilation grille
10 - flange nut. Tightening torque 6 Nm
6. Unscrew the screws 6 that secure the bumper to the fender liner 5 (see illustration 4.0a).
7. Unscrew the bolts 7 with an internal Allen key and remove the bumper, working together with an assistant.
Installation
The front bumper is installed in the reverse order of its removal.
Attention! The shock absorber, which softens the impact during a collision, is self-adjusting in height relative to the cross member. For this reason, the front bumper is automatically held in a given position at the desired height after screwing in the Allen key head bolts.