
Table of contents: Removal ↓ Installation ↓
When performing some work, for example, to remove the V-belt and toothed belt, the radiator frame and front cross member must be moved to the so-called service position.
Attention! If the specified special device is not available, then you can use two M8x90 bolts, on which spacer washers with an outer diameter of 24 mm and a thickness of about 2 mm are put on. In addition, you will need two bushings 80 mm long and 17 mm in diameter.
Removal
1. Unscrew the bolts securing the air intake to the upper front cross member and disconnect the air intake.
2. Remove the engine protective cover.
3. Remove the front part of the engine guard by unscrewing the three mounting bolts.
4. Remove the front bumper, see the relevant chapter.
5. Unscrew bolts 5 from the right and left sides of the front and screw in the special device AUDI-3369 or its replacement in place of both bolts (see illustration).
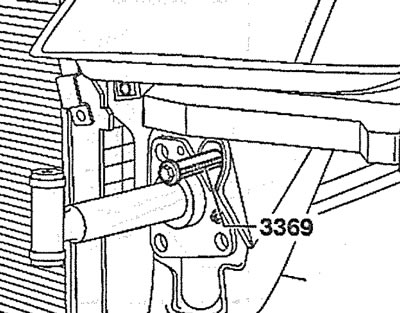
3.5 Screw in the special tool AUDI-3369 or its replacement instead of both bolts
6. Unscrew bolts 2, 3 and 4 from the right and left sides of the upper cross member and radiator frame (see illustration 3.0).
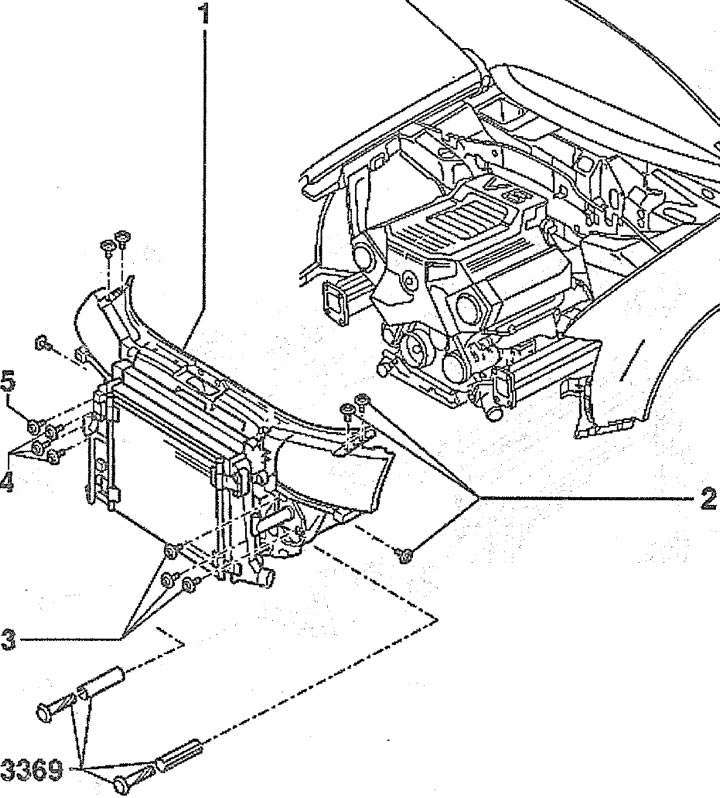
3.0. Radiator frame and upper front cross member:
1 - upper front cross member
2 - upper cross member mounting bolts. Tightening torque 10 Nm
3, 4, 5 - radiator frame mounting bolts. Tightening torque 50 Nm
3369 - device for installing the radiator frame in the service position. The device is installed instead of bolts 5
7. Move the crossbar forward until the rear bolt hole on the crossbar aligns with the front hole on the wing 1 and in this position secure the crossbar with bolts 2 on the right and left sides (see illustration).
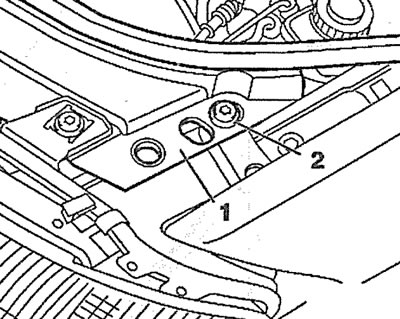
3.7. Move the crossbar forward until the rear hole for bolt 2 on the crossbar aligns with the front hole on the wing 1 and in this position secure the crossbar with bolts on the right and left sides
Installation
Installation of the upper front cross member into the mounting position is performed in the reverse order.