
Table of contents: Removal ↓ Installation ↓
Removal
1. Unscrew, acting from the trunk, hex nuts 14 and 15 (see illustration 5.0).
2. Unscrew the bolts securing the rear part of the right and left mudguards to the bumper.
3. Press the mudguard liner 13 and unscrew the screws 12 located underneath it (see illustration 5.0).
4 Remove the bumper, working with an assistant.
Installation
The rear bumper is installed in the reverse order of removal.
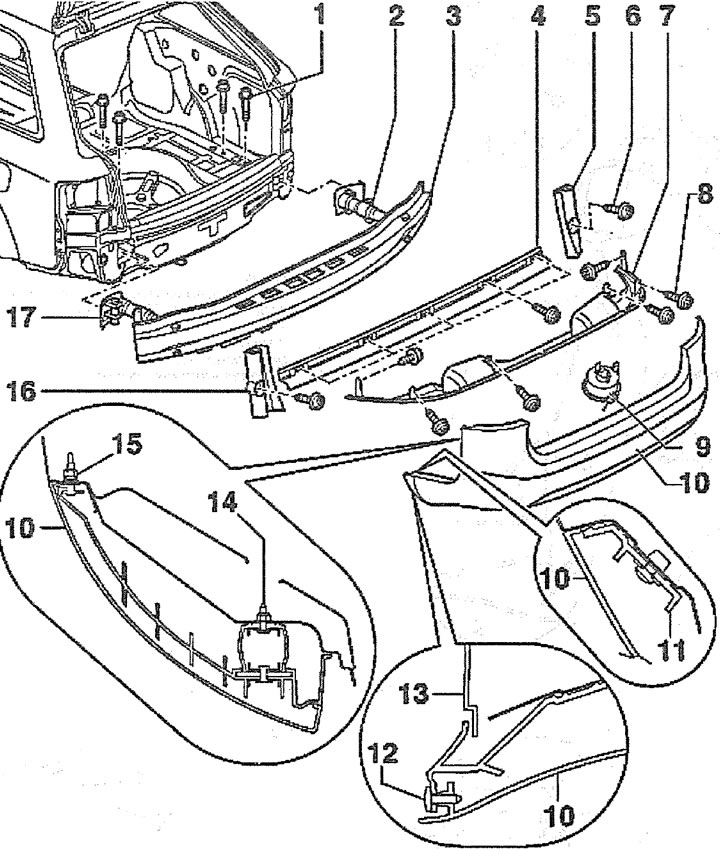
5.0. Rear bumper assembly:
1 - bolt. Tightening torque 23 Nm
2 - shock compensator
3 - rear bumper crossbar
4 - middle bumper support
5 - support of the right side of the bumper
6 - bolts for fastening the middle, right and left bumper supports
7 - overlay. To remove it, you need to unscrew six screws 8 with a countersunk head
8 - countersunk head screw. Tightening torque 1.5 Nm
9 - support. The support should be released after the bumper installation is complete by pulling the string
10 - bumper
11 - guide
12 - countersunk head screw
13 - mudguard
14 - flange nut. Tightening torque 6 Nm
15 - flange nut. Tightening torque 6 Nm
16 - left side bumper support
17 - seal
(The original version is on the portal «AudiManual.ru»)