
Table of contents: Removal and installation a xenon lamp ↓ Parking light and DRL lamps ↓ Xenon lamp control unit ↓
Note: Read the note at the beginning Section 5. When replacing xenon lamps, there is a risk of injury due to high voltage! Be sure to turn off the headlights and disconnect the electrical wiring from the battery. After replacing, briefly turn the headlight on and off to relieve residual voltage. As a safety precaution, wear shoes with rubber soles.
1. The parts of the xenon headlight are shown in the illustration. Removal and installation of the xenon headlight, as well as replacement of the turn signal lamp are carried out in the same way as removal/installation of the halogen headlight (see Section 5). The low-beam/high-beam switching solenoid valve, the headlamp levelling module position sensor and the headlamp turning solenoid motor are built into the headlamp housing and cannot be replaced separately from it.
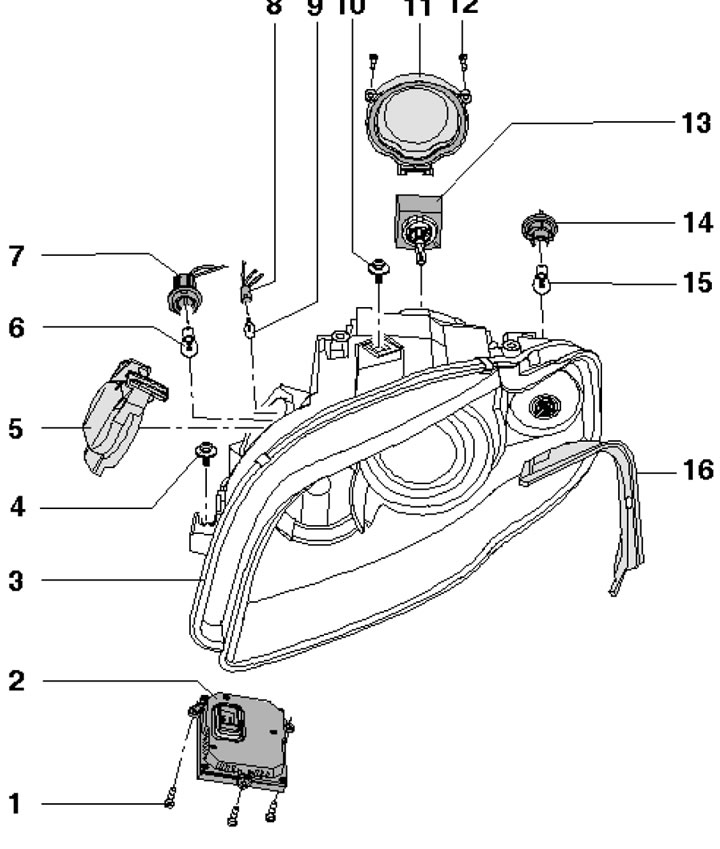
6.1. Xenon headlight parts 1. Bolts, 1.5 Nm; 2. Headlight control unit; 3. Headlight housing; 4, 10. Bolt, 4.5 Nm; 5. Cover for turn signal lamp/DRL lamp; 6. DRL lamp (21 W); 7. Lamp holder 6; 8. Lamp holder 9; 9. Side light bulb (5 W); 11. Low beam lamp cover; 12. Bolt, 1.5 Nm; 13. Xenon lamp with built-in igniter unit (35W, D1S); 14. Lamp holder 15; 15. Direction indicator lamp (21 W, orange; for US models -27/7W, S4B C8); 16. Overlay
Removal and installation a xenon lamp
2. When working on the left side, remove the upper section of the washer fluid reservoir and the power steering fluid reservoir.
3. When working on the right side, remove the air cleaner housing (see Chapter 4).
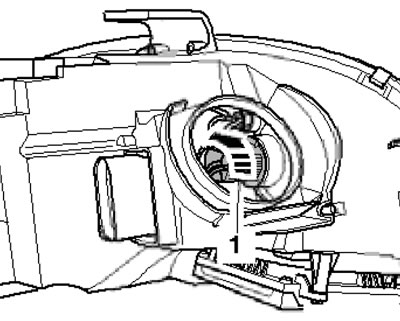
4. Remove the bolts (1 in the illustration), remove the lamp cover.
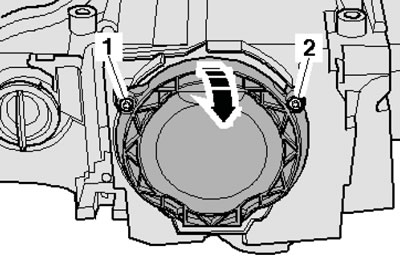
6.4. Removing the xenon lamp cover
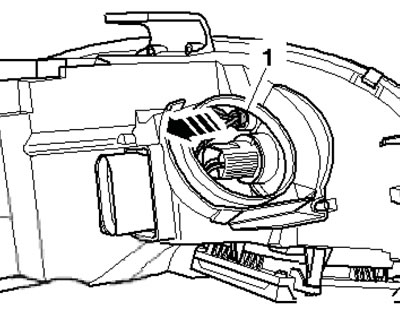
5. Separate the wire from the holders (arrow on the illustration), disconnect the connector (4), press the latches (1 and 3) and pull out the lamp (2).
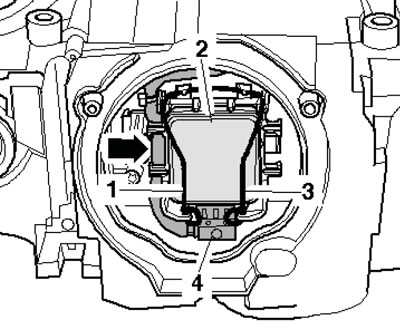
6.5. Removing the xenon lamp
6. Installation is carried out in the reverse order of dismantling the components.
Parking light and DRL lamps
7. When working on the right side, remove the air cleaner duct (see Section 16 Chapter 1).
8. Press the lock and remove the lamp cover (see illustration).
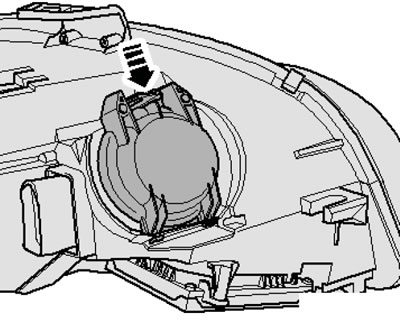
6.8. Removing the lamp cover
9. To remove the DRL bulb, turn its socket (1 in the illustration) counterclockwise and remove it, then unscrew the lamp from the socket.
6.9. Removing the DRL lamp
10. To remove the parking light bulb, press the two retaining tabs of the socket (1 in the illustration) and pull it out, then pull the bulb out of the socket.
6.10. Removing the parking light bulb
Xenon lamp control unit
11. Remove the headlight (see above).
12. Remove the bolts (arrows in the illustration) and pull the control unit (1) out of the headlight.
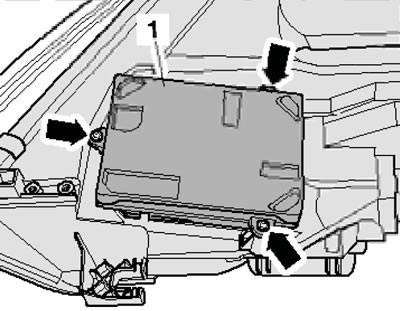
6.12. Control unit fastening
13. Disconnect the wire (2 in the illustration) block (1) and remove it.
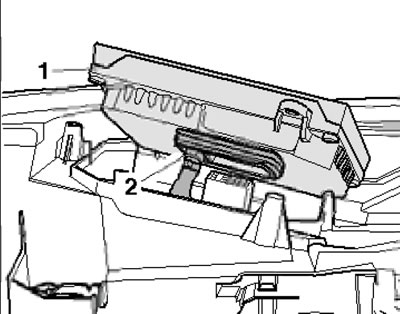
6.13. Wiring on the control unit
14. Installation is carried out in reverse order. Check and, if necessary, replace the gasket.
The original article is located on the online resource AUDImanual